• Notice for iPhone users: DO NOT use the image size reduction option when uploading photos to the forum. This causes portrait images to post as landscape. We have added a warning to the image insert pop-up as well.

1983 frame off refresh - finally

Did you verify that all the body mount channels were installed in the correct location on the Classic floor piece?:fingerscrossed::fingerscrossed:

Mine were not, didn't find out until after paint :banghead:

Excellent point... I am going to have to move some body mounts on the frame an inch or so... it is just what it is with the aftermarket frame and the MD Juan front floor and the rear classic pieces.

cb
 
Excellent point... I am going to have to move some body mounts on the frame an inch or so... it is just what it is with the aftermarket frame and the MD Juan front floor and the rear classic pieces.

cb

Yes, easier to fix now, before paint :cheers::cheers:

I was able to make some plate steel "bridging plates" that spanned between two of the under floor supports, cut down the body mount height at this spot, bolt on fix, did not damage the paint. However, I wish I would have thought to check this before paint :banghead:

Not necessarily "bashing" Classic, even though they never responded to my communications, just trying to make sure no one else runs into this problem :cheers:

Hopefully the Classic piece is built correctly now :shrug:
 
I just pulled a tape on the bed and frame mounts. Looks like Classic has corrected their errors. Good on them and Thx so much guys!
 
Take your time man, You have come so far. It happens to me every time, at some point down the road I say I wish I would have taken my time and did this or that before I painted it. All depends on how nice a paint job you really want. I would be sure and seal seam EVERY seam and joint on the Jeep inside and out. This is not the time to be in a hurry or cutting corners. Great job so far.
 
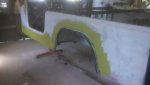
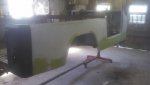
Got these pics the other day. My guy said that Monday night he and I will be able to finish sand it, whatever that means. I see it as work is getting done regardless of what you want to call it! More pics coming when I get there.
IMG_20161004_134253_829.jpgIMG_20161004_134239_083.jpgIMG_20161004_134152_449.jpgIMG_20161004_134100_693.jpg
 
Well there's been some progress. The bottom and underside are lined and the primer is drying as we speak. Some finish sanding on it and she's ready for COLOR! My guy says I can pick the tub up this THURSDAY! WOOT WOOT!! I'm so ready to set this thing back on the frame, it's only been 2 years.

IMG95201611079519444895821.jpg

IMG95201611079518245195962.jpg

IMG95201611079518250595535.jpg

IMG95201611079519450195433.jpg

IMG95201611079519454395762.jpg

IMG95201611079519462195259.jpg

IMG95201611079519464495146.jpg

IMG95201611079519472795545.jpg

IMG95201611079519482395163.jpg

Fingers crossed.........
 
That thing looks REALLY good.
 
OK, got the pig looking SEXY! Here are a few phone shots........not the best but just a teaser for you guys right now.

IMG_20161204_021107_826.jpg

IMG_20161204_021128_850-1.jpg

IMG_20161204_021116_024.jpg

IMG_20161204_021034_589.jpg

I'm on a project for the next several weeks but will be ferrying the tub and many other various bits to the shop over the next few weeks. All I can tell you is that I like it a lot.
 
Thanks Randy. Excited to begin assembling it back. Usually I'm not out on projects this time of year but will have January to do it.
 
Thanks Roscoe!
Got this thing drug back to the shop tonight. Let's hope assembly go well. I'll have to start after the new year. Pics later just too busy.
image.jpg
 
Back
Top