• Notice for iPhone users: DO NOT use the image size reduction option when uploading photos to the forum. This causes portrait images to post as landscape. We have added a warning to the image insert pop-up as well.

1984 SL Restoration

spankrjs

Scrambler Junkie
Lifetime Member
SOA Member
City
Biloxi
State
MS
I woke up this morning planning to get a bunch of work done, did not work out that way, but forward progress none the less.

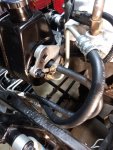
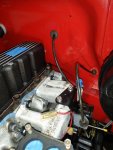
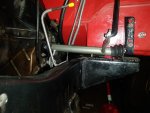
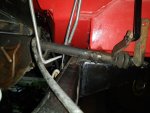
The clutch linkage has kind of been dangling since the Jeep was shoved into the garage. I finally hung the body mounted z-bar bracket to the body, the angle is way off?
20201220_095504.jpg

It is like the body is too low, engine too high, doesn't make since. No body lift on the Jeep, new engine and transmission mounts, so stock power train mounting, no engine lift or anything strange. Who knows.

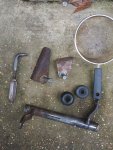
I went ahead and took all the clutch linkage parts off to clean and inspect them. That, and it is easier to modify and play with clean parts as opposed to crusty stuff:
20201220_113137.jpg

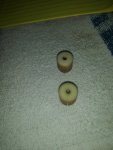
Of course, I got impatient with the plastic bushings, broke both of them. Grrrr.
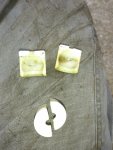
20201220_124056.jpg

I did find one spare bushing at my buddy Chuck's shop, will have to dig through my junk and see if I can find another. I ordered a pair off Amazon today, but with Christmas shipping times, I will be lucky to get them this year!!! Hopefully I can find another one somewhere local:
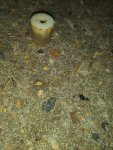
20201220_152340.jpg

Interesting thought about the bushings: Does it even matter that they split? If I insert the two pieces of each bushing around its corresponding ball post thing, slide it in inside the z-bar, it works fine. The bushing is still a perfect tight fit around the ball, so it can't really come off, the tube keeps them tightly in place. The bushings come with two slits on the sides, that basically cut them 90% in half anyway? It would be butch to reuse the broken bushings, but I bet it would work fine.

The little ball things that the bushings ride on are still perfect, no flat spots or excessive wear on the bushing mounting surfaces:
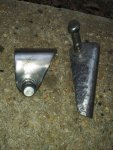
20201220_152346.jpg

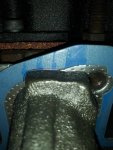
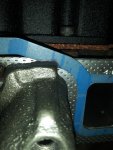
The above picture is kind of funny. The bracket on the left, which bolts to the bell housing, and was caked in oil and grease from the leaking engine, no bad rust at all. The part on the right, that bolts to the body and was not covered in oil and grease, is pitted up pretty good. Those plastic valve covers were good for some things!!!
 

spankrjs

Scrambler Junkie
Lifetime Member
SOA Member
City
Biloxi
State
MS
The other parts of the clutch linkage did have some wear and tear. If I would have been smart, I could have ordered a kit that has all of these parts new. Painted up the new parts, ready to install.

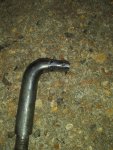
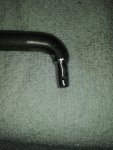
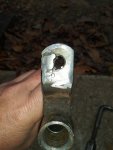
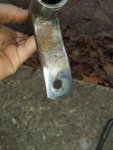
Well, plan B. The stock clutch linkage is basically metal on metal at some of the pivot points. Over time, the metal digs into itself, wallows out the holes and posts. Linkage gets sloppy. Good news, with a welder and a file, you can repair this damage.

I don't have/want a welder, so I let my buddy weld up the holes and posts. I then took them back home and "re-machined" them.

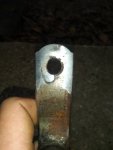
Adjuster rod end after some weld was added, before final "finish" work:

20201220_152357.jpg

Adjuster rod end After sanding and filing:

20201220_164924.jpg

Mostly round and smooth again, way better then before.

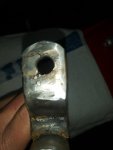
The corresponding holes in the z-bar tabs, Before final finish work:

20201220_152403.jpg

20201220_152408.jpg

After a few minutes with a round file:

20201220_154346.jpg

20201220_164901.jpg

So, a little "RedneckRay" engineering. Not as pretty as "new made in China parts", but a million times better then before, about 95% slop free, so happy with that. Finished the day cleaning the rest of the rust off these parts. So, they are ready for paint, once the weather cooperates.

I will probably re-drill the z-bar bracket that bolts to the body to get the z-bar/cross tube to sit level. I have done this before with the 1" body lift install on my red Scrambler, works fine, easy modification. Plenty of time to do this while waiting for the new bushings.

One final thought about the clutch linkage: I installed new parts on my green Scrambler a few years back, they should not be too wore yet. I could probably take them off, drill the holes oversize for some bronze/brass flanged bushings. In this way, the holes won't get wallowed out, and the posts won't get wore down on the softer bushing material. Would be easy enough to just swap in new bushings when needed in the future. Just a thought I might explore in the future.

For now, on this one, will install the manifolds and all the other associated parts next, after I modify the one clutch linkage bracket. I can always install the clutch linkage from below once the new bushings show up in the mail.

That's it for now.
 

spankrjs

Scrambler Junkie
Lifetime Member
SOA Member
City
Biloxi
State
MS
Snuck out of work early, made it home with just enough time/temperature to paint the clutch linkage parts.

Ready for primer/paint:

20201221_151818.jpg

And painted:

20201221_163532.jpg

Used up two almost empty cans of primer, and three partial cans of paint are now empty. That's why the brackets are black, the adjuster is silver, and the bell crank bar is exhaust manifold grey!!!

Between coats of paint, dug through my junk boxes, "sometimes it is better to be lucky then good", found another good shape clutch linkage bushing to go with the one I found at my buddy Chuck's house!!!

20201221_164156.jpg

A matching pair, more then I can say about myself LOL!!!

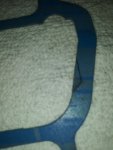
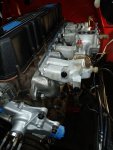
Moving on, bolted on the intake/exhaust manifolds. I always have to trim Fel-Pro intake manifold gaskets, never hear of anyone else having to do this? If not, the connector piece get pinched behind the exhaust manifold and will cause a leak.

Mocked up the gasket/manifolds, marked the gasket where it needs to be trimmed:

20201221_165314.jpg

20201221_165321.jpg

Just two little nips:

20201221_165457.jpg

20201221_165505.jpg

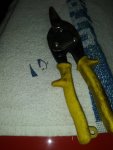
Just a little bit is needed to be trimmed. Since the intake gasket is metal/aluminum, tin snips work perfect:

20201221_170224.jpg
 

spankrjs

Scrambler Junkie
Lifetime Member
SOA Member
City
Biloxi
State
MS
I will post this picture up first, just in case:

20201221_171408.jpg

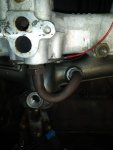
This is the tap size for the threads for the EGR cross over tube. I always check the threads on both manifolds before proceeding.

The FSM goes in depth on how to do this, I kind of do it my own way.

I will hang the exhaust manifold in place on the two studs, barely install the two center exhaust manifold bolts. Get the EGR tube about 2 full threads into the exhaust manifold. Then, position the intake over the EGR tube, get the tube threaded into the intake about 4 threads. EGR tube started in both manifolds, assembly loosely in place, intake on the cylinder head dowel pins:

20201221_171420.jpg

I give this stupid EGR tube a lot of respect. Since it takes a 1" wrench to tighten the fittings, I always hand thread it in as far as possible before reaching for the wrench. Very easy to cross thread these fittings with a 1" wrench!! I will snug both fittings up AFTER I have all the intake/exhaust manifold bolts started:

20201221_171428.jpg

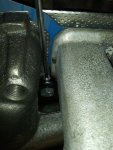
"RedneckRay" trick of the trade for those PIA to reach lower manifold bolts. Use the magnetic probe/stick to hold the bolt in place from above:

20201221_172358.jpg

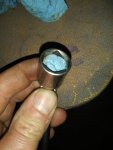
1/4" drive shallow socket on the wobble thingy, paper towel shoved inside socket to make it extra shallow so the bolt won't slip backwards before starting:

20201221_172436.jpg

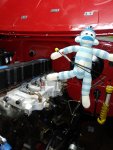
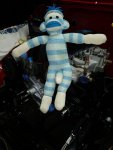
My old buddy PartsMonkey taught me everything I know!!!

20201221_181548.jpg

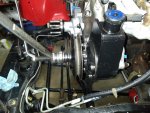
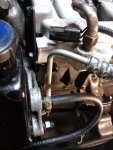
Bolted the power steering pump assembly on to the block/intake/water pump:

20201221_182646.jpg

Feel better about yesterday's lack of progress, like I am finally over a hump.

Thanks for all the help you cheeky little monkey!!!

20201221_182636.jpg

That's it for now!!
 

ag4ever

Average Nut
BENEFACTOR
Gold Member
Silver Member
Lifetime Member
SOA Member
City
Richmond
State
TX
I always have to trim Fel-Pro intake manifold gaskets, never hear of anyone else having to do this? If not, the connector piece get pinched behind the exhaust manifold and will cause a leak.

I had to do the same thing when I replaced the exhaust manifold on the ‘83. You would think they could get the shape right, not like there are multiple patterns for the 232 and 258 regardless of the year.
 

spankrjs

Scrambler Junkie
Lifetime Member
SOA Member
City
Biloxi
State
MS
Plugging away, more relatively easy bolt together work, getting parts back on the Scrambler.

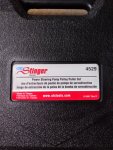
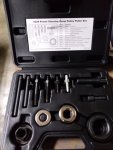
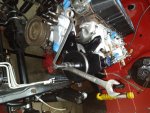
Installed the power steering pump pulley. This is the puller/installer tool I use, works great:

20201222_184804.jpg

20201222_184820.jpg

General idea of how the various bits are installed to install the pulley:

20201222_184029.jpg

Hold the little wrench on the end, tighten the big wrench:

20201222_184022.jpg

20201222_184037.jpg

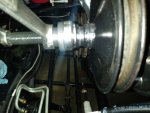
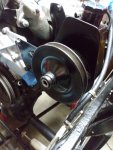
And installed, pulley snout flush with the end of the PS pump shaft:

20201222_184451.jpg

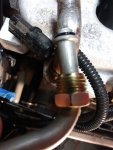
Went ahead and hooked up the supply and return hoses, Don't forget the little o-ring on the supply line:

20201222_195440.jpg

A few pictures of how I routed the lines, this might change slightly after installing the fender/tightening the PS belt:

20201222_195931.jpg

20201222_195936.jpg

I reused the OEM return line clamp, I like this wide clamp:

20201222_195954.jpg
 

spankrjs

Scrambler Junkie
Lifetime Member
SOA Member
City
Biloxi
State
MS
More easy work.

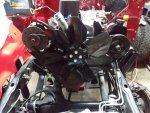
Bolted on the water pump pulley/spacer/fan assembly, and installed both belts:

20201222_210926.jpg

The fan spacing might change, depending on radiator/fan shroud fitment. The fan sits pretty close to the engine, not much pitch to the blades.

Bolted a new master cylinder to the booster, a little anti-seize on the stainless line fittings made getting them started in the master cylinder holes a piece of cake:

20201222_212640.jpg

Line routing, still need to add another set of clamps:

20201222_212646.jpg

And bolted on the throttle cable bracket thingy that goes on the intake:

20201222_215819.jpg

Just a bunch of easy stuff, getting parts off the floor/tables/shelves/bed of Green Scrambler/from the tops of lawn mowers and back on the Scrambler where they belong.

That's it for now :wave:
 

spankrjs

Scrambler Junkie
Lifetime Member
SOA Member
City
Biloxi
State
MS
For whatever reason, the steering shaft reinstallation kicked my butt last night, so I gave up.

Got it installed tonight.

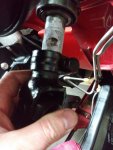
I had the lower coupler thing jammed up, would not extend out all the way, so the shaft would not reach the steering column when it was fastened at the steering box:

20201222_215845.jpg

Took it off the steering box, got it freed up and sliding easy, so it installed quickly tonight.

I fastened the shaft at the column first, with it barely on the steering box:

20201223_163436.jpg

Then, gently tapped the bell coupler down all the way on the steering box:

20201223_163514.jpg

Above picture is before I installed the bolt. Top and bottom of the shaft are similar, notch in shaft lines up with notch in coupler(s), corresponding bolt slides through, finished:

20201223_164007.jpg

I used red Lock-Tite on the nuts. I really prefer the Borgeson steering shafts over the OEM shafts. This OEM shaft is still in great shape, so I reused it. That can be an easy future upgrade for someone else.

Another easy task completed.

20201223_164048.jpg

One last easy relatively easy chore completed:

20201223_180706.jpg

The upper stainless bolt of the "triangle" that holds the evap canister to the firewall. The factory installed a stud here. On this body, the stud got bent and the ends of the threads destroyed. I carefully cut off the last two threads of the stud. Threaded a new nut into place. Carefully straightened out the stud. Had the nut down the shaft about 3/4 of the way, the stud broke. Win some, lose some.

Used the Dremel cut off wheel to flatten down the nub, center punched the root of the stud, drilled through the remnant, tapped it with a 10-24 tap. I will thread in a short bolt from inside the tub, better then new.

Hope to start bolting back on some big chunks soon.

That's it for now!!
 

Belizeit

CJ-8 Member
Gold Member
City
River Ridge
State
La
Glad you said that about the Borgeson, have that waiting in the garage waiting to be installed, and just ordered the MORE steering box brace a couple days ago.
 

spankrjs

Scrambler Junkie
Lifetime Member
SOA Member
City
Biloxi
State
MS
Got a little more work completed today.

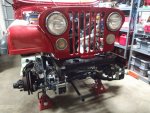
Bolted the grill back into position:

20201224_090837.jpg

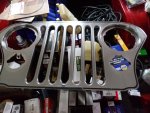
Pulled all the lights off the grill to prepare for the OEM Laredo chrome overlay:

20201224_092051.jpg

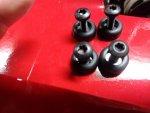
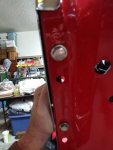
I had previously installed some NOS hood bumpers when the Scrambler was in Baton Rouge. The hood bumpers for the Laredo overlay are different then the regular rubber bumpers. Basically, four well nuts with some small rubber bumpers, secured by Torx bolts. These 4 bolts secure the overlay to the top edge of the grill and also act as a hood cushion when the hood is shut.

Little Torx screws and small rubber bumpers:

20201224_092119.jpg

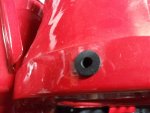
Lower half Well-Nut, already installed:

20201224_092206.jpg

Looking below the top edge of the grill, lower half of Well-Nut. This rubber piece has a nut inside. When you tighten up the Torx screw, it draws the nut upward, bulges out the rubber, keeps it from pulling through the hole:

20201224_092233.jpg

Instructions on how to install from the Factory Service Manual:

20201224_092255.jpg

Tommy did NOT want me to tape the lower edge, so I did not. IMO, it needs to be taped. More on this in a bit.

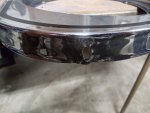
Quick repair around one of the screw holes, the metal was a bit wrinkled:

20201224_092655.jpg

20201224_092910.jpg

20201224_093059.jpg

To install the overlay, I loosely installed the four Torx screws to hold it in place, then tightened down the two outer screws:

20201224_102932.jpg

Not a lot of cushion for the hood? Correct me if I am wrong, I am not a Laredo expert, but don't the Laredo hoods have a piece of rubber glued to the bottom edge that rests on these little bumpers?
 

spankrjs

Scrambler Junkie
Lifetime Member
SOA Member
City
Biloxi
State
MS
This is an OEM overlay and grill. I have never messed with one before, they kind of have a crappy fit.

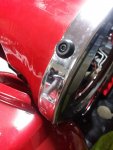
When you tighten down the headlight assemblies, it holds the overlay tight to the face of the grill, but there is a gap at both edges, like part of the overlay that goes under the headlight bezel is a hair too deep:

20201224_103051.jpg

In the picture below I am pinching the overlay tight to the grill, like the screws will, but there is a gap still at the sides:

20201224_103857.jpg

Pinching the overlay to the grill down by the turn signals, no gap:

20201224_103939.jpg

Just me being OCD. JeepAddict told me the gap is normal. Nothing can be done about it, just bugs me. Typical AMC/Jeep fit and finish LOL.

The other issue to watch out for, and again, I am no expert: the grill has a tab, bent inward, above each turn signal. I presume these tabs are supposed to contact the turn signal housings to help ground them, only thing I could figure?

20201224_110254.jpg

20201224_110313.jpg

I really have no idea what purpose these tabs serve?

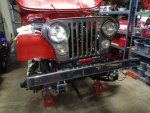
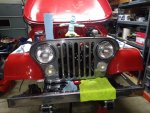
Anyway, all the lights reinstalled, chrome front bumper back on, now it doesn't remind me of my red Scrambler so much anymore!!

20201224_112516.jpg

Looks pretty good. The overlay lays flat to the grill all the way to the bottom, but you can kind of pry it open at the bottom. If it were mine, I would put a thin piece of tape under each turn signal lens. Also, I had scraped out some old goop inside the chrome channels that lay over the grill slats. Again, if it were mine, I would put some 3M Weather strip adhesive on the grill slats to prevent the overlay from floating a bit loose here.


Two more simple chores - installed the throttle cable and the speedometer cable:

20201224_115531.jpg
 
Last edited:

spankrjs

Scrambler Junkie
Lifetime Member
SOA Member
City
Biloxi
State
MS
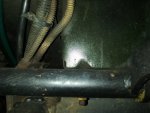
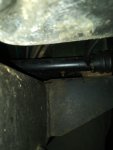
Two reference pictures from my Green Scrambler. OEM body mounts, so similar to the poly no lift body mounts on this red Laredo. Same 258 engine and T5. And, both have identical engine and transmission polyurethane mounts.

No slope on the bell crank on my green Scrambler:

20201224_115826.jpg

20201224_120031.jpg

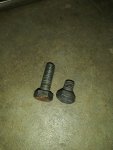
And one main reason I do not typically reuse old bolts:

20201224_132037.jpg

Mocking up the clutch linkage, figured I would just reuse the old bolts for now, snugging with a1/4" ratchet, snap!!!

20201224_132047.jpg

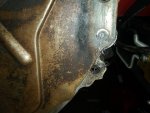
Lower bolt head snapped off. Glad the fender and tire are out of the way!!!

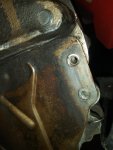
Drilled a pilot hole in the center of the sheared off bolt:

20201224_133227.jpg

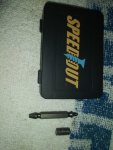
And amazingly, just the first step of the below extractor backed the snapped bolt out:

20201224_133910.jpg

That is also the reason I run taps through all threaded holes and clean the gunk out. Besides OCD, it makes snapped off hardware extraction easier, if necessary!!!!

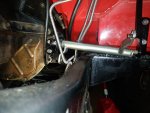
Bell crank in place, gangsta lean:

20201224_141719.jpg

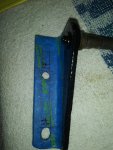
Out comes the blue tape and the "RedneckRay Machine/Fabrication Shop" is open for business:

20201224_144748.jpg

Two new holes, a bit of file work because I only drilled the holes with a 21/64" bit, should have gave myself some more "wiggle room", done:

20201224_153130.jpg

Need to drop the linkage back off and install the boots and clips. Anyway, much better. The more I mess with it, seems like the bell crank tube has a bit too much play where the outer bushing rides, or this bushing has some wear. It is not terrible play, but not as tight as the bushing on the bell housing side. For now, it should be fine, I give it a B+.
 

spankrjs

Scrambler Junkie
Lifetime Member
SOA Member
City
Biloxi
State
MS
I will leave everyone with this last picture.

JeepAddict mailed out his 2020 Christmas cards, him and his "friends?" posing next to his blue YJ Laredo:

20201224_221448.jpg

That's JeepAddict holding a black sock around his neck :ROFLMAO::ROFLMAO:

Merry Christmas :christmas:
 

spankrjs

Scrambler Junkie
Lifetime Member
SOA Member
City
Biloxi
State
MS
Did a little bit of work on Christmas!!!
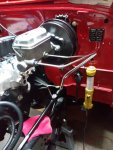
Finished the clutch linkage install.

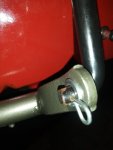
Used a metric washer to replace a missing OEM washer to take up some slack. Had to re-drill both clip holes, one was full of weld and one full of a broken clip/crud:

20201225_105050.jpg

And finished. Next time, I will start with all new parts !!!
20201225_105207.jpg

Easy job, bolted on the starter solenoid, minus some lock washers, need to go shopping:

20201225_111222.jpg

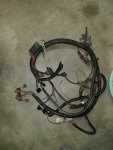
Made the executive decision to "Nutter Bypass" this Jeep, so I won't have to clean this harness.

20201225_111839.jpg

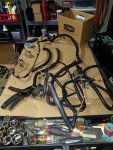
I need to take a look, but this harness appears to be in great shape, will definitely keep it intact as a spare. I have a few old/damaged harnesses that I can hack out the needed ICM wiring from.

I do need to clean/inspect/rewrap the other under hood harness:

20201225_111901.jpg

And mostly finished:

20201225_170752.jpg

Ran out of plastic loom about 3' from the end on the alternator/starter solenoid side.

A few repairs needed, nothing major.

Need to repair the alternator plug:

20201225_170759.jpg

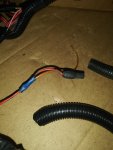
This needs some attention, too:

20201225_170805.jpg

I believe that is a tach hook up and coil connector that is missing it's spade connector, will have to research.

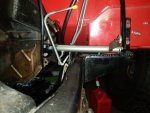
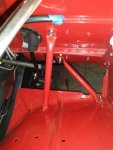
Driver side inner fender support bar reference picture:

20201225_183131.jpg

Front fender and grill bolted back in place and adjusted:

20201225_183206.jpg

That's it for now!!
 
Last edited:

spankrjs

Scrambler Junkie
Lifetime Member
SOA Member
City
Biloxi
State
MS
It was freezing outside when I got up this morning, and the garage wasn't much warmer. So, made a parts run to NAPA in the Green Scrambler to buy some supplies, and let the temperature warm up.

Shifting gears from nuts and bolts to wires and other stuff, getting supplies on hand:

20201226_110500.jpg

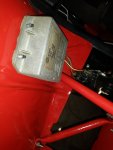
Easy bolt on first thing, to get warmed up, installed the Ignition Control Module:

20201226_111140.jpg

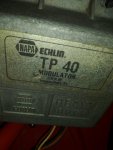
This is an old module, maybe made in the USA??

20201226_111153.jpg

Both front fenders on this Scrambler are replacement parts. For some reason, only 3 of the 4 holes for the windshield squirter bottle are in place?

20201226_111228.jpg

Easy enough fix.

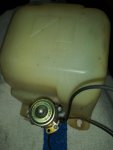
First, I installed a new squirter pump since the OEM motor's spade connector rusted/broke off.

20201226_113000.jpg

Kind of a PIA, but not terrible. It is fun reaching down inside the bottle to get the strainer thing starter on the motor. Takes a 7/8" socket, I simply hand snugged it up.

20201226_115456.jpg

20201226_115514.jpg

Installed thr squirter reservoir and the coolant bottle, marked the inner fender, and removed them. The squirter bottle was missing one mounting hole, the coolant overflow bottle was missing two of its three holes:

20201226_120849.jpg

20201226_120902.jpg
 

spankrjs

Scrambler Junkie
Lifetime Member
SOA Member
City
Biloxi
State
MS
If I would have been smart, I would have marked/drilled these holes BEFORE I installed the manifolds/steering shaft/master cylinder/brake lines. There would have been plenty of room.

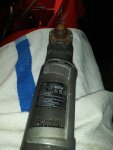
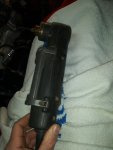
Thank God for the angle drill!!. This thing is a life saver, especially if you ever have to drill the rear valve cover hole in the cylinder head with the engine installed!!! I don't use this thing very often, but it does come in handy when you need it.

20201226_123444.jpg

20201226_123450.jpg

20201226_123715.jpg

And the holes drilled, no problem. Pictures are before final filing of the holes.

20201226_130832.jpg

20201226_130903.jpg

My marks were in the right spots for a change, everything bolted up no problem.

20201226_134748.jpg

After that, time for another "easy job", bolted on the horn.

Scraping new paint off the fender for the horn to ground:

20201226_134755.jpg

Sanding the bottom of the horn bracket:

20201226_134804.jpg

Loosely installed for now. I will tighten it down, in the future, once I install the air cleaner snorkel tube:

20201226_135635.jpg
 

spankrjs

Scrambler Junkie
Lifetime Member
SOA Member
City
Biloxi
State
MS
Started to install the under hood wire harness.

Filled up the ports with dielectric grease:

20201226_140242.jpg

Towels to protect the paint while I loosely ran the harness:

20201226_141703.jpg

When I cleaned and rewrapped the harness yesterday, found a few minor issues.

Ordered a new alternator plug assembly and a new coil connector from NAPA, they should be here Monday. I can still install the entire driver side of the harness and have enough slack to easily make these repairs.

20201226_141716.jpg

Cut insulation on the wires that go to the proportioning valve switch. I taped them up.

20201226_142247.jpg

20201226_142538.jpg

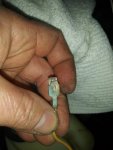
Broken spade connector stuck inside the wiper pump connector:

20201226_143920.jpg

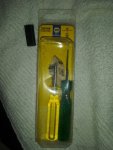
Used the green handled tool to take apart the connector:

20201226_144407.jpg

20201226_144416.jpg

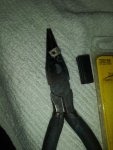
Pulled the spade out with pliers:

20201226_144508.jpg

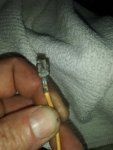
Cleaned up with a wire wheel in the Dremel:

20201226_144835.jpg

Reinserted the connector in the plastic plug, finished.

These are minor issues. I have yet to have to install a new wire harness in any of the Jeeps I have messed with. But, if a harness has a lot of corrosion, needs repairs everywhere, or you are paying shop labor to repair and diagnose problems, I can see where a new harness can save a lot of time/money.

All in all, this harness is in good shape, as was much of the wiring in this Jeep.
 

spankrjs

Scrambler Junkie
Lifetime Member
SOA Member
City
Biloxi
State
MS
While the Dremel was out, cleaned up the headlight ground connectors:

20201226_145555.jpg

And stopped there for now. Dug out two old "feedback harnesses", I should have the correct plugs/wires to build the wiring that will be needed to connect the ICM to the distributor since I will be "Nuttering" this Jeep.

20201226_152227.jpg

That's it for now!!
 

Jeep Addict

Scrambler Junkie
Lifetime Member
City
Baton Rouge
State
La
Even though it’s been so cold out lately it’s good to see that parts monkey is still a proven trooper.
 
Top