

You are using an out of date browser. It may not display this or other websites correctly.
You should upgrade or use an alternative browser.
You should upgrade or use an alternative browser.
Another Scrambler Purchase/Road Trip - UPDATE- BODY ON FRAME AGAIN
- Thread starter spankrjs
- Start date


- City
- God's Country
- State
- AR
On that note, how did the factory setup seem to last so long, while it seems that no matter what you use, it doesn't last long.
What transmission jack are you using, or is that just a floor jack with an adapter?
I have a T176 in the shop and a rebuild kit. Plan is to swap it in for the T5 in my tan CJ7. I need to get after that before I get too old to do it!
What transmission jack are you using, or is that just a floor jack with an adapter?
I have a T176 in the shop and a rebuild kit. Plan is to swap it in for the T5 in my tan CJ7. I need to get after that before I get too old to do it!

- City
- Biloxi
- State
- MS
Not sure of the brand/capacity, but it is a real transmission jack. It makes the lifting/lowering part a piece of cake.On that note, how did the factory setup seem to last so long, while it seems that no matter what you use, it doesn't last long.
What transmission jack are you using, or is that just a floor jack with an adapter?
I have a T176 in the shop and a rebuild kit. Plan is to swap it in for the T5 in my tan CJ7. I need to get after that before I get too old to do it!
I think the longest I have had a clutch last was around 130k miles in one of my old '78 CJ-7's. It was definitely wore when removed, but the fact that the leaking 258 valve cover gasket saturated the disc was the bigger issue
 My 2005 stock TJ Rubicon had 165k on the original clutch when I traded it in, no issues.
I seem to be having problems with the current crop of pilot bushings. The clutches (Luk and Centerforce) seem to be holding up fine. The only things I can suggest:
1) make sure it is real oilite, and porous
2) make sure it doesn't stick to a magnet
3) pack the bushing with lube (I'll be using non-detergent 30w oil)
4) use an oil wick behind the bushing
I have already checked the center of crank to center of bellhousing to center of transmission input shaft with the current engine, bellhousing, and transmission, it is fine, well within spec.
I don't sit on the trail/red lights/traffic with the clutch pedal pushed down. BUT, I do use the hell out of this Jeep but I am not really abusive to the clutch. That being said, all the trail riding/yard work/trailer pulling does involve more clutch usage compared to just highway commuting.
I'm gonna take a good look at the pressure plate and disc. If they look/measure fine I might just reuse them and only replace the pilot bushing and the throw out bearing. I usually advocate against this, since it is so much work to get to the clutch, but if it looks good, it only has 41k miles on it, it should easily last another 60k miles. If I make it that far, with my luck, I will be pulling this stuff out again for some reason

Dave The Sparky
Rebuilding my CJ8 very,very slowly...
- City
- Halifax
- State
- UK
Thinking outside the box here but maybe Jeep built in the notorious leaking rear seal and/or valve cover gaskets in order to keep that pilot bushing lubricated at all times to prevent these very issues you are having.... 
- City
- Biloxi
- State
- MS
Removed the pilot bushing using this tool, a real life saver. Takes about 2 minute's start to finish. Used this on my green Scrambler a few years back, wish I would have brought this tool 30 years ago!!


Beats the hell out of grease/bread/slide hammers/any other method IMO.
Using the above tool, I removed the oilite bushing first, then reinstalled the tool and removed the outer steel "doughnut". Not that I am reusing either piece, but the tool did not damage or mark either piece.

On a stock TJ 4.0 an open face needle bearing is inserted inside the outer steel shell. Went through two of those bearings, then one steelish pilot bushing, and finally an oilite bushing. Anyway, if you don't damage the outer steel shell it can be reused. Easy enough to press another bushing or bearing inside of it.
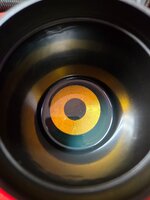
Note all the dried up dust/debris, I am assuming this is remnants of the pilot bushing?

Also note the larger outer hole in the crank that I am using for the larger OD pilot bearing assembly and the deeper inner recessed hole that can also be used with a smaller bushing/bearing.
Using a caliper to measure the ID'S, the removed pilot bushing ID is about 7 thousandths larger then an identical new bushing.
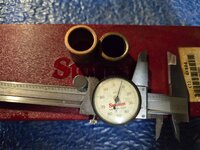
So, the old dried out pilot bushing was slowly getting turned down by the input shaft. Much better a soft bushing getting wore down by the input shaft vs a destroyed bearing turning down the input shaft. Just my opinion here. I've destroyed both bushings and bearings, the bushings don't really cause collateral damage, normally.
Last time I had this transmission down, 2021, I ordered a pilot bushing from Advance Adapters for this application. It arrived after I drove to a bearing supply house in Mobile, AL, and purchased some oilite bushings stock to install into the OEM style outer steel shell/doughnut. Well, I am going to try this Advance Adapter bushing this go around.

Picture of the large Advance Adapter oilite bushing and the oil I am going to soak this bushing in. I will also do the old "finger pack" the bushing lube method, too. And use an oil wick!!!

On my green Scrambler I used regular motor oil, probably fine. I figured this non-detergent oil might be a better choice. I don't think it really matter as long as it is lubed. The bushings are infused with oil when they are made/new, but this oil does wick out. The bag this bushing was sealed in has oil inside of it. The boxes that I kept the oilite bar stock in, and the boxes my other real oilite bushings are stored in are also oil stained. Probably best to keep these bushing in sealed bags. Even still, better idea to lube them again before installing them. My only opinion is use some type of liquid oil, NOT grease.
Soaking the bushing in a cup of above pictured oil for now.
Beats the hell out of grease/bread/slide hammers/any other method IMO.
Using the above tool, I removed the oilite bushing first, then reinstalled the tool and removed the outer steel "doughnut". Not that I am reusing either piece, but the tool did not damage or mark either piece.
On a stock TJ 4.0 an open face needle bearing is inserted inside the outer steel shell. Went through two of those bearings, then one steelish pilot bushing, and finally an oilite bushing. Anyway, if you don't damage the outer steel shell it can be reused. Easy enough to press another bushing or bearing inside of it.
Note all the dried up dust/debris, I am assuming this is remnants of the pilot bushing?
Also note the larger outer hole in the crank that I am using for the larger OD pilot bearing assembly and the deeper inner recessed hole that can also be used with a smaller bushing/bearing.
Using a caliper to measure the ID'S, the removed pilot bushing ID is about 7 thousandths larger then an identical new bushing.
So, the old dried out pilot bushing was slowly getting turned down by the input shaft. Much better a soft bushing getting wore down by the input shaft vs a destroyed bearing turning down the input shaft. Just my opinion here. I've destroyed both bushings and bearings, the bushings don't really cause collateral damage, normally.
Last time I had this transmission down, 2021, I ordered a pilot bushing from Advance Adapters for this application. It arrived after I drove to a bearing supply house in Mobile, AL, and purchased some oilite bushings stock to install into the OEM style outer steel shell/doughnut. Well, I am going to try this Advance Adapter bushing this go around.
Picture of the large Advance Adapter oilite bushing and the oil I am going to soak this bushing in. I will also do the old "finger pack" the bushing lube method, too. And use an oil wick!!!
On my green Scrambler I used regular motor oil, probably fine. I figured this non-detergent oil might be a better choice. I don't think it really matter as long as it is lubed. The bushings are infused with oil when they are made/new, but this oil does wick out. The bag this bushing was sealed in has oil inside of it. The boxes that I kept the oilite bar stock in, and the boxes my other real oilite bushings are stored in are also oil stained. Probably best to keep these bushing in sealed bags. Even still, better idea to lube them again before installing them. My only opinion is use some type of liquid oil, NOT grease.
Soaking the bushing in a cup of above pictured oil for now.
- City
- Biloxi
- State
- MS
Just random thoughts and observations.
Pilot bushing for a stock 258/T4/T5/T176 application compared to the bushing I was using with the AX15. The AX15 input shaft on my transmission is .75 OD, the OEM Jeep transmissions listed above have a smaller OD input shaft tip.

Note how the OEM bushing, on the left, is thicker, potentially storing more lubricant. Maybe this is why they last much longer then the thinner bushing, on the right, I was using with the AX15. Also note the box for the stock type bushing. It was hard to find these real Oilite, Made in the USA, PB79 bushings. Very old boxes. All the new ones I have purchased all stick to magnets.
Used a lighter on the removed bushing, trying to get it to sweat some lubricant out. No go, it is bone dry.

Original Novak supplied pilot "bushing". Note how it too dried out AND sticks to a magnet. Not ideal.

So, going to use the Advance Adapter bushing this go around. Obviously much more Oilite material so hopefully it will hold more lubricant, and more importantly, for a longer period of time.
Now, on to release bearings, and I have a collection

Top left is the bearing that came with the new Luk clutch kit. No number stamped on it anywhere.
Top center came from Andy, we think it came from Novak. Again, no number stamped on it anywhere.
Top right, no idea where it came from. It has a number stamped on it.
Both bottom bearings are SKF self aligning bearings. One of these is currently installed in this Scrambler and IMO it is crap. It feels a bit loose and it slung grease all inside the bellhousing. Not impressed with how open this bearing is. Allows grease out and crap in. And I really don't understand or see the need for the "self aligning" part of this bearing? It basically has lateral play built into it. No idea. I used a similar bearing in my green Scrambler but without the self aligning feature. I feel that is a better bearing IMO.
Part number stamped on the back side of the top right bearing.

I am thinking that this bearing came with another Luk clutch kit purchased years ago? Who knows.
Back side of all these bearings.
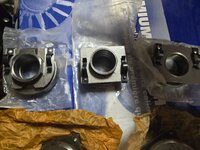
Since I don't feel like spending $50 on a non self aligning SKF release bearing, I am going to use the bearing included in the Luk clutch kit. It feels good, no large openings, and the backing piece is beefy. The other two top bearings will go in a spare parts box. I will probably shit can the two new SKF self aligning release bearings unless anyone wants them.
So, pilot bushing and release bearing decision made. Also, going to install the new disc and pressure plate. With 40k miles on it and the fact that it is already removed, it would be really cheap of me to reinstall it
Anyway, that's the plan. Will start cleaning parts and reassembling a little bit over the next few days.
I am also dropping off the rear drive shaft to my drive shaft guy's shop tomorrow for a rebalance. It either threw off a welded on balance weight or I hit something and knocked it off. No vibration evident but might as well take care of it while it's off. The CV part of this shaft still feels good, maybe a hair/ maybe gritty feel. I'll let him replace these parts if need be. IIRC I have at least 60k miles on this drive shaft/CV/u-joints, so if they need to be replaced not a terrible service life at all for this application/usage IMO.
I would get @badkarma Canadian Mike to help me with the CV rebuild, if need be, but I don't want to have to pay Tariffs on his ass
That's it for now!!
Pilot bushing for a stock 258/T4/T5/T176 application compared to the bushing I was using with the AX15. The AX15 input shaft on my transmission is .75 OD, the OEM Jeep transmissions listed above have a smaller OD input shaft tip.
Note how the OEM bushing, on the left, is thicker, potentially storing more lubricant. Maybe this is why they last much longer then the thinner bushing, on the right, I was using with the AX15. Also note the box for the stock type bushing. It was hard to find these real Oilite, Made in the USA, PB79 bushings. Very old boxes. All the new ones I have purchased all stick to magnets.
Used a lighter on the removed bushing, trying to get it to sweat some lubricant out. No go, it is bone dry.
Original Novak supplied pilot "bushing". Note how it too dried out AND sticks to a magnet. Not ideal.
So, going to use the Advance Adapter bushing this go around. Obviously much more Oilite material so hopefully it will hold more lubricant, and more importantly, for a longer period of time.
Now, on to release bearings, and I have a collection
Top left is the bearing that came with the new Luk clutch kit. No number stamped on it anywhere.
Top center came from Andy, we think it came from Novak. Again, no number stamped on it anywhere.
Top right, no idea where it came from. It has a number stamped on it.
Both bottom bearings are SKF self aligning bearings. One of these is currently installed in this Scrambler and IMO it is crap. It feels a bit loose and it slung grease all inside the bellhousing. Not impressed with how open this bearing is. Allows grease out and crap in. And I really don't understand or see the need for the "self aligning" part of this bearing? It basically has lateral play built into it. No idea. I used a similar bearing in my green Scrambler but without the self aligning feature. I feel that is a better bearing IMO.
Part number stamped on the back side of the top right bearing.
I am thinking that this bearing came with another Luk clutch kit purchased years ago? Who knows.
Back side of all these bearings.
Since I don't feel like spending $50 on a non self aligning SKF release bearing, I am going to use the bearing included in the Luk clutch kit. It feels good, no large openings, and the backing piece is beefy. The other two top bearings will go in a spare parts box. I will probably shit can the two new SKF self aligning release bearings unless anyone wants them.
So, pilot bushing and release bearing decision made. Also, going to install the new disc and pressure plate. With 40k miles on it and the fact that it is already removed, it would be really cheap of me to reinstall it
Anyway, that's the plan. Will start cleaning parts and reassembling a little bit over the next few days.
I am also dropping off the rear drive shaft to my drive shaft guy's shop tomorrow for a rebalance. It either threw off a welded on balance weight or I hit something and knocked it off. No vibration evident but might as well take care of it while it's off. The CV part of this shaft still feels good, maybe a hair/ maybe gritty feel. I'll let him replace these parts if need be. IIRC I have at least 60k miles on this drive shaft/CV/u-joints, so if they need to be replaced not a terrible service life at all for this application/usage IMO.
I would get @badkarma Canadian Mike to help me with the CV rebuild, if need be, but I don't want to have to pay Tariffs on his ass
That's it for now!!
Last edited:
- City
- Biloxi
- State
- MS
Worked on this one a little bit Friday night, but hit a road block so........
Cleaned up the flywheel and ran a tap through all the pressure plate bolt holes. No fingernail snags on the flywheel, it should be fine.
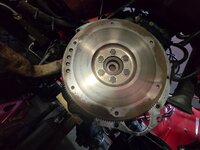
Removed the pivot ball, spring, and release fork from the bell housing.

The clutch fork had one of the little "tits" wore off so picked up a new one from O'Reilly. Not even sure this little "tit" is that critical, but $20 for a new part, why not.

For the amount of miles on the old fork, the wear to the shaft divot is minimal.

Cleaned up the skid plate and associated transmission mount components. This skid plate could tell some tales

Cleaned up the inside of the bell housing and the transmission input shaft, and problems.

Input shaft looks fine, no ridges, but it is not good. I polished it up with some 600 gritty sand paper, so some slight scratches evident. The other lines and markings are not grooves, but this shaft is no good, as best I can tell.

So, the slight chamfer at the tip is fine, they are made this way. The problem I have is that the shaft has wore kind of oddly. Measuring with a caliper, the entire tip grows 3 thousandths when you move from tip to splines. When you slide a bushing on the shaft tip it rocks/wobbles. It should not do this. On my good T176, a new pilot bushing slides easily on the shaft with next to no lateral play. Same thing on a T5 that I have on the shelf. This AX15 shaft has worn funny.
The first roller bearing I put in the crank probably damaged this shaft some when it dried out. I am sure the second bearing did the shaft no favors when it gave up the ghost. The bushings were more forgiving but the damage was already done. Pretty sure this is why the oilite bushing only lasted 41k miles. I could probably pop a new bushing in there and maybe get 10-20k more miles on it before it starts talking again, but that's just not me. Since it is tore down, might as well fix it correctly. Which means tearing this R151F (basically an AX15 with a 4.3:1 first gear ratio vs the Jeep AX15 3.8:1 first gear transmission) completely apart.
I ordered a new input shaft for a Jeep AX15. Pretty sure it will work but won't know until the transmission is tore down. You can not change the input shaft on these transmissions without a complete tear down.
I will call Novak Monday for some information, but Marlin Cawler might be a better source of information since this is a Toyota transmission.
According to the internet the Jeep input shaft should work. The difference between the 3.8:1 vs 4.3:1 transmissions is only the actual first gear gear and the corresponding gear on the counter shaft. The other gears on the counter shaft are identical.
My transmission has a 10 spline inch and an eight OD shaft, .75 pilot tip, and the same length as the Jeep AX15 shaft. I really won't know until I tear it down if my input shaft has the same 29 teeth like a Jeep AX15. Hopefully so. If not, well I'll have a $100 AX15 clutch disc alignment tool with the part I already ordered.
If my current input shaft is different from the Jeep version, and proves hard/expensive to obtain, I can always take it to a machine shop and attempt either of the following:
Turn the shaft down and make a custom bushing to fit the new turned down shaft OD.
Turn the shaft down enough to press on a stainless steel sleeve to return the OD back to .75.
Hopefully the Jeep input shaft will work. I will continue on cleaning up parts. Might as well and order a rebuild kit for the AX15, too. It only has 60-70k miles on it, but since the whole transmission has to be tore apart.......
I will either rebuild the transmission myself OR let a local retired Jeep dealer mechanic rebuild it. Talked to this guy briefly on Saturday. He worked at the local dealership where my 05 Rubicon came from, my 22 Gladiator, and my 392 came from. Good guy, he worked there for close to 40 years, and was the guy who did all the transmission work there. Figure I can trust this guy and it could save me some time. We will see.
That's it for now.
Cleaned up the flywheel and ran a tap through all the pressure plate bolt holes. No fingernail snags on the flywheel, it should be fine.
Removed the pivot ball, spring, and release fork from the bell housing.
The clutch fork had one of the little "tits" wore off so picked up a new one from O'Reilly. Not even sure this little "tit" is that critical, but $20 for a new part, why not.
For the amount of miles on the old fork, the wear to the shaft divot is minimal.
Cleaned up the skid plate and associated transmission mount components. This skid plate could tell some tales
Cleaned up the inside of the bell housing and the transmission input shaft, and problems.
Input shaft looks fine, no ridges, but it is not good. I polished it up with some 600 gritty sand paper, so some slight scratches evident. The other lines and markings are not grooves, but this shaft is no good, as best I can tell.
So, the slight chamfer at the tip is fine, they are made this way. The problem I have is that the shaft has wore kind of oddly. Measuring with a caliper, the entire tip grows 3 thousandths when you move from tip to splines. When you slide a bushing on the shaft tip it rocks/wobbles. It should not do this. On my good T176, a new pilot bushing slides easily on the shaft with next to no lateral play. Same thing on a T5 that I have on the shelf. This AX15 shaft has worn funny.
The first roller bearing I put in the crank probably damaged this shaft some when it dried out. I am sure the second bearing did the shaft no favors when it gave up the ghost. The bushings were more forgiving but the damage was already done. Pretty sure this is why the oilite bushing only lasted 41k miles. I could probably pop a new bushing in there and maybe get 10-20k more miles on it before it starts talking again, but that's just not me. Since it is tore down, might as well fix it correctly. Which means tearing this R151F (basically an AX15 with a 4.3:1 first gear ratio vs the Jeep AX15 3.8:1 first gear transmission) completely apart.
I ordered a new input shaft for a Jeep AX15. Pretty sure it will work but won't know until the transmission is tore down. You can not change the input shaft on these transmissions without a complete tear down.
I will call Novak Monday for some information, but Marlin Cawler might be a better source of information since this is a Toyota transmission.
According to the internet the Jeep input shaft should work. The difference between the 3.8:1 vs 4.3:1 transmissions is only the actual first gear gear and the corresponding gear on the counter shaft. The other gears on the counter shaft are identical.
My transmission has a 10 spline inch and an eight OD shaft, .75 pilot tip, and the same length as the Jeep AX15 shaft. I really won't know until I tear it down if my input shaft has the same 29 teeth like a Jeep AX15. Hopefully so. If not, well I'll have a $100 AX15 clutch disc alignment tool with the part I already ordered.
If my current input shaft is different from the Jeep version, and proves hard/expensive to obtain, I can always take it to a machine shop and attempt either of the following:
Turn the shaft down and make a custom bushing to fit the new turned down shaft OD.
Turn the shaft down enough to press on a stainless steel sleeve to return the OD back to .75.
Hopefully the Jeep input shaft will work. I will continue on cleaning up parts. Might as well and order a rebuild kit for the AX15, too. It only has 60-70k miles on it, but since the whole transmission has to be tore apart.......
I will either rebuild the transmission myself OR let a local retired Jeep dealer mechanic rebuild it. Talked to this guy briefly on Saturday. He worked at the local dealership where my 05 Rubicon came from, my 22 Gladiator, and my 392 came from. Good guy, he worked there for close to 40 years, and was the guy who did all the transmission work there. Figure I can trust this guy and it could save me some time. We will see.
That's it for now.
Last edited:
- City
- Biloxi
- State
- MS
Saw that option on the internet, too. That would definitely be a ship to shop option, pretty sure no one around here does this kind of work?Another option is to have the original shaft repaired via spray welding, turning down to original dimensions, then heat treating.
- City
- Biloxi
- State
- MS
Random notes.
I will now be using an Advance Adapters AMC extended pilot bushing:
.75 ID
1.818 OD
.75 THICK
Part# 716166
The OEM Wrangler bearing, SKF SCE129 (from NAPA website):
.7874 ID
1.001 OD
.555 THICK
On a bushing, the "internet" says .001-.004 clearance between ID and shaft.
Interesting that the OEM bearing to shaft has .0374 clearance, BUT bearing vs bushing?
My clutch disc and pilot bushing/bearing needs mimic a 1994 Jeep 4.0 which uses a 10 spline, 1-1/8" shaft, with a pilot bearing ID .787.
Supposedly the original R151F input shaft 1-1/8", 10 spline, 6.5" long, 19/32 tip (.5938 OD vs my .75 OD)
Only numbers recognizable on my transmission sticker:
01 47 01
"4779"
Jeep AX15 = 3.38 1st gear
R151F = 4.3:1 1st gear
AX15 = 1st gear is 31 teeth, corresponding cluster gear is 12 tooth, multiplied by internal reduction 2.58 = 3.38
R151F = 1st gear is 32 teeth, corresponding cluster gear is 11 tooth, multiplied by internal reduction 2.58 = 4,3
Supposedly my transmission only has a 17% overdrive, the Jeep version has a bit more.
AX15-16A input shaft fits '92+ Wranglers, 10 spline, 1-1/8" shaft OD, .75" tip diameter
Post #1220 checking bore alignment.
Bell housing to adapter bolts are 7/16" bolts, use 10mm washers for OD clearance, torqued to 45 foot pounds.
Supposedly the transmission I bought from Novak does contain the 4.3:1 first gear. Maybe they changed, or ordered, these transmissions with the correct Jeep input shaft? From the "internet", supposedly the AX15, pre '96 R150F, and 151F input shafts are identical, same 29 tooth gear count, only difference is the AX15 input shaft is about 1" longer. This was from a Pirate 4x4 post from 2009, BUT it had pictures.
Once I pull my transmission apart I can easily confirm the 1st gear ratio and input shaft information. But, just from driving the same Jeep with a T176 (1st gear similar to AX15) and a T5 and an AX15, I am 99% sure my transmission is the 4.3:1 1st gear ratio, it feels just like the OEM T5 which has a 4.03 1st gear. There is a noticeable difference between 1st gear in a T176 vs T5.
Just random thoughts..................
I will now be using an Advance Adapters AMC extended pilot bushing:
.75 ID
1.818 OD
.75 THICK
Part# 716166
The OEM Wrangler bearing, SKF SCE129 (from NAPA website):
.7874 ID
1.001 OD
.555 THICK
On a bushing, the "internet" says .001-.004 clearance between ID and shaft.
Interesting that the OEM bearing to shaft has .0374 clearance, BUT bearing vs bushing?
My clutch disc and pilot bushing/bearing needs mimic a 1994 Jeep 4.0 which uses a 10 spline, 1-1/8" shaft, with a pilot bearing ID .787.
Supposedly the original R151F input shaft 1-1/8", 10 spline, 6.5" long, 19/32 tip (.5938 OD vs my .75 OD)
Only numbers recognizable on my transmission sticker:
01 47 01
"4779"
Jeep AX15 = 3.38 1st gear
R151F = 4.3:1 1st gear
AX15 = 1st gear is 31 teeth, corresponding cluster gear is 12 tooth, multiplied by internal reduction 2.58 = 3.38
R151F = 1st gear is 32 teeth, corresponding cluster gear is 11 tooth, multiplied by internal reduction 2.58 = 4,3
Supposedly my transmission only has a 17% overdrive, the Jeep version has a bit more.
AX15-16A input shaft fits '92+ Wranglers, 10 spline, 1-1/8" shaft OD, .75" tip diameter
Post #1220 checking bore alignment.
Bell housing to adapter bolts are 7/16" bolts, use 10mm washers for OD clearance, torqued to 45 foot pounds.
Supposedly the transmission I bought from Novak does contain the 4.3:1 first gear. Maybe they changed, or ordered, these transmissions with the correct Jeep input shaft? From the "internet", supposedly the AX15, pre '96 R150F, and 151F input shafts are identical, same 29 tooth gear count, only difference is the AX15 input shaft is about 1" longer. This was from a Pirate 4x4 post from 2009, BUT it had pictures.
Once I pull my transmission apart I can easily confirm the 1st gear ratio and input shaft information. But, just from driving the same Jeep with a T176 (1st gear similar to AX15) and a T5 and an AX15, I am 99% sure my transmission is the 4.3:1 1st gear ratio, it feels just like the OEM T5 which has a 4.03 1st gear. There is a noticeable difference between 1st gear in a T176 vs T5.
Just random thoughts..................

FLCJ8
Legacy Registered User
- City
- Palm Bay
- State
- FL
Great idea to keep all this info in one place, for you as well as us.. 
You would think with the large difference between the two suspected ratios it would be fairly easy to tell which one you have before taking it apart.
Dumb question... while the tranny is out can't you just put it in first gear, rotate the input shaft and count the number of turns on the output, or vice-versa?Once I pull my transmission apart I can easily confirm the 1st gear ratio and input shaft information. But, just from driving the same Jeep with a T176 (1st gear similar to AX15) and a T5 and an AX15, I am 99% sure my transmission is the 4.3:1 1st gear ratio, it feels just like the OEM T5 which has a 4.03 1st gear. There is a noticeable difference between 1st gear in a T176 vs T5.
You would think with the large difference between the two suspected ratios it would be fairly easy to tell which one you have before taking it apart.
- City
- Biloxi
- State
- MS
Picked up my rear driveshaft this afternoon. The weight that came off must have been tiny. Spinning the shaft on the balance machine it was still well within spec. Putting the tiniest bit of metal on it through it off. So, rear shaft good to go, no charge on the balance check, happy days. It wasn't vibrating, but better safe then sorry. I must have 70k miles on this rear drive shaft, and it still has all the original Spicer u-joints/CV components, which are all still fine. My angles are pretty good and I regularly grease it all, so hopefully all that work keeps paying off.
Went ahead and ordered an AX15 rebuild kit, hopefully it will all work on this R151F. Downloaded and printed out the Jeep FSM AX15 rebuild pages. Doesn't look too bad, will probably just rebuild it myself.
Drained the transmission and transfer case, pulled off the bellhousing and Dana 300.

This picture shows the front adapter plate and bearing retainer. The adapter plate is definitely from Novak, I would assume the front bearing retainer is a Novak piece, too. Neither look like standard AX15/R151F parts.

I called Novak this morning and talked to tech support. Guy I talked to was not there back in 2014 when I bought this transmission, he was not even aware that they sold this version of the transmission. He thinks it uses a different input shaft, but doesn't know for sure. So, not real helpful. I'll know when I pull it all down.
Doing the old @FLCJ8 trick, I used a marker and marked a spline on the input shaft and a put a mark on the rear Dana 300 yoke (before removing it). 99% sure I have transmission in 1st gear, Dana 300 in 2wd. It took a little more then 4.25 turns of the input shaft to get one rear yoke revolution. So, for good and bad, 99% sure that this is a real deal 4.3:1 first gear R151F transmission.
That's it for now.
Went ahead and ordered an AX15 rebuild kit, hopefully it will all work on this R151F. Downloaded and printed out the Jeep FSM AX15 rebuild pages. Doesn't look too bad, will probably just rebuild it myself.
Drained the transmission and transfer case, pulled off the bellhousing and Dana 300.
This picture shows the front adapter plate and bearing retainer. The adapter plate is definitely from Novak, I would assume the front bearing retainer is a Novak piece, too. Neither look like standard AX15/R151F parts.
I called Novak this morning and talked to tech support. Guy I talked to was not there back in 2014 when I bought this transmission, he was not even aware that they sold this version of the transmission. He thinks it uses a different input shaft, but doesn't know for sure. So, not real helpful. I'll know when I pull it all down.
Doing the old @FLCJ8 trick, I used a marker and marked a spline on the input shaft and a put a mark on the rear Dana 300 yoke (before removing it). 99% sure I have transmission in 1st gear, Dana 300 in 2wd. It took a little more then 4.25 turns of the input shaft to get one rear yoke revolution. So, for good and bad, 99% sure that this is a real deal 4.3:1 first gear R151F transmission.
That's it for now.
Last edited:
- City
- Biloxi
- State
- MS
I'm not going to do a step by step AX15 rebuild here, but I will include my pictures and specific notes from my journey.
This guy has a pretty good rebuild thread, but I have already noted a few difference, but still a good reference:

 www.jeepforum.com
I also printed out/using an OEM Factory Service Manual (FSM) for this transmission:
To start with, you probably really need a vice to take this transmission apart. It is NOT a box, more like a center plate that holds everything, then the two covers slide on from either end and incapsulate the rotating assemblies. Borrowed a vice from work, bolted it to a big ass heavy block of wood, as good as it gets for poor RedneckRay.

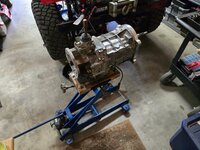
I actually used my transmission jack, raised up high, to make a nice work bench for the initial disassembly steps:
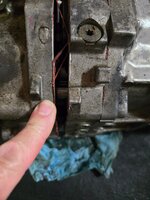
After removing some shifter parts, and all the case bolts, you need to pry the two cases off the center plate. I placed the transmission on the ground, on a thick rubber mud flap, to remove the cases. It will make a mess, oil will go everywhere. When you pry the cases off, use the built in prying lugs, DON'T pry against the sealing surfaces of the cases or center plate. Below is a pry lug:
My transmission came from Novak, new, with their adapters installed. I have this transmission adapted to bolt to the stock T176 bell housing. At the time I ordered the transmission, this made sense, I had a 258. I have since installed a 4.0, but still using the same parts. IF I would have started with a 4.0, I probably would have just used a Jeep AX15 bell housing. Oh well. Novak supplied "faux" front bearing retainer (in my application just a place for the OEM CJ release bearing to go), Novak aluminum adapter plate visible.
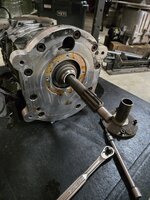
Novak adapter plate removed from the front of the transmission, revealing the actual OEM front bearing retainer.

More "pry lugs", these are on the front bearing retainer.

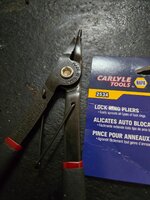
You are going to need some good lock ring plyers, NOT snap ring plyers. I bought these, amazingly still made in the USA, I am also still using my 30 year old Craftsman lock ring plyers.
Another "pry lug" location.
Front and rear cases removed from the center plate, still on the ground here, kind of scary looking compared to a T5/T176!!!

And mounted up in the vice. Do NOT clamp the center plate with the vice unless you want leaks. I used some bolts/washers through one of the lower plate/case bolt holes, clamp to the bolt heads. An extra pair of hand would help getting the transmission in the vice, and clamping it down, but I made do by myself just fine. This thing, even without the cases, is heavy. Not NV4500 heavy, but definitely is not a T5!!

Again, this is NOT a step by step guide. I am using the FSM, following it, for the most part.
This guy has a pretty good rebuild thread, but I have already noted a few difference, but still a good reference:
Major Repair - AX-15 rebuild
IF YOU HAVE QUESTIONS ON THIS WRITEUP, PLEASE ASK THEM HERE: http://www.jeepforum.com/forum/f12/major-repair-mean-maxs-ax-15-rebuild-question-thread-1067696/ Okay kids, hang on for a while because this could be a bumpy ride! I am just starting an AX-15 rebuild on an old neglected AX-15 that...
I also printed out/using an OEM Factory Service Manual (FSM) for this transmission:
To start with, you probably really need a vice to take this transmission apart. It is NOT a box, more like a center plate that holds everything, then the two covers slide on from either end and incapsulate the rotating assemblies. Borrowed a vice from work, bolted it to a big ass heavy block of wood, as good as it gets for poor RedneckRay.
I actually used my transmission jack, raised up high, to make a nice work bench for the initial disassembly steps:
After removing some shifter parts, and all the case bolts, you need to pry the two cases off the center plate. I placed the transmission on the ground, on a thick rubber mud flap, to remove the cases. It will make a mess, oil will go everywhere. When you pry the cases off, use the built in prying lugs, DON'T pry against the sealing surfaces of the cases or center plate. Below is a pry lug:
My transmission came from Novak, new, with their adapters installed. I have this transmission adapted to bolt to the stock T176 bell housing. At the time I ordered the transmission, this made sense, I had a 258. I have since installed a 4.0, but still using the same parts. IF I would have started with a 4.0, I probably would have just used a Jeep AX15 bell housing. Oh well. Novak supplied "faux" front bearing retainer (in my application just a place for the OEM CJ release bearing to go), Novak aluminum adapter plate visible.
Novak adapter plate removed from the front of the transmission, revealing the actual OEM front bearing retainer.
More "pry lugs", these are on the front bearing retainer.
You are going to need some good lock ring plyers, NOT snap ring plyers. I bought these, amazingly still made in the USA, I am also still using my 30 year old Craftsman lock ring plyers.
Another "pry lug" location.
Front and rear cases removed from the center plate, still on the ground here, kind of scary looking compared to a T5/T176!!!
And mounted up in the vice. Do NOT clamp the center plate with the vice unless you want leaks. I used some bolts/washers through one of the lower plate/case bolt holes, clamp to the bolt heads. An extra pair of hand would help getting the transmission in the vice, and clamping it down, but I made do by myself just fine. This thing, even without the cases, is heavy. Not NV4500 heavy, but definitely is not a T5!!
Again, this is NOT a step by step guide. I am using the FSM, following it, for the most part.
- City
- Biloxi
- State
- MS
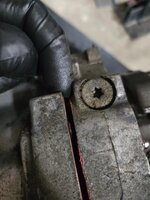
The FSM says the 5th gear shift fork is held to the shaft with a set screw. Mine is held in place with a bolt. NOTE - all transmission bolts thus far have been metric, the Novak stuff is SAE, so big pile of tools all over the place.

This is a PIA to get to, to measure, since this must be measured with the gears installed, but mine was super tight cramming in a .0125 feeler gauge, so good to go.
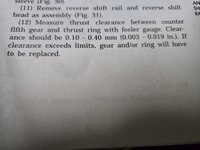
Another NOTE from the FSM, which should save me some time:

I will NOT be removing the shift rails, I have no reason to, they are still straight, no issues at all with shifting into/out of any gears. There are several pages describing the shift rail removal process. Just me, but if you do not need to remove the rails, leave them in place.
Where I stopped last night, I am almost ready to remove the counter shaft and main shaft.
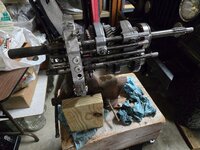

One last NOTE - be very careful removing some of these parts, they will have springs and check balls. These will go flying into the great unknown if you are not careful. I would not know anything about the 5th gear thrust washer check ball dropping to the floor and hiding for two hours...............
That's it for now
This is a PIA to get to, to measure, since this must be measured with the gears installed, but mine was super tight cramming in a .0125 feeler gauge, so good to go.
Another NOTE from the FSM, which should save me some time:
I will NOT be removing the shift rails, I have no reason to, they are still straight, no issues at all with shifting into/out of any gears. There are several pages describing the shift rail removal process. Just me, but if you do not need to remove the rails, leave them in place.
Where I stopped last night, I am almost ready to remove the counter shaft and main shaft.
One last NOTE - be very careful removing some of these parts, they will have springs and check balls. These will go flying into the great unknown if you are not careful. I would not know anything about the 5th gear thrust washer check ball dropping to the floor and hiding for two hours...............
That's it for now
- City
- Biloxi
- State
- MS
A little bit more work last night.
Two lock rings removed, voila, empty transmission center plate (except for shift rails which are staying put):

More parts on the floor!!!

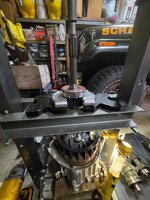
Using my press to remove the input shaft bearing. My press is almost too small between the two horizontal rails for this, the gear just cleared. NOTE - not the proper way to use a bearing splitter!!!!!!!!!
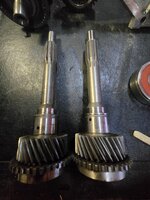
Good news, my original and replacement input shaft match up 100%. I even installed it on the main shaft, it meshes perfectly with the shift hub.
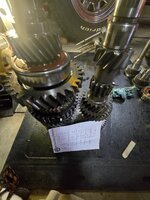
Moment of truth, counted up 1st gears teeth, and the corresponding 1st gear on the cluster gear, and I do have the R151F, 4.3:1 first gear, which I was already 95% sure of.

Using a bearing splitter/puller to remove the cluster gears front bearing.

One thing to note: the cluster gear front bearing's rollers do NOT ride directly on the cluster gear, they ride on that central hub, to the right of the bearing in the picture below. The rear cluster gear bearing DOES ride directly on the cluster gear, just like a T5.

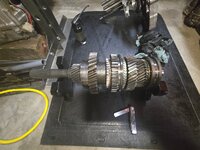
Just a reference picture of the main shaft.

Two lock rings removed, voila, empty transmission center plate (except for shift rails which are staying put):
More parts on the floor!!!
Using my press to remove the input shaft bearing. My press is almost too small between the two horizontal rails for this, the gear just cleared. NOTE - not the proper way to use a bearing splitter!!!!!!!!!
Good news, my original and replacement input shaft match up 100%. I even installed it on the main shaft, it meshes perfectly with the shift hub.
Moment of truth, counted up 1st gears teeth, and the corresponding 1st gear on the cluster gear, and I do have the R151F, 4.3:1 first gear, which I was already 95% sure of.
Using a bearing splitter/puller to remove the cluster gears front bearing.
One thing to note: the cluster gear front bearing's rollers do NOT ride directly on the cluster gear, they ride on that central hub, to the right of the bearing in the picture below. The rear cluster gear bearing DOES ride directly on the cluster gear, just like a T5.
Just a reference picture of the main shaft.
- City
- Biloxi
- State
- MS
Reference picture of this synchronizer hub's installation orientation, the two sides are very slightly different.

Reference picture. Main shaft mounted up on some press blocks, checked the clearance between 1,2, and 3 gears to their corresponding thrust washers. All my clearances were good to go, well within the specifications.
Reference pictures, 5th gear, back end of main shaft. Note the direction. The larger OD end of the gear should go against the rear bearing.


Stuck here for now, need to obtain a larger bearing splitter. The HF splitter kit I have can only accommodate up to a 3" OD bearing, this bearing is closer to 4". I will have to use a bearing splitter/puller set up from hear on out. My press does NOT have enough room between the horizontal press rails to press the large OD gears between them. No big deal, I hope.
That's it for now.
Reference picture. Main shaft mounted up on some press blocks, checked the clearance between 1,2, and 3 gears to their corresponding thrust washers. All my clearances were good to go, well within the specifications.
Reference pictures, 5th gear, back end of main shaft. Note the direction. The larger OD end of the gear should go against the rear bearing.
Stuck here for now, need to obtain a larger bearing splitter. The HF splitter kit I have can only accommodate up to a 3" OD bearing, this bearing is closer to 4". I will have to use a bearing splitter/puller set up from hear on out. My press does NOT have enough room between the horizontal press rails to press the large OD gears between them. No big deal, I hope.
That's it for now.
- City
- Biloxi
- State
- MS
A little bit more disassembly work.
Using a larger bearing splitter, two jaw puller, some 9/16 Grade 8 bolts, was able to remove 5th gear and the rear bearing.
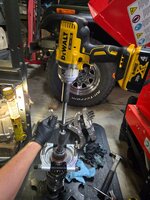
Pressing these two pieces off, you can remove all the way down to the first gear synchronizer ring. Parts in order from rear of shaft inward.

What the shaft looks like after removing the above parts.

One big difference I have experienced vs the above linked rebuild thread: My 5th gear was a press fit, it was NOT just going to slide off after removing the snap ring, leaving just the bearing to press off. Also, DO not press first gear off without FIRST pressing the bearing/5th gear off. If you do, you will shear that little locating peg pictured above which keys a thrust washer into place on the main shaft.
After pressing the 5th gear/rear bearing off, I almost thought I F'd up 5th gear, looking at its internal splines!!!

I had to do a quick Google search, this is what they look like. I am not an AX15 expert by any means, and I have heard of some type of upgraded 5th gear deal. I wonder if the earlier gears were different in this regard? Anyway, my gear is fine, just concerned me when I first saw it!!!!
Two random reference pictures for me:
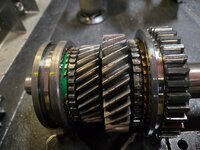
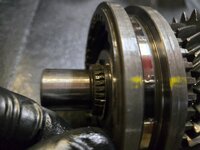
Ran out of time, but ready to press off the next gear and this synchronizer assembly.
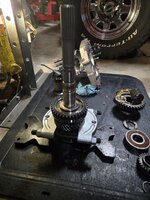
The synchronizer hub is a slight press fit to the shaft splines. You have to use the gear to press the synchronizer assembly off. The bearing splitter is upside down, flat face against the bottom of the gear. You do NOT want to be only pressing on the gears teeth!!!! This is more of a "light" press fit versus 5th gear.
That's it for now.
Using a larger bearing splitter, two jaw puller, some 9/16 Grade 8 bolts, was able to remove 5th gear and the rear bearing.
Pressing these two pieces off, you can remove all the way down to the first gear synchronizer ring. Parts in order from rear of shaft inward.
What the shaft looks like after removing the above parts.
One big difference I have experienced vs the above linked rebuild thread: My 5th gear was a press fit, it was NOT just going to slide off after removing the snap ring, leaving just the bearing to press off. Also, DO not press first gear off without FIRST pressing the bearing/5th gear off. If you do, you will shear that little locating peg pictured above which keys a thrust washer into place on the main shaft.
After pressing the 5th gear/rear bearing off, I almost thought I F'd up 5th gear, looking at its internal splines!!!
I had to do a quick Google search, this is what they look like. I am not an AX15 expert by any means, and I have heard of some type of upgraded 5th gear deal. I wonder if the earlier gears were different in this regard? Anyway, my gear is fine, just concerned me when I first saw it!!!!
Two random reference pictures for me:
Ran out of time, but ready to press off the next gear and this synchronizer assembly.
The synchronizer hub is a slight press fit to the shaft splines. You have to use the gear to press the synchronizer assembly off. The bearing splitter is upside down, flat face against the bottom of the gear. You do NOT want to be only pressing on the gears teeth!!!! This is more of a "light" press fit versus 5th gear.
That's it for now.
- City
- Biloxi
- State
- MS
Crap day yesterday.
The 12 ton press would not budge the 3/4 synchronizer hub/2nd gear off.
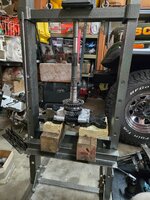
Went to retighten the bearing splitter, did NOT pay attention, tightened it up right into 3rd gears teeth, chipped one. Add another part to the list.

Gave up on that end, removed the main shaft's front lock ring, it deformed itself in the removal process.

This lock ring is a specific thickness, mine is 1.88mm thick. I found the Toyota part number for this ring, a "B" stamp, 1.85 - 1.9mm. Will order that. Will try to find an OEM 3rd gear.............................
I am going to remount the shaft in the press over the weekend and leave it under pressure, maybe the hub will break free. Maybe freeze it, definitely will NOT torch it. Maybe buy a really deep/strong 2 jaw puller and use the impact gun to help "shock" it free.
That's it for now.
The 12 ton press would not budge the 3/4 synchronizer hub/2nd gear off.
Went to retighten the bearing splitter, did NOT pay attention, tightened it up right into 3rd gears teeth, chipped one. Add another part to the list.
Gave up on that end, removed the main shaft's front lock ring, it deformed itself in the removal process.
This lock ring is a specific thickness, mine is 1.88mm thick. I found the Toyota part number for this ring, a "B" stamp, 1.85 - 1.9mm. Will order that. Will try to find an OEM 3rd gear.............................
I am going to remount the shaft in the press over the weekend and leave it under pressure, maybe the hub will break free. Maybe freeze it, definitely will NOT torch it. Maybe buy a really deep/strong 2 jaw puller and use the impact gun to help "shock" it free.
That's it for now.