• Notice for iPhone users: DO NOT use the image size reduction option when uploading photos to the forum. This causes portrait images to post as landscape. We have added a warning to the image insert pop-up as well.

Another Scrambler Purchase/Road Trip - UPDATE- BODY ON FRAME AGAIN

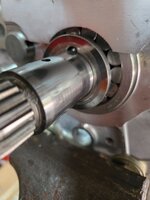
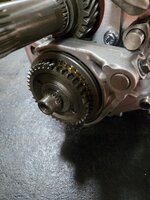
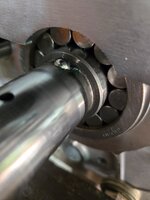
Grease the shit out of this little ball, install it in the hole in the counter shaft.
20250419_145128.jpg

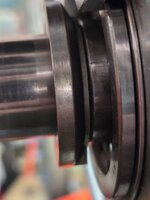
This thrust washer slides over the ball. The top round notch goes over the ball, NOT the square notch!!

20250419_145137.jpg

Installed.

20250419_145213.jpg

20250419_145335.jpg

Countershaft 5th gear and synchronizer assembly.
20250419_145407.jpg

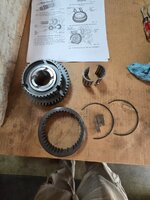
Installing the three little tabs and the two snap rings. Both rings go on this side.
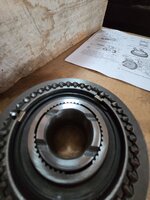
20250419_150123.jpg

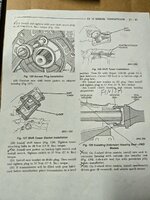
Hard to explain in words the orientation of the little tabs, this illustration shows it best.

20250419_150131.jpg

I greased up the split bearing, installed the assembly on the counter shaft.
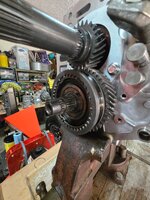
20250419_150810.jpg

This is the first real issue I have ran into with regards to the rebuild kit components. Slight difference in outer teeth: original to the left, house shaped; new on right, more ramped. No big deal?
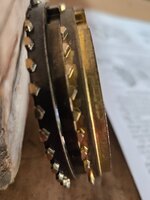
20250419_150821.jpg

Major problem:

20250419_153336.jpg

The ID of the new ring is larger than the original ring and it jambs up inside the synchronizer hub. It will not work. In the above notes you will see that the ID of the hub is larger than the OD of the ring. This gives a bit of play, which it needs.

I panicked thinking I installed the wrong synchronizer blocking ring on 3rd or 4th gear, nope, they work as they should. I was super OCD matching up these rings as I went, just didn't think to check 5th gear with its hub since the other four fit perfect. Lesson learned.
 
So, in breaking with my OCD, I reused the original 5th gear brass blocking ring. It has no abnormal wear to the little outer teeth, the internal brake ridges feel as sharp and pronounced as the new blocking rings. Rock and Roll.

And again, this outer gear had to be tapped on with a big socket and hammer. It is a tight fit on the splines. I did not have to beat the crap out of it, but it definitely did not push on. You have to carefully hold and align the brass blocking ring so that it's notches stay lined up with the three little tabs that are installed in the synchronizer hub while installing this part.

20250419_162653.jpg

There is some chatter/parts available for an upgraded 5th gear assembly, not really sure about all of that. I do know that this part on mine has 47 teeth like the Jeep version. So, maybe my transmission is a Jeep AX15 and it only has the R151F 1st gear and counter shaft? Not sure about that, most of the Toyota R151Fs have a nut that holds this gear on instead of a clip. I do know that I have the 4.3:1 first gear like a Toyota.

This original vs "upgraded" 5th gear assembly could explain my brass blocking ring difference. Maybe mine is original and not an "upgraded" version. I had no issues with shifting into and out of 5th gear before so don't really see the need for an "upgrade" here. So, let's continue on......

Luckily for me, this original 5th gear clip still fits super tight, so no reason to try and obtain a different clip here.

20250419_162705.jpg

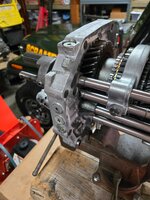
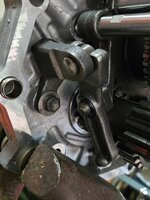
Installing the reverse gear shifter head/rail assembly. Don't forget to grease and install the check ball inside this part while installing it!! The ball goes inside this part, between the two round bores, where the screw driver is pointing.

20250419_165051.jpg

Slide the 5th gear shift rail back, install the 5th gear shift fork, blue lock tite on the bolt.

20250419_165935.jpg

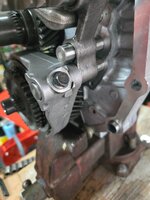
Balls, springs, caps and sealant. I installed a bit of this sealant on the caps to prevent oil leaks. The original builder installed some type of sealant on these cap threads, too, just not sure what.

20250419_171159.jpg

The four holes where these parts go. All these parts are identical.

20250419_171204.jpg

Installed.
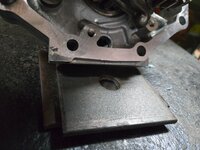
20250419_171925.jpg

Reverse shifter parts next.

20250419_172010.jpg

Installed. Blue lock tite on the bolts.

20250419_173351.jpg

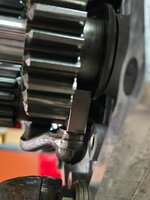
That little swivel headed square tang that slides into the reverse gear collar is the shift fork for reverse.

20250419_173411.jpg
 
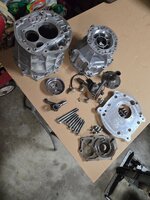
And ready to install the front and rear cases.

20250419_173744.jpg

20250419_173750.jpg

Thankfully, running out of transmission parts!!!!

20250419_180852.jpg

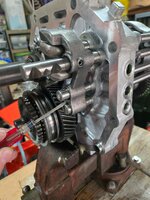
Test fitting/dry fitting/experimenting with different techniques to install the front case.

20250419_183024.jpg

I don't like the idea of placing the case on a stand, facing up, then lowering the slab/shafts down vertically though it. I'm sure this works but I don't like it. I believe I will probably prop the center slab up on a wedge, front up at a slight angle, hold the input shaft slightly upward, slide the case down to the center slab.

Anyway, that's it for now, Happy Easter!!
 
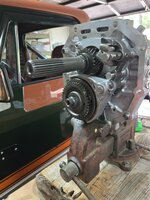
Piddled a bit with this one today.

I emailed the eBay seller I bought the rebuild kit from to see if I could purchase the correct 5th gear blocking ring. I sent a picture and description of the issue. I figured they would get back with me in a few days. Amazingly, they emailed me back this morning (Easter Sunday) and said they would send out the correct part tomorrow!! Fingers crossed. So, it was easy enough to access this part: remove one clip, pull off one gear with a harmonic balancer puller.

20250420_140946.jpg

Dang OCD 😆

So, stalled with the the transmission, decided to clean up the Dana 300.

This was the fun part, scraping off RTV and the gasket from the transmission face of the clocking ring.

20250420_143513.jpg

20250420_145350.jpg

I went back and re-read the Novak instructions, they called for the installer to RTV a gasket to each side of their clocking ring. They mention that this is a "wet" cavity, but I don't see how? The transmission has a seal on the back side to keep it's oil in, the Dana 300 input shaft goes inside this seal, no leak. I installed the Novak supplied double lip seal in the Dana 300's input shaft, so no leak here. I found no evidence of gear oil in this cavity. I could even see the mark on the Dana 300 input shaft where the AX15 rear seal rides on it. It is close to the tip of the input shaft, but it seals. Who knows.... I will install another gasket here, but use aviation sealant instead of RTV. I have found that it seals great, AND is much easier to clean off in the future.

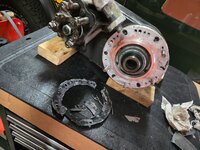
More of a reference picture for me, since three of the six studs were loose. I also marked the clocking ring with a marker to remind me which holes to use.

20250420_150458.jpg

And just like that, spotlessly clean and the three loose studs red lock tited back into place.

20250420_165026.jpg

Have had a minor leak at the Dana 300 inspection pan, so pulled it off to reseal this area.

20250420_171458.jpg

I had originally just sealed this plate to the case with RTV. I will go back with a paper gasket and aviation sealant. Will clean up the bolts and plate at work on the bench mounted wire wheel. Will carefully scrape all the old RTV off tomorrow evening, and run a tap through all the holes to clean out the gunk. Gear oil was seeping out around the bolt threads, so I will put some hardening sealant on the "through the case" bolt threads this time around.

That's it for now.
 
So, in breaking with my OCD, I reused the original 5th gear brass blocking ring. It has no abnormal wear to the little outer teeth, the internal brake ridges feel as sharp and pronounced as the new blocking rings. Rock and Roll.
I emailed the eBay seller I bought the rebuild kit from to see if I could purchase the correct 5th gear blocking ring.
Are you the only one that believed you were going to be able to sleep at night with the used blocking ring in your rebuild? :unsure:

Is it possible the damage to the spacer plate was caused by the weight of the trans/transfer case leveraging down at the plate, maybe a difference in the engine support and rear support mount materials allowing some stress/movement?

Anyway, carry on. Love your detailed posts. :thumbsup:
 
Are you the only one that believed you were going to be able to sleep at night with the used blocking ring in your rebuild? :unsure:

Is it possible the damage to the spacer plate was caused by the weight of the trans/transfer case leveraging down at the plate, maybe a difference in the engine support and rear support mount materials allowing some stress/movement?

Anyway, carry on. Love your detailed posts. :thumbsup:

The new blocking ring will be here tomorrow 😆

As for the aluminum plate, who knows? I'm running a 4.0 and AX15 just like numerous wranglers over the years. Now, I reckon the Dana 300 hanging off the back of the transmission is a bit heavier then the OEM Wrangler aluminum transfer case?? Could that smoosh the aluminum spacer plate, I reckon?? The new plate is steel so should hold up better if that is a factor.

But, in order for the weight to leverage the powertrain downward, either the upper three bell housing to engine block bolts would have to stretch, loosen, or the bell housing would have to deform. I haven't seen any evidence of this???

I'm using polyurethane 258 engine mounts and a polyurethane stock CJ transmission mount, with the torque arm. I mounted the transmission mount assembly in the AX15 transmission mount "foot" area. All the mounts are still fine as far as I can tell.

Maybe a switch to a newer Wrangler style transmission mount would support the weight better? I also still have the Novak AX15 mounting kit I purchased at the same time as the transmission, I never used it because adapting the stock mount set up was so easy. But, IIRC, fullsize pickup trucks use this same CJ transmission mount, so it must hold up fine. And if the transmission mount failed, the whole powertrain would pivot downward?

I have hammered down pretty good on this Jeep and I don't really get any torque twist to the drive train. My Dana 300 shifter is close to the body tub/floor cut out so any excessive movement would cause a nice metal on metal banging sound.

Good theory and idea, wish I knew the answer? I wonder if the damage to the aluminum plate is recent or it was always like that and I just never gave it any notice??

Another thing about checking the center bore of crank to center bore of bellhousing: even with new dowel pins that fit tight into the bell housing dowel bores, before you snug up the bellhousing to engine block bolts, pretty sure there is some very slight play available. I might set up the dial indicator to see if I can measure it. So, that little bit of movement comes into play, too. I guess the thing that helps me is the fact the bellhousing bolts to transmission, then the whole assembly ties into the block. Maybe this attachment method helps center the whole assembly better compared to having the bellhousing bolted tight to the block, then attaching transmission to it??

Another odd thing, to me anyway, about checking how parallel the engine block is compared to the transmission side of the bellhousing: the FSM said to check this flatness within 1/8" from the edge of the big round hole in the center of the bellhousing. Seems to me you would want to check this out at the edge where the transmission bolts to the bellhousing. And say if it out a hair, when you torque those four 7/16" bolts down to 45 foot pounds, it will probably pull it flat to the transmission adapter plate face.

Just more random RedneckRay thoughts......
 
Decided to clean up the inspection plate/hardware tonight and reinstall it. More RTV scraping fun!!!

20250420_171458.jpg

For whatever reason it is much easier to scrape RTV off of steel/cast iron compared to aluminum. It is just a lot more fun trying to keep it out of the inside of the transfer case. Mission accomplished!

20250421_174221.jpg

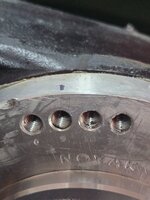
The screw driver is inserted into the only "through" hole, the other nine holes are "blind " holes. I put some hardening sealant on this one "through" bolt.

Some aviation sealant and a new paper gasket, good to go.

20250421_184741.jpg

Besides the pan leak, I only have two other minor leaks from the Dana 300:

1) Slight leak from the intermediate shaft to case bore, rear side only. I might try to coat this joint with some sealant on the outside, worth a shot.
2) Slight leak at the speedometer cable/VSS connection. Nature of the beast I reckon.

The biggest cause for the two minor leaks could be me. My transfer case is clocked at like nine degrees IIRC, so almost flat. Now, you are supposed to only run two quarts of gear oil in the Dana 300, but I think I have been running closer to four quarts 😆 I haven't blown out any seals or pushed oil out of the vent hose, so no worries there. I guess the biggest issue with running this much oil in it is that certain things that were not designed to be submerged in oil all of the time are. I should have installed a site tube while it is down to monitor fluid level. Since this project has dragged on way longer then I thought, I'll do that the next time this Dana 300 is on the bench!!! For now, I'll just keep on filling it to bottom of the fill plug 😆

That's it for now.
 
Made some decent progress tonight.

Quick reference picture for me for the correct orientation of this gasket. It will only fit on one way.

20250422_164841.jpg

My new 5th gear synchronizer brass blocking ring showed up and fits perfectly, matches the old one exactly.

20250422_165947.jpg

Installed.

20250422_171518.jpg

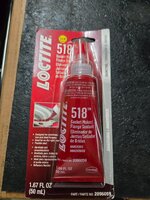
Time to pick a case sealant!!!!

20250422_172845.jpg

The two cases and the center slab are all aluminum. No damage to the mating surfaces. I have used RTV in the past on sealing up the aluminum T5 cases, no issues. This time I decided to use the anaerobic sealant, hope it works!!

20250422_172854.jpg

20250422_172901.jpg

I did quite a few trial/dry runs before committing to the final seal. I ended up bench assembling both case halves to the center slab by slightly spacing the center slab up on some steel plates. Worked perfect for me. I very lightly oiled the OD of both front bearings, front of shift rods, and the front of the reverse gear shaft. Lightly is the key word, don't want oil dripping into your sealant. I wiped the mating surfaces down one last time with acetone, go time!!!

Put a bead on the front case:

20250422_174032.jpg

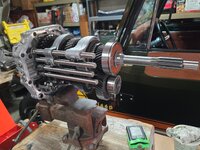
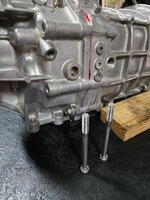
This picture shows how I have the center slab tilted up. This allows me to easily slide the front case on to the center slab. The center slab has dowel pins for the front and rear case halves. So once they line up they can't move. Very helpful!!

20250422_174227.jpg

This picture shows the steel shims I am using to space the center slab upward, and allow me to pivot it the other direction, too. The sealing surfaces are above this so good to go.

20250422_174233.jpg

I let the anaerobic sealant sit for about two minutes, then carefully slid the front case on. Dry practice runs pay off here. I forgot to take a picture of the front case on, but it went on no problem. The front case half is tricky, the rear case half is much easier to slide on.

Rear case half with a bead of anaerobic sealant, don't forget about the little plastic oil funnel!!!!

20250422_174954.jpg
 
I did deviate from the FSM here. The FSM tells you to slide the front case on, then install the front bearing clips and the front bearing retainer. I did not want to pause to do this, I wanted to get both case halves on to the center slab and bolted together. I did not have any issues doing it my way.

Both case halves installed.

20250422_175250.jpg

The FSM tells you to out some RTV on the case bolt threads. None of these bolts go inside the case, or seal any oil passages. I think they tell you to do this to help lock the bolts into place, like a weak thread locker. I did what the FSM said, used some Grey RTV.

20250422_175254.jpg

There are 10 bolts, only two lengths. The two long bolts go on the passenger side side.

20250422_175728.jpg

All 10 bolts installed, torqued to spec.

20250422_180457.jpg

I installed both front bearing clips on next.

20250422_181424.jpg

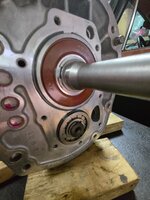
I used RTV to seal the steel front bearing retainer to the aluminum case. Flat mating surface to flat mating surface.

20250422_182004.jpg

And installed. I put a little oil/grease on the new front seal.

20250422_183505.jpg

With the case halves bolted on, and the front bearing retainer installed, both the cluster gear and mainshaft are properly supported and locked into place. All shift rails are in neutral. The input and output shaft spin freely and separately. Everything feels great, fingers crossed!!!
 
  • Like
Reactions: SKT
Running out of transmission parts, almost there!!!

20250422_183659.jpg

Since I am using a T176 bellhousing I still need to bolt on the adapter plate to the front of the transmission, then the previously pictured CJ front bearing retainer (I am using all stock CJ release bearing and clutch linkage), and finally bolt the bellhousing to the adapter plate.

20250422_183711.jpg

Then the Dana 300 bolts to the back of the AX15, then all of this stuff!!!

20250422_183729.jpg

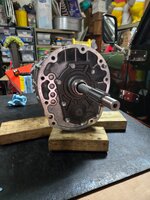
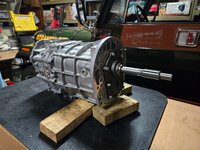
I'm just glad to be finally looking at an assembled transmission again!!!

20250422_184025.jpg

That's it for now 😃
 
I did deviate from the FSM here. The FSM tells you to slide the front case on, then install the front bearing clips and the front bearing retainer. I did not want to pause to do this, I wanted to get both case halves on to the center slab and bolted together. I did not have any issues doing it my way.

I can't believe you didn't follow the instructions to the letter... Disappointed in you. :ROFLMAO:
 
Last of the transmission parts!!!

20250423_174432.jpg

The last shift rail ball/spring/plug goes here. I put some hardening sealant on all of these plug's threads to prevent leaks.

20250423_174439.jpg

Installed.

20250423_175346.jpg

Shifter arm rail slides in back here.

20250423_175353.jpg

And the Shifter arm goes in through the top. The dangling leg slides into the shift rail head notches on the driver side.

20250423_175401.jpg

I used red loctite on this bolt.

20250423_181432.jpg

The final plug Installed with some sealant on the threads.

20250423_181437.jpg

Installed the reverse light switch.

20250423_181441.jpg

And finished, except for the Shifter, which I will install once the transmission is bolted back into place. Every bit of transmission tunnel clearance helps!

20250423_181453.jpg
 
Installed the Novak adapter plate, with their special bolts, to the front of the transmission next.

20250423_182440.jpg

One dowel pin is in the adapter plate, the other dowel pin is in the face of the transmission.

20250423_182445.jpg

Followed their directions.

20250423_182453.jpg

And installed.

20250423_191817.jpg

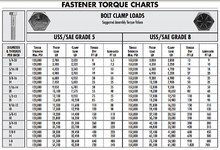
The Novak directions do not mention what to torque the bolts which hold the steel release bearing collar to the aluminum adapter plate to. I emailed them and got a kind of "crappy" reply of "just use a torque chart for the bolt size, duh". We'll, if I knew what class of bolt the socket head allen cap screws were I would, but I don't. I torqued them to 20 foot pounds and didn't strip anything, going to call it good. I used blue locktite on these bolts, and the adapter to transmission bolts.

That's it for now!!
 
A good thing with the anaerobic sealant: all that excess red goop sticking out of the seams simply wipes off clean with a rag dampened with acetone.
 
Back
Top