• Notice for iPhone users: DO NOT use the image size reduction option when uploading photos to the forum. This causes portrait images to post as landscape. We have added a warning to the image insert pop-up as well.

Another Scrambler Purchase/Road Trip - UPDATE- BODY ON FRAME AGAIN

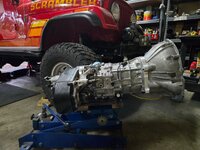
Getting ready to reinstall the transmission/transfercase/bellhousing assembly. I dumped a quart of oil in the transmission yesterday, it didn't leak out, so gonna say the anaerobic sealant should be good to go.

Assembling the release bearing arm to bellhousing, dont forget the little ball and spring.
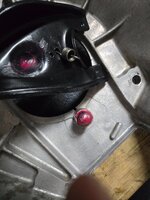

20250425_171313.jpg

And the release bearing installed.

20250425_172033.jpg

And the bellhousing bolted to the adapter plate.
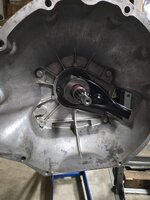
20250425_173539.jpg

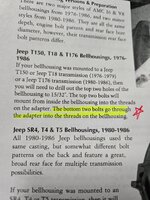
The Novak instructions mention threading the lower bellhousing bolts into the original threaded bellhousing holes, but not the case with my threaded adapter plate, all four bolts are installed from inside the bellhousing.
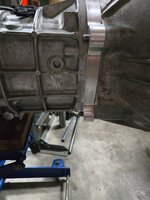
20250425_173545.jpg

20250425_173554.jpg

Trimming the ridiculously too large OD of a Dana 300 to transmission gasket before installing it.

20250425_174413.jpg

The AX15 rear case has a weep hole in the bottom. I plugged this up with RTV before, did the same thing this time. If either seal leaks a little bit into the small cavity where the transmission output shaft slides into the Dana 300 input shaft I don't care. I use yellow metal safe gear oil in the Dana 300 so if some cross contamination occurs so be it. No leaks before, hope for the same now.

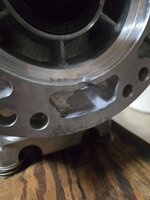
20250425_174840.jpg

20250425_175007.jpg

I used aviation sealant to glue the paper gasket to the Dana 300 clocking ring. I did not want to use RTV again. No real reason to goop the whole face all the way out to the edge IMO.
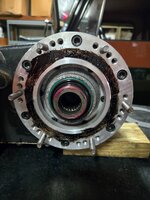
20250425_175418.jpg

And a thin coat on the rear transmission case.

20250425_175426.jpg
 
  • Like
Reactions: SKT
All bolted together.

20250425_181949.jpg

Temporarily installed the transmission shifter to test this thing out. I have all five forward gears and one reverse, so hopefully good to go!!!

20250425_182634.jpg

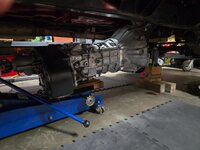
In position ready to install!!!

20250425_184442.jpg

Was too wore out from scraping paint all day at work today to continue on tonight, hope to get this thing bolted back in tomorrow morning.

That's it for now.
 
Wrapped it all up today.

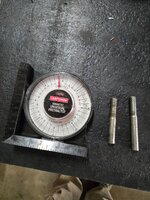
I use some home made dowel pins to help get everything lined up a bit easier. I also used the angle finder to make sure the engine down angle matches the transmission up angle.

20250426_093251.jpg

And bolted up.


20250426_093308.jpg

The big transmission jack is very helpful. Once the bellhousing was on the longer dowel pins, I loosened the bolts holding the whole assembly tight to the jack, to give me a bit of play. Slid right in fairly easy. Then a couple of hours installing all the other stuff!!!

My transmission came with this metal baffle plate under the Shifter, and a gasket on each side of this plate. Gaskets seem to be in good shape so I reused them. My shift tower has a breather, some do not.

20250426_154213.jpg

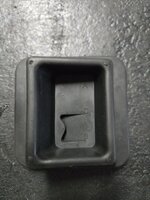
Spent about 30 minutes modifying/test fitting/more modifying this Omix clutch fork boot to make it work. I wish someone else made these things!!

20250426_183732.jpg

20250426_184040.jpg

20250426_184609.jpg

20250426_184806.jpg

20250426_185059.jpg

And finished, better than nothing. If I did not cut the boot it would prevent the fork from coming off the pressure plate fingers. Like I said, better than nothing. The exhaust heat usually kills these things, should have bought a few.

20250426_190745.jpg

20250426_190749.jpg

Clutch fork moves as it should, and the boot blocks up most of the hole.
 
So got it all together, took it off the jack stands, went to start it, dead battery :crazy:

20250426_194750.jpg

Charged it for a bit, got impatient, jump started it, pushed it out the garage, everything seems to work fine. Clutch works fine, transmission shifts into and out of all five gears and reverse fine. Drove it around just a little bit, belt was squealing, so didn't want to drive it to far. Drove it long enough to go up and down through all five gears, no problems.

So, a belt kept squealing, could smell electrical burning smell, so drove back home and parked it. Opened the hood, smelled bad. Went to touch the alternator, it was hot. Spit on the alternator, spit sizzled off. So, pretty sure the alternator cooked it self. I have a spare, will change it out tomorrow. Have the battery on a slow charge, see if it comes back. This battery was one I had in the black 86 plow Jeep. It was new, but old on the shelf, so got it cheap. It might have died, too.

Oh well, at least the clutch and pilot bushing and transmission seem fine :headbang:

I need/want to fix a few more minor issues (oil pan gasket leaks, maybe rear main seal, fix leaking rear wheel hubs) with this one before National so might disable it again soon.

That's it for now!!
 
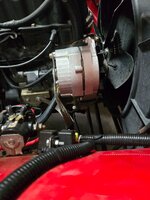
Swapped in a new alternator this morning, first picture is just a wire reference picture for me.

20250427_090550.jpg

20250427_100251.jpg

I had a spare alternator in the garage from a couple of years ago when I was having alternator issues. I slow charged the battery over night and it seems to be OK.

About the only real issue I ran into yesterday during all the powrtrain reinstallation work: driver side frame rail, skidplate center bolt, the inner frame welded nut had "loose" threads, the 3/8" bolt would slip in the threads when you would go to tighten it up.

It would be hard to "drop a bolt down through the frame at this location, no close by frame access holes. So, being RedneckRay, used what I have at hand.

20250427_103136.jpg

20250427_103142.jpg

The 11/32" bit just slipped through the 3/8" nut threads, which it should. But, I was able to run a 10mm x 1.50 tap into the 3/8" nut and retap it. Kind of butch, but works, and I was able to snug up the 10mm bolt with a 3/8 ratchet. So, tight and secure. Next time I have the skid plate down I can probably drill this nut out to 11mm, but that is an odd size. Maybe 7/16" would be better?

Anyway, secured and tight.

20250427_103616.jpg

You can see where I "dropped a bolt" down through the frame on the front hole when the original nut broke free. Judging by the skid plate condition, not sure why I have these issues!!!

Anyway, drove around for about an hour running errands. Transmission and clutch working flawlessly, so very happy/relieved about that.

20250427_122808.jpg

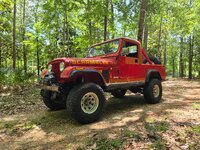
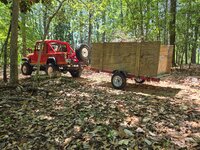
Even put the Scrambler back to use, hauled about 4 trailer loads of limbs down to the road. This is all the stuff that piled up while it was down for repairs.

20250427_140954.jpg

Gave it a wash, drove it some more, everything seems good to go.

20250427_170637.jpg

20250427_170747.jpg

Will probably drive this one to work tomorrow, then temporarily diable it, again:

20250427_123138.jpg

That's it for now.
 
No rest for the weary!!

My oil pan gasket has been "seaping" for about 4 years, pretty much around the whole perimeter. It never drips, but stays damp. It has not fixed itself. I purchased a rear main seal 4 years ago, too, just in case. Well, when I pulled the flywheel off last week, the backside had some oil spray, so I would assume the rear main seal is seaping a bit, too.
20250428_173330.jpg

20250428_173336.jpg

20250428_173340.jpg

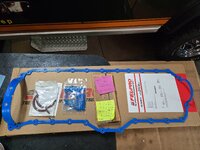
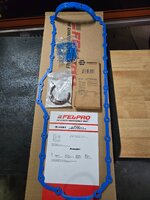
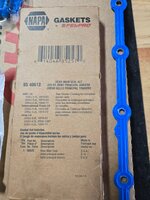
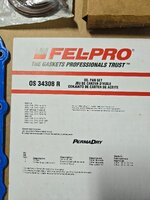
I installed one of these FelPro oil pan gaskets on the original 258 that came in this Jeep when I rebuilt the whole Scrambler. That was easy, the engine was out and I spun the block upside down on an engine stand. Probably won't be as easy this time but shouldn't be too bad.

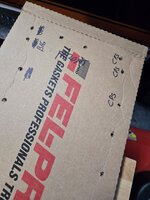
I made use of the old box, probably not needed with my engine, since it has all bolts, only two or three different sizes. On a stock 4.0 in a Wrangler/Cherokee this might be more critical due to all the studs they use to secure various lines to the oil pan.

20250428_174314.jpg

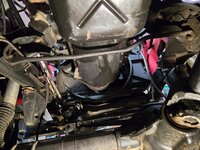
Reference pictures for me, the under engine cross bar.

20250428_175431.jpg

20250428_175437.jpg

20250428_175442.jpg

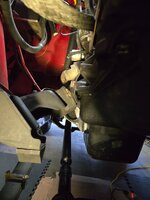
That passenger side engine mount frame horn catches a crap load of grease due to the front driveshaft slip joint being located directly underneath it!!

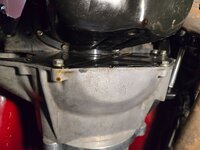
And a few pictures of all the "seeps". Not terrible, but over the last year or two I am having to add around half a quart of oil to the engine between oil changes. And all that leaking oil blows rearward over everything which irritates me to no end.

20250428_175454.jpg

20250428_175504.jpg

20250428_175534.jpg
 
Close up of my labeling. Again, probably overkill for this application.

20250428_185623.jpg

20250428_185628.jpg

From what I am seeing I only have three different bolt sizes:

1) (x4) 5/16" bolts
2) (xcrapload) 1/4" bolts
3) (x3) slightly longer bolts for my CPS

So, this is a 4.0 engine, BUT I am using the Mopar MPI kit for a 4.2 on it, so my crank position sensor mounts to the front driver side oil pan flange, reads off a special harmonic balancer.

Pulled the starter and cross bar off, will definitely need to jack up engine and pull the passenger side motor mount/block mounted plate off for the oil pan to clear. No big deal.

20250428_185654.jpg

The front half of this Scrambler is more YJ than CJ, i.e. a 4.0/AX15. Blasphemy, I know, but when in Rome......

20250428_190221.jpg

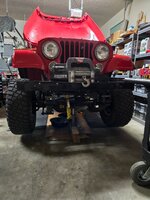
This Scrambler, with 33" tires and 4.5" suspension lift, no reason to put it up higher off the ground to do this job, seams to be the perfect height. A closer to stock height vehicle would probably need jack stands. I do have the whole front of the Jeep jacked up to aid in oil draining.

20250428_190607.jpg

Since I'm not in a hurry, I will let the oil drain tonight/tomorrow. Will drop the oil pan tomorrow night, maybe let the engine drip dry on cardboard for a day or two before resealing it all back up.

That's it for now.
 
I was able to drop the oil pan tonight.

Had to remove the passenger side motor mount/block plate to remove the last two oil pan bolts, and for oil pan removal clearance. Reference picture for me.

20250429_173406.jpg

Placed a jack under the bellhousing, jacked it up a hair, got it out.

20250429_174519.jpg

Crank position sensor and mounting bracket reference picture, driver side, front of oil pan.

20250429_175333.jpg

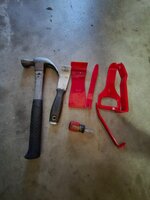
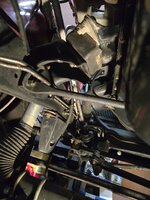
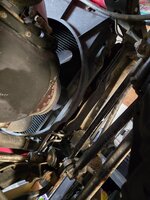
Most of my oil pan bolts were kind of loose. I was thinking the pan would come off easy. Nope. I ended up hammering the thin scraper blade between the block and pan to tear up the cork gasket that was glued hard into place. Then, hammered in the plastic interior panel clip removal tools to pry it loose. The plastic won't gouge the block or pan.
20250429_184508.jpg

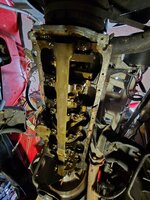
Lower end breathing free.

20250429_184606.jpg

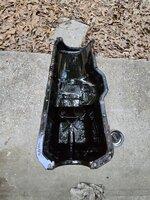
And the pan, and some trouble.

20250429_185355.jpg

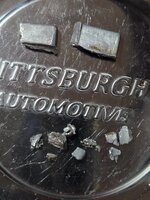
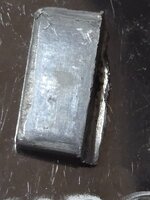
Besides some pieces of old oil pan gasket, two larger chunks of non-ferrous material, probably aluminum, and some smaller pieces. None of this sticks to a magnet.

20250429_185405.jpg

20250429_190637.jpg

20250429_190657.jpg

I have no idea where these pieces came from. They are flat, no curvature. They might not even be an internal engine part, maybe something that fell inside the engine before I purchased it??

I was thinking maybe piston skirt pieces, BUT these parts are perfectly flat, no curvature? Maybe some piston webbing?

20250429_190847.jpg

I will pull all 6 spark plugs out so I can easily turn the engine over and inspect the bottom of each piston for missing parts. Besides pistons, I can't think of any other internal engine component that is aluminum? And flat, and machined smooth. And these pieces look too thin to be parts off a piston? I was thinking maybe part of a valve cover baffle boss, BUT the valve cover has a rough cast texture. Like I said, maybe something that fell inside the engine before I bought it? No idea.

As crazy as it sounds, especially with my OCD, I'm surprisingly not terribly worried about this, maybe I should be? Don't know.

The engine runs perfect. Maintains 60-80psi oil pressure while running. Around 40psi oil pressure at hot idle. No ticks or knocks. Not down on power. Gas mileage is consistent, around 14mpg for last few years of around town driving, slightly higher on highway driving. Starts and runs perfect. I had just pulled all 6 spark plugs out when I was checking crank to bellhousing bore alignment, all 6 looked perfect and identical. No crank walk.

I'll feel better after I spin the engine over by hand and inspect all six piston bottoms. If nothing looks damaged, I reckon rock and roll and keep on going.

Any guesses on what this could be?

I'll send some pictures to Hesco tomorrow, they built the engine, maybe they will have some insights.

That's it for now.
 
My pistons are definitely aluminum, well, a magnet won't stick to them.

These little metal pieces feel really, really, really cheap and light, like no way they could be part of an internal engine component.

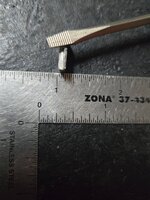
A few size pictures.

20250429_215551.jpg

20250429_221145.jpg

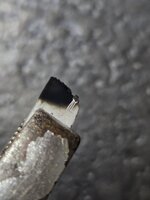
I put a cigarette lighter on one of the pieces to verify it wasn't plastic. It did not melt or catch on fire, so some type of cheap alloy material? It did charr, but scraped off easy enough.

20250429_215816.jpg

20250429_215921.jpg

With only being maybe 1/8" thick, and feeling so cheap/light, I really don't think it is a piece(s) off a piston.

I'll spin the engine over and verify piston integrity. I am really hoping this is some type of foreign debris/artifact from when the engine was built?
 
Did some investigation tonight, I think I know the problem, and it's not gonna be too bad, finger's crossed!!!

Pulled all six spark plugs out, to make turning over the engine by hand easier.

20250430_182535.jpg

All six plugs look nice and identical, good news there.

Laid under the engine, turned it over with a socket/ratchet on the harmonic balancer bolt, got covered in oil because when you start rotating the engine without the oil pan on all kinds of cool stuff happens!!!

20250430_185655.jpg

So, examined all 6 aluminum pistons, all 6 are fine, not missing any parts. Kind of PIA to do this by yourself, but done, and I feel better. Looked up on both the driver side and passenger side. All good.

So, I don't build engines every day, not sure I have ever had a Jeep 4.0 piston in my hand, so kind of panicked at first when I noticed this about the piston skirts:

20250430_185845.jpg

The skirt only extends down on the left and right sides. When I first noticed one of the pistons didn't have a skirt on the front/rear my heart sank. Then, I realized none of them do!!! I reckon the skirt is only needed on the two sides due to the way the connecting rod pulls/pushes the piston up and down, side load, not a front to back load.

Anyway, relieved to say the least.

So, what else is aluminum? The timing chain cover. Well, yeah, but so what. Well, checked the slack again on the chain, bingo, I hope!!

At rest:

20250430_190212.jpg

Pushed up:

20250430_190223.jpg

And at rest:

20250430_190226.jpg

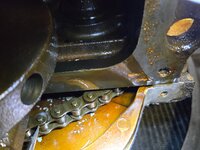
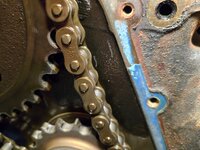
Over an inch of slack, pretty sure the maximum allowed is 1/2"!!!!

You can also note some contact marks to the inside face of the cover where it looks like the link pins knocked the oil staining off.

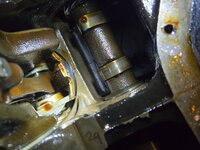
So, I am used to CJ 258 engines, nothing inside the timing chain cover. BUT, on a 4.0, and some later YJ 258's, the timing chain cover has some type of chain snubber, which is held in place by two cast aluminum tabs. Pretty sure those two tabs are what I found in the oil pan. Not sure what happened to the snubber, what it's made of, or if it was ever even installed inside this cover. I'm thinking the chain has so much slack it started getting closer and closer to the inside edges of the cover until it hit these tabs and sheared them off. You can see in the previous pictures how chewed up the little tabs are, due to getting chewed up by the chain/cam gear/crank sprocket. After installing the new alternator the other day I thought I heard a strange buzzing sound from the front of the engine. Guess it wasn't the alternator!!! That's my hypothesis.

So, new timing chain, new timing chain cover, and a new timing chain cover gasket set will be here tomorrow. So, looks like I will.be pulling down the front of the engine this weekend.

That's it for now!!
 
More just general notes.

Hesco built this engine.

Block casting: 53010341
According to internet, this is 1998-2006 block number.

Head casting: 7120
According to the internet, this is a 1991-1995 head number, and the best 4.0 head.

My crankshaft has a "girdle" on it, connected to the main bearing caps. My main bearing caps have studs, so you torque the inner nut for the mains, slide the girdle over the studs, torque the smaller girdle nuts down. According to the internet this is a 1996 and up feature.

So, since the block is all I am concerned with now, I am ordering parts like this is a 1998 Wrangler with a 4.0. I'll know for sure once I pull the front of the engine down.
 
My old 4 cylinder had a rubber tensioner or whatever it’s called. I always wondered why the 258 didn’t. The 4.0 does or doesn’t have one ? Don’t blame you for changing it out before it turns into a problem like we dealt with on mine. :crazy:
 
My old 4 cylinder had a rubber tensioner or whatever it’s called. I always wondered why the 258 didn’t. The 4.0 does or doesn’t have one ? Don’t blame you for changing it out before it turns into a problem like we dealt with on mine. :crazy:

According to the internet, and pictures of timing chain/gear sets, the 4.0 has some type of "snubber" attached inside the timing chain cover. I haven't torn mine down yet to see what mine had/was supposed to have. I find it hard to believe that if there was a "snubber" in there that it was completely destroyed, but who knows? The only parts I found were the aluminum clips, maybe the "snubber" material was gradually worn away and captured by the oil filter? I might cut it open to see what's inside...
 
Long two days at work, but worked on this one a bit tonight.

Pulled the radiator, radiator and heater hoses, fan shroud, fan clutch, belts, water pump and pulley, alternator, alternator bracket, partial PS pump bracket removal, and the lower crank pulley.

Reference pictures for me. I am using all 258 V-belt accessories/pulleys/harmonic balancer on the front of a 4.0. Had to use some spacers on the alternator bracket to timing chain cover studs/bolts when I originally installed this engine back in December of 2016.

20250502_183644.jpg

20250502_183650.jpg

20250502_183742.jpg

And stopped here for the night.

20250502_192900.jpg

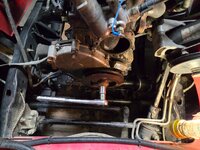
Yeah, that ratchet and socket is not going to remove the harmonic balancer to crankshaft bolt. IIRC, it is a 1/2"-20 bolt, torqued to 80 foot pounds, and I know I red Loctited the hell out of that bolt due to the 4.0 having a slightly shorter snout then the 4.2 harmonic balancer. Was tired, didn't want to screw something really PIA up!!!!

Can't get my impact on it, the grill and winch are in the way. Will have to loosen up the winch mount, space it up a couple of inches, put a torch on that bolt for a little bit, then put the impact on it. Definitely do not want to round off the head/break to bolt/mess up the crankshaft threads.

That's it for now.
 
Some progress today.

Got the winch out of the way to run extensions through the grill to get a straighter shot at harmonic balancer bolt.

20250503_094817.jpg

Still a no go.

20250503_094825.jpg

I used my little MAP gas torch, briefly, to try to heat the bolt, but it's too hard to concentrate the heat only on the bolt. I did not want to damage the harmonic balancer. So, stuck.

I talked to this mechanic guy a few weeks back, just BSing, and we were talking about body mount bolts and what a PIA they can be. He says his shop does so many newer Ford truck body mounts that he bought an inductive heat gun thing to melt the thread locker to make bolt removal drama free. So, called him up, he let me borrow it.

20250503_112654.jpg

Wrapped the little coil around the bolt head, turned it on, heated the bolt up for about 5 minutes until the head was red, impact took it right out.

20250503_114230.jpg

This was just an Amazon special tool, but worked great. I need to buy one. More importantly, no more red Loctite on harmonic balancer crank bolts!!!!! I think that tool cost about $180.00, BUT, if I would have rounded off that bolt head/broke head off/stripped out the crank threads............

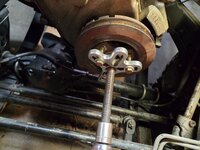
Moving along, pulling off the harmonic balancer.

20250503_120134.jpg

Reference picture for me.

20250503_120914.jpg

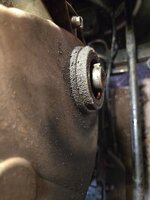
Looks like this front seal had been leaking a bit too.

20250503_120949.jpg

Reference picture for me.

20250503_121334.jpg

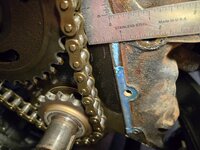
Timing chain cover removed, marking where chain is at full droop and extension.

20250503_122517.jpg

Definitely 1/2" of slack or more!

20250503_122538.jpg
 
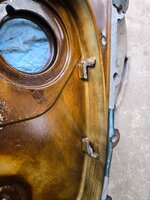
So, where did the aluminum pieces come from that I found in the oil pan? Pretty sure this was where they came from. Pictures of the inside of the timing chain cover, what's left of the "rub block" clips. I never found any evidence that the 'rub block" was ever installed, should have found some chunks, nothing?

20250503_122601.jpg

20250503_122607.jpg

20250503_122621.jpg

And a new cover, clips intact.

20250503_122948.jpg

20250503_122953.jpg

I will install the new cover, with the "rub block". No idea why Jeep decided to put this feature inside the 4.0 timing chain covers? Some reference to the later 4.2 timing chain covers having this feature, too. Who knows?

Reference pictures for me, RTV locations on oil pan. But, new gasket might be different, will have to mock it up.

20250503_154046.jpg

20250503_154050.jpg

20250503_154053.jpg
 
Back
Top