• Notice for iPhone users: DO NOT use the image size reduction option when uploading photos to the forum. This causes portrait images to post as landscape. We have added a warning to the image insert pop-up as well.

Another Scrambler Purchase/Road Trip - UPDATE- BODY ON FRAME AGAIN

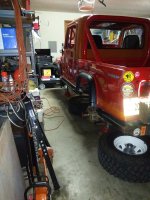
Woke up early Saturday morning to this:
20220715_233446.jpg

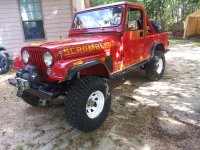
Topped off the front and rear differentials, removed center caps from wheels, reinstalled tire/wheels:
20220716_093503.jpg

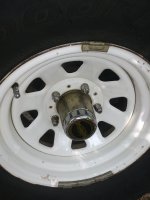
I left the center caps off for diagnostic purposes:
20220716_093510.jpg

With the caps off, you can easily place your hand on all four wheel hubs and check the temperature. They should get warm, but not hot. You should be able to leave your hand on them if everything is OK.

Well, everything was not OK. I should have went to bed early and adjusted the wheel bearings in the morning. So, I did not follow the exact instructions I spelled out earlier. I torqued all four inner nuts to 50, BUT I then backed off the inner nut to adjust play to how I liked it. This is wrong. All four of my wheel hubs were a hair too tight. I felt this after torquing the outer nuts, hubs were a little stiff. Not terrible, but not right. I chocked this up to new bearings and grease.

Quick road test, hubs were too warm, getting hot, especially front driver side. So, back in the garage, pulled driver side front back down. I readjusted it 5 times, never could get it right.

Finally followed the instructions, to the letter, just like when I originally installed all this stuff 12 years ago. Worked perfectly!!!

Now, I still do not understand why? The bearing play is set with the inner nut. Outer nut is just a jam nut. Washer separates the two. When I set play to feel, it was great, until I tightened the outer nut. Then the hub would get a hair tight? When you adjust the inner nut via the instructions, it is too loose. BUT, when you tighten outer nut, play is perfect???. Makes no sense to me, its not like you are shrinking the spindle or collapsing the nut/washer stack?? Who knows. Follow the instructions, works perfect.

Since the front driver side was now perfect, I went ahead and redid the other three corners. Took all day, but I am now confident they are good to go.

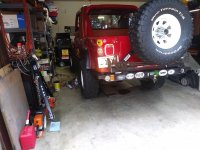
A few more things to check, then time to start packing:
20220716_181614.jpg

That's it for now :wave:
 
… that the Warn customer service lady said would not work with my front hub conversion. She was wrong.
Technically speaking, she was right. Inner spline count is wrong, and if you don’t have custom outer shafts or old parts to use, they would not work. Tough part about customer service is they have to give information based on customers that don’t have the ability to problem solve nor understand how to make things work. If a product does not work 100% right out of the box, the customer blames the manufacturer for faulty design or manufacturing, etc… This is a general problem with our society as a whole. (Gets off soap box, carry on.)
 
Technically speaking, she was right. Inner spline count is wrong, and if you don’t have custom outer shafts or old parts to use, they would not work. Tough part about customer service is they have to give information based on customers that don’t have the ability to problem solve nor understand how to make things work. If a product does not work 100% right out of the box, the customer blames the manufacturer for faulty design or manufacturing, etc… This is a general problem with our society as a whole. (Gets off soap box, carry on.)
I informed the customer service lady that I was going to install my inner splined gears from the old hubs into the new hubs. She said it would not work and to look for used hubs. I'll post up the email chain. She spent all of 10 minutes researching my problem. I guess my Warn Lifetime Warranty on these products is null and void :thumbsup:

I assume they think people can't/don't ever disassemble the hubs to clean/grease them? No idea, I'm glad my hunch was correct.

Only problem will be if I run out of 27 spline inners :eek:

In her defense, I'm sure not that many customer service people have any ideas about legacy products, or technical aspects of their products, beyond what it says on the computer screen?
 
More problems today, most were kind of pre-existing, but have not fixed themselves through my inaction.

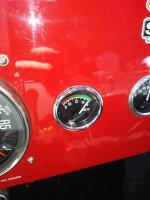
Stupid volt gauge:

20220717_111118.jpg

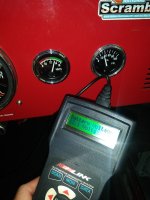
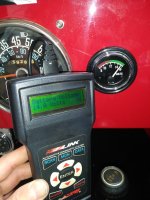
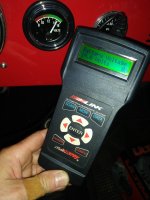
Actual voltage. Scan tool reads PCM which gets voltage directly from battery, PCM does not control charging. Using scan tool is the same/same reading as putting multi meter directly on battery. Easier to read this while driving LOL.

20220717_112231.jpg

Battery actually reading low in above picture, maybe a clue, maybe I took picture right after cranking engine over.

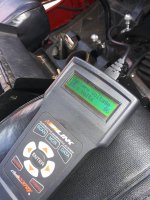
The problem: I am over charging. The gauge pegged to the bottom while on the interstate so I shut it down. The alternator has been consistently overcharging, enough to trip an error code on the CEL. While driving:

20220717_163702.jpg

Swapped on a new alternator, did some yard work:

20220717_112936.jpg

20220717_115938.jpg

Still over charging.

Switching gears, found the problem with the driver side front wheel bearing that caused all my bearing maintenance:

20220717_125422.jpg

Hard to see in the picture, but the race split/cracked. I imagine this caused the damage to the rollers that caused the noise that led to all the previous work!!! Not sure how that happens while driving??
 
A few months back, while on the interstate, the windshield to hard top front seal blew out. It ended up in the cab.

So, lets replace the seal!! A CJ is not quiet, but it is even louder on the interstate with an open gap between the hard top and windshield. You also get rained on!!

20220717_133359.jpg

Bought this, DON'T, waste of money for a CJ:

20220717_133416.jpg

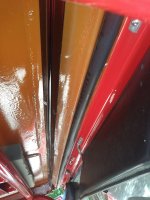
I only bought this kit for the front seal. It is supposed to be self sticking, it won't. So, I glued it in place with some 3M weather strip adhesive:

20220717_144244.jpg

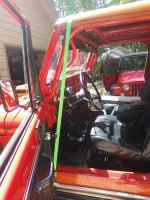
The problem: seal is the wrong shape/too thick. I could not get the hard top to sit down all the way, even with a ratchet strap!!!!

20220717_144902.jpg

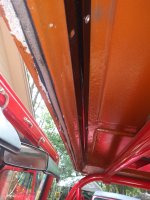
I ended up using some black RTV and glued my old foam seal back in place.

20220717_152736.jpg

Removing the 3M goop stripped the paint off this part of the hard top. Actually took some white off, too. Only paint damage in this area, where seal is, not visible when the top is on. Still sucks, one of those days.....

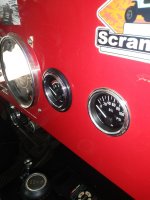
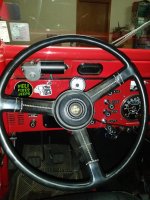
Spaced the stupid volt gauge off the dash with a thick o-ring.

20220717_161440.jpg

Gave me just enough clearance for the light to plug in:

20220717_161454.jpg

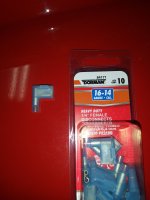
It's a butch repair, but kind of works. Two 90 degree female spade connectors would work better, need to obtain some. So, another waste of time, which I am quickly running out of.
 
More stupid POS volt gauge that doesn't work correctly:

20220717_162723.jpg

In the picture above, good voltage. Sometimes the alternator/battery are working correctly, other times over charge city.

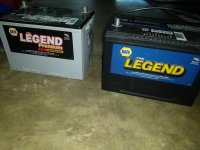
Pulled a regular battery out of the black '86 CJ-7. It was stamped 12/21. Current AGM on left, regular battery on right:

20220717_175224.jpg

AGM is only four years old:

20220717_175250.jpg

But, case is starting to swell:

20220717_175240.jpg

Is this a clue? Not sure, but not good. Is it a "chicken or egg" situation? Did a bad alternator overcharge battery and damage it, or is bad battery causing the alternator to over charge?

I have installed three different alternators today, pretty sure they are not the problem. All battery cables, ground cables, alternator and solenoid wiring is good.

I am running regular CJ charging system, nothing exotic. I can't think of any issue with the wiring that would cause the alternator to over charge? I had a problem awhile back with the excite wire, it was broken, causing a no charge situation.

Maybe that no charge situation damaged the AGM battery?

Anyway, with the regular battery installed, working much better. Scan tool shows 13.6-14.3 battery voltage 95% of the time. It will still spike slightly over 15 every once in awhile, for a second or two, but enough to store a new over charge code.

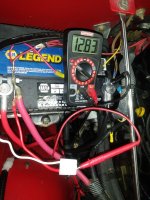
The just installed battery has been sitting in the black Jeep in my yard for over a month, disconnected. It was showing 12.38 volts when I first installed it in the red Scrambler, so it might need to charge up a hair.

Cleared the code, will drive to work tomorrow to see if it is fixed. If so, great. If not, not sure what else to do at this point. Need to leave for Colorado on Thursday.

I always have "plan B":

20220716_181648.jpg

The furthest I have driven it was about 300 miles straight. It did fine, but not sure if it/I am ready to take it on a 3 week road trip?

:fingerscrossed: the red Scrambler is fixed.

That's it for now.
 
Thought I had it fixed with the battery swap, nope, still over charging :banghead::(

Going to "build" a new alternator wiring harness, that's really all that's left. No way I have been though six alternators, all with defective voltage regulators :shrug:

The only wires:

1) Big red wire from charge post on alternator to battery side of solenoid (I could run this straight to battery)
2) Sense wire (goes from alternator plug back to charge post on alternator (could run this to battery easy, or fuse panel, more difficult)
3) Excite wire, pretty sure there is no way this could cause an over charge, but I'm open for suggestions
4) I could add a ground from alternator case to engine block/battery (never had to do this before)

I am out of ideas. This is a simple Delco 10si alternator, nothing exotic.
 
  • Like
Reactions: SKT
Does the excite wire of your alternator require a resistor like a GM 3 wire? When I did my TBI swap my alternator did not work at all until i wired in a resistor. That said it was just not working at all, not overcharging. This would be cheap and easy to check. Take the brown wire from alternator, but it and splice a turn signal.

For items 1, 2 and 4 - I wouldn't think any of that would affect operation. Thousands of folks run their connections in the same manner. I would check and make sure all the connections are clean and not corroded anywhere.
 
I'm curious to see what you come up with. I've got a similar situation with the gauge pegged at 16, but I check under the hood and it measures 13.8.. Two alternators and two batteries later, no difference. Though I have not gone through the wiring yet.
 
Sense wire should run to the battery, or close to it. You are regulating the voltage at the alternator with it connected to the charge post.


This is a good reference for alternator issues.
 
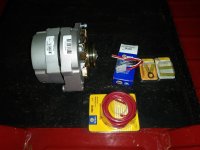
Swapped the NAPA alternator out for a new one, voltage regulator definitely shit the bed in the old one, it was charging over 18 volts. Bought some supplies to redo the wiring, again:

20220718_170352.jpg

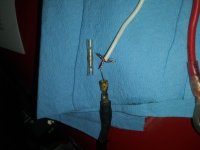
The problem, and hard to see from the picture:

20220718_171310.jpg

The new plug I installed in March was defective. The red wire was never connected to the metal tab inside the plug!!!!!! Hooked the old plug red wire to battery, NO voltage on the tab. So, voltage regulator always assumed the battery was not charged and tired to full charge all the time, prematurely killing the regulator, alternator, and probably the AGM battery.

I never would have thought to check out a new wire plug with the multimeter, guess I will have to for now on.

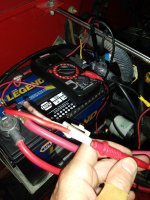
After I crimped an eyelet on the end of the new new plug, verified it works correctly:

20220718_172343.jpg

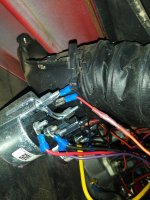
The other wire on this plug is the excite wire. Inside the vehicle harness is this weird brown wire with a single silver strand. This carries slight voltage to alternator to get it to start charging. Something like that. I had to add a diode in this wire to prevent this low voltage current from back feeding into the Mopar MPI ECM and preventing the engine from turning off with the key. I should have put it further downstream from the alternator, I'm out of slack after this newest repair:

20220718_172806.jpg

I need to obtain a few spare diodes. Also, future project, I need to replace/upgrade that stupid brown resistor wire. It is a PIA to work with, easy to break. Also, it is almost 40 years old. I left the original wire harness in this Jeep when I rebuilt the Scrambler. It is still in good shape and functional, but it is also 40 years old. Future project.

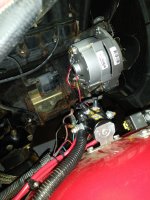
Ran a new 10 gauge wire from alternator to battery side of solenoid while I was at it:

20220718_182805.jpg

Took it for a 40 minute drive, looks good to me:

20220718_184127.jpg

I never saw the voltage go over 14.2, fingers crossed this issue is fixed. That was fun.

Bought these for the voltage gauge light assembly:

20220718_191329.jpg

Looked under the dash, light is working and mostly in the hole, good enough for now. I'm done messing with it. Gotta have one issue, this is a good one to have!!!!!!


Last time I reinstalled the steering wheel I put it on crooked. Drove me crazy, one of the spokes blocked the tach while driving straight. Pulled it, re-centered, happy.

20220718_192507.jpg

Will drive this one to work tomorrow and Wednesday to verify charging system is working properly, 99% sure it is.

Start to pack tomorrow night, going to bed early tonight.

That's it for now :fingerscrossed:
 
Thanks for the update. Engine not turning off was one of my earlier symptoms when the overcharging issue was noted. Have a Great Trip!
 
So, alternator worked perfect last night...........................

Still not overcharging, so :D

But, after all three initial engine starts today, the alternator is not self exciting any longer :banghead:

But, once you initially exceed around 1,200 engine RPM, it starts charging, stays charging, and does not overcharge, so :shrug:

I am "THINKING" the "new new" plug is not making good contact on the excite tab in the alternator. This has me worried that the other wire could come loose and start the whole "overcharging" scenario process all over again. So, tonight I am going to cut the nice little plug off of these two wires and crimp on two separate female spade terminals. It won't be pretty, but it will confirm/refute my suspicions............

I could also have an issue with the OEM brown excite wire somewhere. It has broke before, it could have been damaged from me handling it yesterday and snapped last night when I was driving just from engine vibration. So, not 100% confident in this part of the circuit, either.

I am NOT an expert, but I do not believe that losing the "self excite" function on a Delco 10si alternator will hurt anything??? Feel free to correct me if I am wrong. It just will not start charging until the engine RPM spins the parts inside fast enough to "excite" it to start charging.

Hopefully my operation tonight will be successful. If not, I plan on just driving it as is until/if the alternator fails. I ordered a Tuff Stuff one wire 100amp alternator from Summit this morning. I paid for overnight shipping from the closest Texas warehouse, so it will be here tomorrow. I will throw it in the spares box, just in case.

Not saying the one wire set up is better or worse then the my current OEM set up, but it will eliminate my potentially problematic excite wire. And, I won't have to worry about the diode on the excite wire failing and causing a "no ignition shut off" situation due to back feeding current into the PCM, I hope............................

The guilty party at the post office:

20220719_104750.jpg


That's it for now........................
 
Well if nothing else, you will have the best or better looking Scramblers on the road or in the mountains for the next couple weeks in mid America. :thumbsup: :headbang:
 
Finally, success, I think :fingerscrossed:

So, all day the alternator would not self energize. Of course, when I get it home, it would, intermittently. Before I cut the stupid plug off, I checked it with a multimeter, excite side was really low voltage. After disconnecting the battery, I cut the plug off. Hooked battery back up, excite wire checks out fine. Stupid damn plug!!!

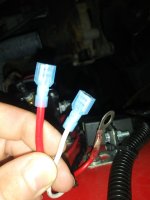
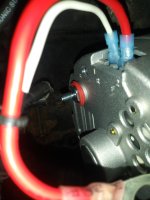
So, I crimped on two separate insulated female spade terminals in lieu of the plug:

20220719_164248.jpg

Make sure you know where each wire goes!! These two spade terminals fit super tight on the alternator tabs:

20220719_164811.jpg

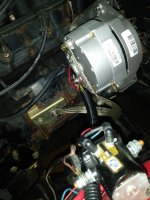
Hooked all the wires/battery back up, added a huge ground strap on the alternator for @bigwalton :

20220719_170402.jpg

The sumbitch works perfect now. No over charging, self excites without touching the gas.

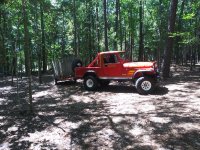
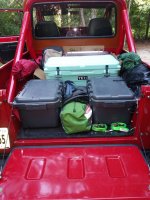
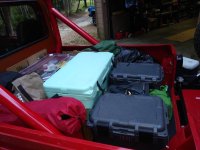
Before it decides to break again, loaded it up!!!

20220719_193336.jpg

20220719_193344.jpg

Still need to throw my waterproof clothes bags on top. If I was just going to Colorado I would only have half this crap. But, I plan to head straight to Michigan for Sand Blast after Colorado, so need my camping crap.

Game plan is to drive it to my dear friend @Jeep Addict tomorrow night in Baton Rouge. That will give me a good 2.5 hour interstate shake down run. If it makes it that far should be good to go :fingerscrossed:

That will also give me a 2.5 hour head start toward Amarillo. If everything goes according to plan, stop for the night Thursday in Amarillo/Vega. If I can do that, it will be a much easier drive on Friday to Buena Vista.

That's it for now :wave:
 
Overnight shipping for the one wire alternator failed, it won't be here until tomorrow :banghead:

Alternator worked perfect yesterday. Started it up tonight to pull it out the garage, alternator did not self excite, had to rev engine to 1,200 RPM to get it to start charging :(

Through a spare alternator in the bed, will attempt the 2.5 hour drive to Baton Rouge tonight. If it survives this hopefully it will make it to Colorado/Michigan :fingerscrossed::fingerscrossed:
 
Overnight shipping for the one wire alternator failed, it won't be here until tomorrow :banghead:

Alternator worked perfect yesterday. Started it up tonight to pull it out the garage, alternator did not self excite, had to rev engine to 1,200 RPM to get it to start charging :(

Through a spare alternator in the bed, will attempt the 2.5 hour drive to Baton Rouge tonight. If it survives this hopefully it will make it to Colorado/Michigan :fingerscrossed::fingerscrossed:
This trek needs its own thread.
 
Back
Top