• Notice for iPhone users: DO NOT use the image size reduction option when uploading photos to the forum. This causes portrait images to post as landscape. We have added a warning to the image insert pop-up as well.

It's time to start making some changes.....

I'm sure you know... on TJ/LJ they moved the front brake line frame mount behind the axle.

Now get back to thrashing for Moab :)
 
I'm sure you know... on TJ/LJ they moved the front brake line frame mount behind the axle.

Now get back to thrashing for Moab :)

I am still trying to figure out how I want to run the brake lines. I really would rather not have a single brake line on each side being 30in or however long they would be. The problem is that when the suspension is compressed, that long brake line has to go somewhere and I'm trying not to get caught into the coil springs or the tires. In my mind, I keep seeing a single brake line coming off of the upper link mount.
I need to compress the suspension again to find out what is possible.
 
... In my mind, I keep seeing a single brake line coming off of the upper link mount.
I need to compress the suspension again to find out what is possible.

This sounds like what I have wondered for years.
Why can't the line(s) run to the center of the axle and run across solid - like the rear axle - and flex to the calipers?
Well, I can see it in my head. :crazy:
Can't wait to see your solution.
 
I am still trying to figure out how I want to run the brake lines. I really would rather not have a single brake line on each side being 30in or however long they would be. The problem is that when the suspension is compressed, that long brake line has to go somewhere and I'm trying not to get caught into the coil springs or the tires. In my mind, I keep seeing a single brake line coming off of the upper link mount.
I need to compress the suspension again to find out what is possible.

I've seen a couple builds that ran stainless lines along the top of the top link. Then short braided lines at the caliper and ends of the top link. Worked out good and none of the hoses needed much travel.
 
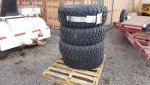
:bacon::woohoo: Tires finally showed up after being on order since November.
 

Attachments

  • 20180110_151356.jpg
    20180110_151356.jpg
    94.6 KB · Views: 158
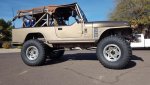
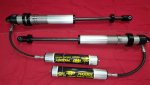
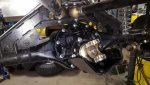
Tires have been swapped now and it's sitting on the 37's. The front brake lines are done for the most part too. The connection line between the axle and frame is only about 18" long so it should be manageable to control when the suspension is compressed. The front gears are now done and the 3rd member is well on it's way to being done. Supposedly the front coilovers have been shipped too......
 

Attachments

  • Jeep_scrambler_37_tires_2.jpg
    Jeep_scrambler_37_tires_2.jpg
    74.1 KB · Views: 132
  • HP_Dana_44_front_brake_lines_2.jpg
    HP_Dana_44_front_brake_lines_2.jpg
    67.9 KB · Views: 131
  • HP_Dana_44_front_brake_lines_1.jpg
    HP_Dana_44_front_brake_lines_1.jpg
    71.7 KB · Views: 133
Tires have been swapped now and it's sitting on the 37's. The front brake lines are done for the most part too. The connection line between the axle and frame is only about 18" long so it should be manageable to control when the suspension is compressed. The front gears are now done and the 3rd member is well on it's way to being done. Supposedly the front coilovers have been shipped too......

Looks good, but I think your toe is too far out :rotfl::rotfl::rolleyes: :thumbsup: :cheers: :wave:
 
I get to finalize the coilover upper mounts this weekend. 😁
 

Attachments

  • 20180119_170602.jpg
    20180119_170602.jpg
    41.2 KB · Views: 228
So I finally got the shocks mounted this weekend. Because these are set up to use 3" ID springs, I had to re-do quite a few things to get them to fit. It's in there now and after I get my other springs this week, I'll have a chance to check things a little better. Maybe next weekend I'll be able to pull out all of the parts and weld this crap up and paint it. I already had my track bar bracket break on me because the new tires are so sticky that they tend to grab the trailer sides while loading. The front gears are in and done along with the 3rd member set up and ready to be installed. With the 14" coilovers installed, I'm ending up with over 19" of wheel travel now. The pics below are the final fittment of the mounts and the travel. When it's articulated, the spring isolator on the drivers side just rubs the frame. I think that if I turn down the OD about .200", I'll be altight. We will find out. Needless to say, I'm running out of time and I'm off to get some Rustoleum to prep for next weekend's welding day. one more thing off of the list......
 

Attachments

  • 20180120_160929[1].jpg
    20180120_160929[1].jpg
    44.6 KB · Views: 209
  • 20180120_165331[1].jpg
    20180120_165331[1].jpg
    67.2 KB · Views: 211
  • 20180120_164952[1].jpg
    20180120_164952[1].jpg
    63.4 KB · Views: 214
  • 20180120_165351[1].jpg
    20180120_165351[1].jpg
    40.5 KB · Views: 214
  • 20180120_164932[1].jpg
    20180120_164932[1].jpg
    66.1 KB · Views: 211
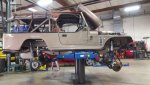
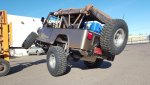
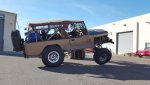
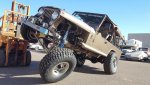
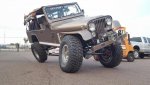
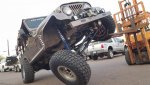
Tick tock tick tock...... 6 more days to finish this thing(Saturdays). The upper shock hoops and upper shock mounts are welded in now with reinforcements. I ended up running some tube up to the side of the upper shock mount to strengthen it too. the rear 3rd member is installed and ready to go now. I also got one of the front bump stops installed and most of the other side done. I finally have some coilover springs so I was able to get those installed and flex this thing out. It looks like it's gonna work damn good from what I see on the forklift. I have to adjust the rear links to center the tire in the wheel wells when it's compressed along with adjusting the rear bump stops to limit the travel a little bit. The front fenders came off so I could weld the tubing up front and get it ready for some paint next weekend. While they are off, I'll finish building the brake lines and get the proportioning valve and line lock plumbed up too. :crazy: While I'm at it, I'll build some new power steering/hydroboost/cooler lines because they look like crap now.....:headbang:
 

Attachments

  • Jeep Scrambler CJ8 front and rear coilovers.jpg
    Jeep Scrambler CJ8 front and rear coilovers.jpg
    66.4 KB · Views: 175
  • Jeep Scrambler CJ8 upper coilover mount 2.jpg
    Jeep Scrambler CJ8 upper coilover mount 2.jpg
    56.4 KB · Views: 173
  • Jeep Scrambler CJ8 currie rear axle 3.jpg
    Jeep Scrambler CJ8 currie rear axle 3.jpg
    67.9 KB · Views: 176
  • Jeep CJ8 Scrambler flex test 13.jpg
    Jeep CJ8 Scrambler flex test 13.jpg
    55.8 KB · Views: 171
flex test pics
 

Attachments

  • Jeep CJ8 Scrambler flex test 20.jpg
    Jeep CJ8 Scrambler flex test 20.jpg
    69.2 KB · Views: 175
  • Jeep CJ8 Scrambler flex test 19.jpg
    Jeep CJ8 Scrambler flex test 19.jpg
    57.7 KB · Views: 175
  • Jeep CJ8 Scrambler flex test 8.jpg
    Jeep CJ8 Scrambler flex test 8.jpg
    75.9 KB · Views: 176
Looking Great :headbang:

Are you going to put a bolt in crossbar at the top of the hoops?


And judging by the last pic your getting some "frame flex" too...............I wonder if mine does that :crazy:
 
Looking Great :headbang:

Are you going to put a bolt in crossbar at the top of the hoops?


And judging by the last pic your getting some "frame flex" too...............I wonder if mine does that :crazy:

I did make the cross bar removable. You can just see one of the clamp connector in the pic of the upper mount. A little frame flex maybe but without the hood being held down it looks much worse than it actually is. My radiator cap just rubs the bottom of the hood on the drivers side. :)
 
It's getting closer now. The front brake system is installed and bled. I just don't have time to rebuild the rear line so that will have to wait. The new master cylinder is installed along with the line lock and adjustable proportioning valve for the rear control. I fought the install of the front RCV parts so now the front axle is complete and the E-locker has been tested. This week, I'll order the front driveshaft and get that done. Next weekend I'll build the air intake so I can finally take this thing for a drive. I flexed it again after making a couple of more adjustments after the fenders were reinstalled and checked for driveshaft lengths.
 

Attachments

  • EJS2018 list to get done.jpg
    EJS2018 list to get done.jpg
    39.8 KB · Views: 116
  • Jeep Scrambler 3 link flex test_1.jpg
    Jeep Scrambler 3 link flex test_1.jpg
    56.4 KB · Views: 117
  • Jeep Scrambler 3 link flex test_2.jpg
    Jeep Scrambler 3 link flex test_2.jpg
    58.3 KB · Views: 117
  • Jeep Scrambler 3 link flex test_3.jpg
    Jeep Scrambler 3 link flex test_3.jpg
    65.3 KB · Views: 114
Back
Top