• Notice for iPhone users: DO NOT use the image size reduction option when uploading photos to the forum. This causes portrait images to post as landscape. We have added a warning to the image insert pop-up as well.

Joe's 1982 Scrambler Restoration Thread (Retitled From: Bringing The Scrambler Home)

The website is called stockinteriors.com. Here is a link: link

The carpet I ordered has the optional mass backing and is the ultra plush grade of carpet. I would have ordered the standard grade of carpet, but the available colors are different and the ultra plush was a closer match to the stock color.
 
Last edited:
Nice work Joe!! Your interior is slate blue as well, right? So you chose "Lapis blue? Do you happen to know if they have a carpet kit for the rest of the scrambler's bed? The pic in the link is a little hard to tell if thats an actual Scrambler or a CJ 7?
 
Last edited:
Yes. My interior is slate blue and I chose lapis blue. I'm not sure if they make a kit for the bed, but they do sell the carpet so you could do the bed yourself.
 
Hi Gang,

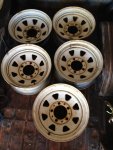
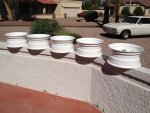
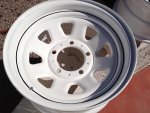
Just a short update on my project. I finally got around to having the 5 white wagon wheels I had powder coated and this morning, I painted the black strip on them using a Bugler pinstriping tool. I was impressed at how easy it was to lay a nice even pinstripe on the wheels. Although not perfect, I'm very happy with the results.

Attached are a few pictures before and after the restoration. I'll be having my tires mounted on them today and will take a picture after I switch wheels out. I'll be keeping the stock base factory wheels and having them powdercoated and then storing them just in case I ever want to switch back.

Joe

Before picture:

attachmentphpattachmentid45114d133969145-1.jpg


After picture:

attachmentphpattachmentid45115d133969145-1.jpg


Closeup of the pinstripe I painted on to match the factory pinstripe:

attachmentphpattachmentid45116d133969145-1.jpg


Thanks to Mike, I also have a set of chrome wheels that will soon be re-plated and then I'll have the option to see what the factory chrome wheels look like with slightly larger tires.


Joe
 

Attachments

  • IMG_1450.jpg
    IMG_1450.jpg
    178 KB · Views: 202
  • IMG_1495.jpg
    IMG_1495.jpg
    249.6 KB · Views: 202
  • IMG_1496.jpg
    IMG_1496.jpg
    170.6 KB · Views: 200
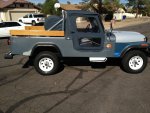
And here's a couple of pictures with the wheels installed:

attachmentphpattachmentid45119d133971212-1.jpg


attachmentphpattachmentid45118d133971212-1.jpg
 
Gotta love the Bugler! It is the perfect tool for the job. Looks great!
 
HEHE... another project :-)

My next Scrambler project has found its way into my home:

:D


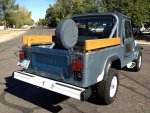
attachmentphpattachmentid45479d134306820-1.jpg


A big thanks to PavementPounder for sending this my way!

Joe
 
Them rims look very good, I got a set I'm going to paint ot powder coat like you did, where can one get the tool to put the pin strip on? Do you have a pic of it?

Thanks
Curtis
 
You can purchase the tool from Bugler: http://www.beugler.com/
It was amazingly easy to do... just watch the video that comes with the tool or check out youtube for do it yourself instructions.

Them rims look very good, I got a set I'm going to paint ot powder coat like you did, where can one get the tool to put the pin strip on? Do you have a pic of it?

Thanks
Curtis
 
I just went through all 12 pages with my 8 year old son. He loves looking at the pictures. I like what you have done. I like the white spokes the best.

Keep up the good work.
 
First step in the installation is complete, I installed the turn signal / cruise control switch today.

One note... the steering column with cruise control is identical to the one without cruise control, whether you have a tilt column or standard column.
I've seen some posts on the web where people think they are different. The only difference is the turn signal switch.

Another note... cruise control as an option is a completely bolt-on item. The system is completely standalone and doesn't require any components that must be installed at the factory. Even the wire harness is standalone.

Standby for more...

Here are a few pictures:

attachmentphpattachmentid45494d134324633-1.jpg


attachmentphpattachmentid45495d134324633-1.jpg


attachmentphpattachmentid45496d134324633-1.jpg


attachmentphpattachmentid45497d134324633-1.jpg
 
Very nice Joe. Are you going to do a write up on the install? And I'm curious on how you like it. I've thought about it too versus an aftermarket set up. Let us know.
 
I'm taking pictures as I go and I'll write something up as soon as I get everything installed and working. So far... this is a VERY easy job. I hope it stays that way.
 
Hi Gang,

Well... it turns out that installing a factory cruise control system is as bolt-on and as easy as it seemed it should be. I've completed the install and it works perfectly. Cruising at a set speed, speeding up and slowing down can now all be done using the cruise control switches on the turn signal control switch.
The cruise control is every bit as smooth and stable as the one on my 2008 Toyota. The only thing I noticed is that going up hills takes the system awhile to get back up to speed and going down hills takes the system awhile to slow down. There are adjustments on the regulator for centering, sensitivity, and low speed cut-in, I may play with them a bit to see how I can impact the system.

As far as the installation goes, it was really quite easy:

Day 1:

Install the turn signal / cruise control switch. This entailed removing the steering wheel, horn parts, locking ring, and the turn signal stalk. The only trick to this part of the job was removing the pins from the four wire connector at the end of the cruise control switch. Since I have a tilt wheel, the connector needs to be removed to feed the wires down the column next to the turn signal wires. On a manual column, the connector will fit through the column without removing the pins.

Day 2: (the longest day)
Install the servo on the driver's side fender. The holes on my fender were already there so all I had to do is bolt the servo on. Connect the servo throttle cable to the EXISTING (yes, the factory throttle bracket, at least on my Jeep, is already configured for cruise control) throttle bracket. Gotta love Jeep for this. Bolt on the vacuum reservoir. Drill a 1/2" hole in the firewall straight back from the servo. Remove the six wires from the servo connector so that I can feed the wires through the hole. Feed the wires and the vacuum hose that goes to the clutch cut-off switch through a grommet and through the hole in the firewall. Replace the pins into the connector. Connect one vacuum line from the vacuum reservoir to to a vacuum fitting at the base of the carb and the other vacuum line from the reservoir to the servo.
Remove the old speedometer cable and install the new speedometer cable that has the speed sensor in the middle of it.

Day 3:
Plug everything in on the inside of the cab. The regulator plugs into the connector that came through the firewall from the servo. Find the EXISTING cruise control plug (thanks again Jeep/AMC) behind the dash near the brake switch and plug it in. Plug in the harness from the turn signal control switch. Bolt on the clutch engage switch (note: this switch also has a vacuum disengage feature that connects to the vacuum line that ran through the firewall from the servo). Attach the electronic regulator to the firewall. Plug in the power connector to the cruise control outlet on the fuse box.

The next step was to take it for a test drive... the moment of truth.... usually the moment where I find out I did something wrong... but not this time. I accelerated up to 45mph, turned the cruise control switch to on, and (holding my breath) pushed the set button. I felt the accelerator peddle move ever so slightly away from my foot and the speed settled in at 46mph. I tested the accelerate and decelerate features and they worked perfectly. A smile settled on my face :)

Here are a few random pictures:

attachmentphpattachmentid45526d134342217-1.jpg


attachmentphpattachmentid45527d134342217-1.jpg


attachmentphpattachmentid45528d134342217-1.jpg


attachmentphpattachmentid45529d134342217-1.jpg


I still need to route some of the wires underneath my dash and permanently mount the electronic regulator (it is on velcro now so I can make the necessary adjustments easily).

All in all... this was quite a satisfying modification.

Joe

 
Took the Scrambler on my first long trip with the cruise control and I couldn't stop smiling... It definitely increases comfort dramatically as you can move around as you like without your foot tied to the gas pedal. The cruise control worked kept up fine, even on a roughly 6% grade. There was no speed "wandering" and the only thing I noticed was that was different than modern cruise control is that it is more aggressive on the gas pedal when you use the control to accelerate and decelerate... There clearly is no "fuel saving" algorithm in the increment/decrement control loop.
 
Hi Gang,

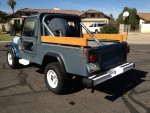
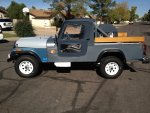
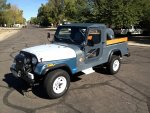
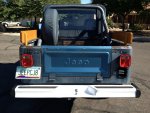
I finally found the correct (for my Scrambler) slate blue top and soft doors. Here are some pictures of my Scrambler with the slate blue top installed. To me, it looks so different with the slate blue top instead of the white top. I'm actually not sure which one I like better. Thoughts?

It really is time for paint now... I may have to bite the bullet and pay someone to paint the Scrambler.

Anyway... here are the new pictures:
 

Attachments

  • IMG_1963.jpg
    IMG_1963.jpg
    226.6 KB · Views: 157
  • IMG_1961.jpg
    IMG_1961.jpg
    231 KB · Views: 158
  • IMG_1960.jpg
    IMG_1960.jpg
    245.4 KB · Views: 158
  • IMG_1957.jpg
    IMG_1957.jpg
    271.3 KB · Views: 156
  • IMG_1966.jpg
    IMG_1966.jpg
    226.9 KB · Views: 158
  • IMG_1965.jpg
    IMG_1965.jpg
    264.4 KB · Views: 156
Back
Top