• Notice for iPhone users: DO NOT use the image size reduction option when uploading photos to the forum. This causes portrait images to post as landscape. We have added a warning to the image insert pop-up as well.

Spankrjs' 1984 Long Term Project

spankrjs

Scrambler Junkie
Lifetime Member
SOA Member
City
Biloxi
State
MS
The floor ones mount really close to the single threaded hole that is already there. But are you going to drill for the side brackets or just install it so it doubles as an ejector seat ? :)

I vote ejector seat.

Sent from my SCH-I545


Ejector Seat:thumbsup:

I haven't looked into it too much, but the front brackets should be easy enough. As for the rear brackets, that typically mount to the CJ7 wheel wells, I plan on making some type of floor mount brackets that will hold the rear brackets, and secure to existing threaded holes in the floor. I just need to figure it out/make them:crazy:
 

wm69

Scrambler Junkie
Silver Member
Lifetime Member
City
God's Country
State
AR
Ejector Seat:thumbsup:

I haven't looked into it too much, but the front brackets should be easy enough. As for the rear brackets, that typically mount to the CJ7 wheel wells, I plan on making some type of floor mount brackets that will hold the rear brackets, and secure to existing threaded holes in the floor. I just need to figure it out/make them:crazy:

Go ahead and make several sets after you do all the measuring, cutting, and fabbing.
 

spankrjs

Scrambler Junkie
Lifetime Member
SOA Member
City
Biloxi
State
MS
The brakes quit working on this one the other day, and I almost smashed into JeepAdict truck, it was pretty sweet:rotfl:

Anyway, these braided stainless lines don't like rubbing against the front tires, who would have thought:crazy:

002_zps7ef71fa8-1.jpg


So, I swapped on these:

003_zps87295e69-1.jpg


These were the only lines that the NAPA by my house had in stock that would fit: part #'s 382686 and 382687. They fit fine, and clear the tires. And they work great on the street. I "think" they are long enough, I will have to verify by disconnecting the sway bar and putting it on an RTI ramp. For $16 apiece, I hope it is a workable solution.

That's it for now:wave:
 

certifiablejeep

Definitley Certifiable
Lifetime Member
City
Bedford
State
NH
I have about 10 pictures I was going to post up tonight that shows almost the same thing... spent yesterday replacing front brake hoses... mine weren't totally gone through though, but they were rubbing... the braided part was gone and the teflon part inside was worn almost down... it allowed air in there and if I hit the brakes more then a tap, it locked all 4 wheels up... VERY STRANGE BEHAVIOR!!!!

took a while to figure out what was what, but in the end, looks like you (and me) got it all straightened out.

Scary though. Brakes are no joke!

cb
 

John N

Addicted....Ex-SOA VP
BENEFACTOR
Gold Member
Lifetime Member
SOA Member
City
Rockville
State
VA
The brakes quit working on this one the other day, and I almost smashed into JeepAdict truck, it was pretty sweet:rotfl:

Anyway, these braided stainless lines don't like rubbing against the front tires, who would have thought:crazy:

002_zps7ef71fa8-1.jpg


So, I swapped on these:

003_zps87295e69-1.jpg


These were the only lines that the NAPA by my house had in stock that would fit: part #'s 382686 and 382687. They fit fine, and clear the tires. And they work great on the street. I "think" they are long enough, I will have to verify by disconnecting the sway bar and putting it on an RTI ramp. For $16 apiece, I hope it is a workable solution.

That's it for now:wave:
Wow! Are you a day (actually 2) late with this post. I was getting texts from the Colorado mountains for a part number for this, this weekend. Jeeperdd (Dustin) and Treblehook (Dylan) were stuck and trying to figure this out.
 

certifiablejeep

Definitley Certifiable
Lifetime Member
City
Bedford
State
NH
I don't want to hijaaaaaack, but this is what I went through... lucky to have brakes unlike you... I just wanted people to get the word and check them hoses!

Damage to the old one and the new RE one.
IMG_6170.jpg

The old ones together... one side rubbed, the other did not.
IMG_6172.jpg

Work in progress
IMG_6168.jpg

Back on all four... and working!
IMG_6173.jpg

cb
 

bigwalton

Alaskan Postal nutjob
FORUM MANAGER
SOA Member
City
Dexter
State
MI
This is why I made spring retainer thingamabobs to pull the hose away from the tire. Been going strong for at almost a decade and no chance of rubbing :thumbsup: Will try to remember a picture next time in the garage. Simple long/light spring bolted to shock tower and a plastic cable clamp of the right size around the hose in a location that doesn't stress much at all un-flexed, but is enough to hold the hose away from the wheel.
 

spankrjs

Scrambler Junkie
Lifetime Member
SOA Member
City
Biloxi
State
MS
I have about 10 pictures I was going to post up tonight that shows almost the same thing... spent yesterday replacing front brake hoses... mine weren't totally gone through though, but they were rubbing... the braided part was gone and the teflon part inside was worn almost down... it allowed air in there and if I hit the brakes more then a tap, it locked all 4 wheels up... VERY STRANGE BEHAVIOR!!!!

took a while to figure out what was what, but in the end, looks like you (and me) got it all straightened out.

Scary though. Brakes are no joke!

cb

Mine still worked good enough to stop one time, but I had to use the parking brake the second time:thumbsup:

Wow! Are you a day (actually 2) late with this post. I was getting texts from the Colorado mountains for a part number for this, this weekend. Jeeperdd (Dustin) and Treblehook (Dylan) were stuck and trying to figure this out.

LOL, they called me with some Mopar MPI questions the other day:thumbsup: I found a bunch of part #'s on the internet, and of course, the NAPA I went to didn't have any. But, they have good parts counter guys there, so we dug through the book and found something that they had in stock, that would work. The ones I put on are supposedly 6" longer then stock.

I don't want to hijaaaaaack, but this is what I went through... lucky to have brakes unlike you... I just wanted people to get the word and check them hoses!

Damage to the old one and the new RE one.
View attachment 43209

The old ones together... one side rubbed, the other did not.
View attachment 43210


cb

It's pretty easy to swap them out, I still need to verify that the ones I bought are long enough so as not to act as limiting straps:crazy: Your damaged line looks just like mine.

This is why I made spring retainer thingamabobs to pull the hose away from the tire. Been going strong for at almost a decade and no chance of rubbing :thumbsup: Will try to remember a picture next time in the garage. Simple long/light spring bolted to shock tower and a plastic cable clamp of the right size around the hose in a location that doesn't stress much at all un-flexed, but is enough to hold the hose away from the wheel.

Yep, I did something similar with my red Scrambler, I just forgot to do something with this one:banghead:
 

certifiablejeep

Definitley Certifiable
Lifetime Member
City
Bedford
State
NH
I have mine zip tied out of the way for now to the extended bump stop, so that is a good short time fix.
I am pretty sure this happened because of the 35's vs. the 33's. The 33's were M/T's, but no side biters, the Baja Claws are very aggressive on the sides.

cb
 

Jeeperdd

CJ-8 Member
Silver Member
SOA Member
City
Gordonsville
State
VA
Wow! Are you a day (actually 2) late with this post. I was getting texts from the Colorado mountains for a part number for this, this weekend. Jeeperdd (Dustin) and Treblehook (Dylan) were stuck and trying to figure this out.
We ended up with an 88 Chevy front brake line only after rummaging through brake line boxes.
 

spankrjs

Scrambler Junkie
Lifetime Member
SOA Member
City
Biloxi
State
MS
Well, since it is really hot and humid outside now, what better time to start working on this one again:rotfl:

We have a ride in Louisiana (Sicily Island) this weekend, so I have been busy trying to tie up some odds and ends on this one.

Will update with pictures soon....................:wave:
 

spankrjs

Scrambler Junkie
Lifetime Member
SOA Member
City
Biloxi
State
MS
While this does not sound important, one major problem I have been having with this Scrambler has been the spark plug wires. My TBI engine has Ram Horn exhaust manifolds. With this set up, you can not run the spark plug wires over the valve covers. You have to run them behind the engine, down, then up to the spark plugs.

The "heat shield blankets" I put over the crappy Accel spark plug wires have worked, i.e. I haven't melted anymore boots. But, this was not the ideal situation.

GM cars that use Ram horn manifolds run the wires behind the engine, down, then up to the spark plugs. They also usually have special brackets and metal heat shields. I have tried my best to replicate this set up, using off the shelf parts and careful wire routing/securing.

To start with, I needed a set of wires. I bought a set of plug wires from NAPA that fit a 1974 Corvette. I did this for two reasons:

1) Corvettes of this era used HEI distributors, which is what I have on my TBI engine
2) They used Ram horn manifolds, so they have extra long wires for plugs 1,3, 2, and 4.


Picture of the wires, and a new coil. To give you an idea of the length of these wires, the sheet of plywood is 5' long:

001_zps9e2c4a47-1.jpg


002_zps19760f3f-1.jpg


I also purchased these wire clips. They are a stock item at Advance Auto Parts. I knew that I needed something to clip the wires to the engine, so I gave these a shot. Worked out good, for now. I had to cut the grommets to slide over the wires. You then push the wire/grommet into the little notches. I did not cut any wires, but it could lead to chaffing, if the grommets fall apart. I will have to keep an eye on this.

004_zps41b6fc90-1.jpg


Not the most interesting, but here are some pictures of how I ran my wires. It might be helpful to someone else. Also, feel free to critique.


Starting on the passenger side front, #2 and #4:

005_zpsff2ed050-1.jpg


Then back, showing #6 and #8:

006_zps8efe6445-1.jpg


Showing the clearance on #8, I have about 1-1.5" clear. Also shows the wires going up the fire wall. Excuse the mud :-)

007_zpsf1982138-1.jpg


And from the valve cover mounted bracket to the distributor:

008_zps0948bfdb-1.jpg


The passenger side wasn't too bad. Wire #2 could have been shorter, so I ran it wide and covered it in black tubing to protect it from chaffing.


The driver side was a bigger pain, due to the steering shaft, plus more stuff over there (wiper and coolant bottles/master cylinder brake booster) and the fact that the engine is offset to this side to allow front drive shaft clearance, due to the 700R4.

From the distributor to the valve cover bracket:

009_zpsdb9bbb8b-1.jpg


From the bracket to *7 and #5:

010_zpsf8d31b50-1.jpg


I used a plastic clip, in an existing hole in the front fender, to secure #3 and #1. This gets them past, and clear of, the steering shaft. Yep, leaking master cylinder lids take the paint right off of sheet metal :-(

012_zps51eb5ccc-1.jpg
 

spankrjs

Scrambler Junkie
Lifetime Member
SOA Member
City
Biloxi
State
MS
And finally, from the fender clip to #3 and #1:

013_zps16c41d4c-1.jpg


It took me about 4 hours to get this figured out, routed, secured. Not glamorous, but I hope it works. I have excellent wire to manifold clearance now, so:fingerscrossed:


While I was on the driver side, I also swapped out the stock steering shaft for a Borgeson unit:

014_zps4fbabaea-1.jpg


The stock shaft had a tore boot, and the resulting wear in the lower coupler. I did not paint the shaft, due to a leaking master cylinder lid:banghead: Anyway, big improvement:thumbsup:

And of course, swap one thing out, more problems:

015_zpsfb99801b-1.jpg


Two things:

1) The slightly bigger OD of the Borgeson shaft rubs the PS pressure hose.
2) The plastic wire tie that secures the boot on the Borgeson shaft rubs the PS return line

1) Easy fix, loosened the PS pressure line at the pump, slightly rotated it, and now it clears.
2) Need to install a slightly longer rubber section of return line, and it will clear.

So, between now and Thursday night:

1) PS return line hose modifications
2) Install new shackles/bushings (more on this later)
3) Install drive flanges on the rear hubs (more on this later)

That's it for now:wave:
 

mysunnshine

Legacy Registered User
City
Phoenix
State
AZ
MSD makes some really nice wire retainers that you can fab brackets for.
dazu6yny-1.jpg


Sent from my SCH-I545
 

spankrjs

Scrambler Junkie
Lifetime Member
SOA Member
City
Biloxi
State
MS
This one has been running/driving pretty well. No real problems, until a few days ago, gas gauge quit. So, before Sand Blast, a few more things to do to this one:

1) Fix gas gauge - FIXED
2) Install new shifter floor plate/boots
3) Borgeson steering shaft - INSTALLED
4) Door panels/door weather striping

IMG_20140502_170602283_zps4dd566e1-1.jpg


Will try to start working on this one again, soon, that's it for now:wave:

Still need to do #2 and #4 before Sand Blast, plus whatever else I find:rotfl:

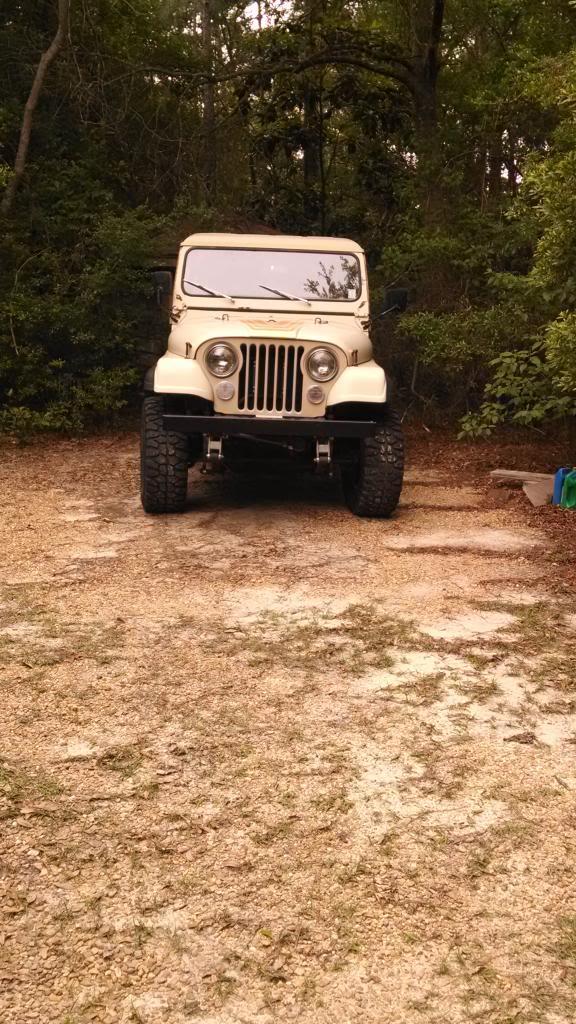
I have been busy doing yard work, so the scenery looks different, need to post an updated picture:thumbsup::wave:
 

BRKLYNZ28

Scrambler Junkie
Lifetime Member
City
BROOKLYN
State
NY
#4 wire might rotate down and melt on the manifold.. just saying what i see.. i had that problem when i was playing around one day.. :( add a zip tie to hold it in that position just in case..
 

spankrjs

Scrambler Junkie
Lifetime Member
SOA Member
City
Biloxi
State
MS
MSD makes some really nice wire retainers that you can fab brackets for.
dazu6yny-1.jpg


Sent from my SCH-I545

That looks :drool:

Unfortunately, my manifolds have no mounting provisions, i.e. no threaded holes. I wish they had the mounting holes to install even the factory shields. On my block, the knock sensor is on one side, and a oil pressure switch on the other, so I can't run the wires against the block cleanly, either:banghead:
 

spankrjs

Scrambler Junkie
Lifetime Member
SOA Member
City
Biloxi
State
MS
#4 wire might rotate down and melt on the manifold.. just saying what i see.. i had that problem when i was playing around one day.. :( add a zip tie to hold it in that position just in case..

Good eye:thumbsup:

I have #4 clipped to #2, which is secured to the fender well, but a zip tie sure wouldn't hurt:thumbsup::wave:
 

spankrjs

Scrambler Junkie
Lifetime Member
SOA Member
City
Biloxi
State
MS
I completed another project I have been meaning to complete - swap out the super long shackles for some shorter versions.

The old Confer Shackles, they measure 5-3/4" center of bolt to center of bolt; stock shackles are 3". Also note how the shackles are straight up and down, NOT good for ride quality!!!!

001_zps9770612b-1.jpg


I purchased these Rugged Ridge Shackles (3-3/4" long) when I bought the Borgeson steering shaft: I used the 4WDH CJ8 Card, saved some cash:

002_zpsde30bf37-1.jpg


I also swapped out the shackle hanger bushings. The existing hangers had stock style "rounded face" bushings. The bushings I used have the "flat face", which are what should be used with flat shackles. Stock shackles have a round indentation for a "round face bushings", aftermarket shackles are flat.


003_zps07dca4da-1.jpg


The 20 gallon fuel tank makes the rear shackle change a bit more involved. I find it easier just to drop the shackle hangers off the frame, then put together the new shackle assembly. The bolts that came with these shackles were a bit long, so the heads had to face the gas tank side for clearance. As this Scrambler came from California, the 30 year old shackle hanger bolts came out with no issues!!!!!!!!!!!

004_zpsadfbbaae-1.jpg


Assembled, back on the ground, look how the front shackle leans forward, like it should. The old shackles hung straight down, so when you would hit a bump, they had to raise up before they would swing forward:

005_zpsfe8e84d9-1.jpg


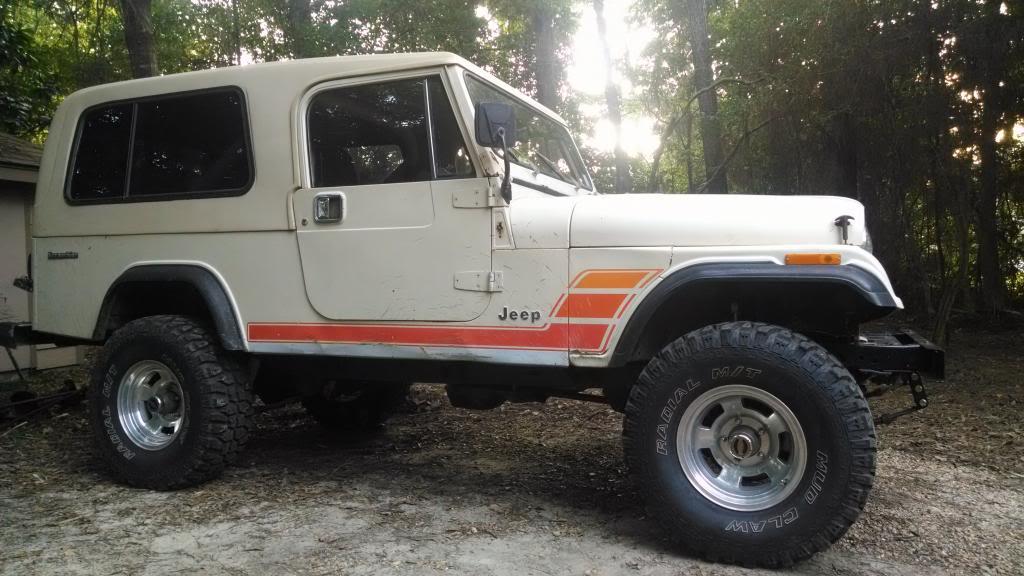
I went from shackles that were 5-3/4" long to 3-3/4" long, so it did drop the Scrambler 2":

006_zpsa65b67ed-1.jpg


007_zps93f24577-1.jpg


So, I did lose 2" of clearance, but the tires still clear just fine. But, the huge improvement in ride quality/handling were well worth it:

1) It drives much smoother, still firm, but much better, with the shackles leaning forward, like they should.
2) The caster is much closer to where it should be, which eliminated a slight "vague feel", and improved the "return to center characteristic" of the steering.

All in all, well worth it IMO.


Off topic, but what I have been up to - yard work.

Notice the difference in the back ground:

009_zpsa50e737e-1.jpg


A 20hp DR Field and Brush mower turns this:

010_zps3dbc68b9-1.jpg


Into this:

008_zpsbc784d05-1.jpg


I can honestly say, the DR mower does what it says. I have used it to cut down 3" diameter trees, plus it just shreds underbrush. Now I have room for more Jeeps LOL!!!!!!!!!!

Back on topic, I should be able to change out the PS return hose tonight, and install the drive flanges on the rear, then a 5 hour road trip on Friday to go hit some trails!!!!!!!

That's it for now.
 
Top