
You are using an out of date browser. It may not display this or other websites correctly.
You should upgrade or use an alternative browser.
You should upgrade or use an alternative browser.
Spankrjs' 1984 Long Term Project
- Thread starter spankrjs
- Start date
- City
- Biloxi
- State
- MS
You only lost 1". Shackle lifts one end of the spring only so you only see half the difference.
Oops, your right

But it was cold outside..................

scrambled eggs
Basic User
- City
- chapin
- State
- sc
"I was in the pool"
Oops, your right
But it was cold outside..................
- City
- Biloxi
- State
- MS
- City
- Cobourg, Ontario, Cana
- State
- da
You only lost 1". Shackle lifts one end of the spring only so you only see half the difference.
I was just about to post this... Only 21 hours late to the party. DAM METRIC TIME!!!!
- City
- Biloxi
- State
- MS
I was just about to post this... Only 21 hours late to the party. DAM METRIC TIME!!!!
2nd place is first place loser

- City
- Biloxi
- State
- MS
And some more last minute work complete before this weekends trip.
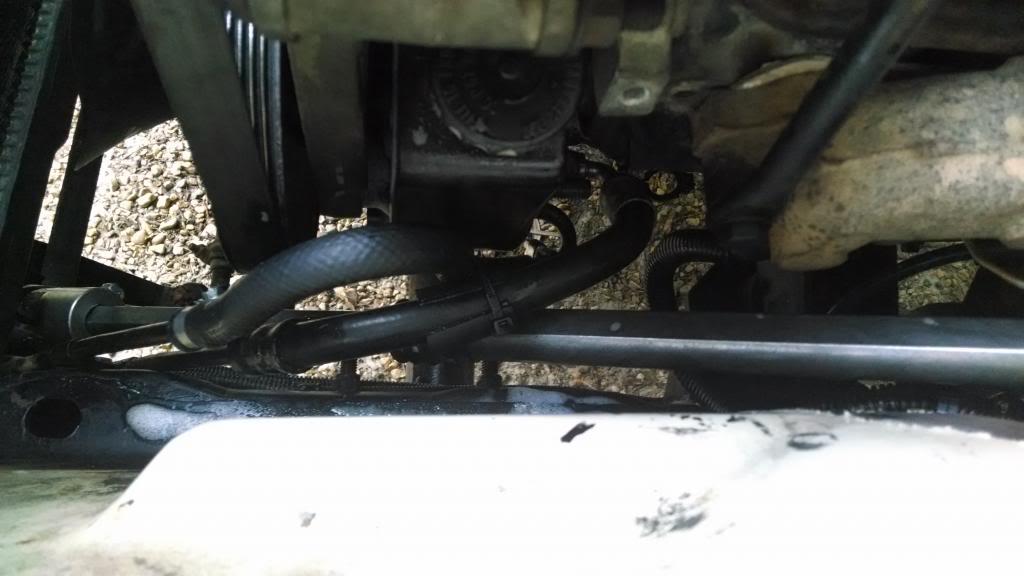
I changed the PS return hose, which became a 1 hour project!!!!!!!!! The previous owner used fuel line for the return line, so it was falling apart. Besides this it was chaffing on the steering shaft. I installed the correct "hydraulic/PS hose", which is a bit stiffer. This made it really fun to get over the giant flares someone put on the metal return lines!!!!!!!!
Anyway, ran a bit longer hose, so it arches up, and clears the PS pressure hose and the steering shaft. I also secured the two metal lines that go to the PS box to the frame. They have just been dangling down there.
One other "quick" fix, better then nothing, for now:
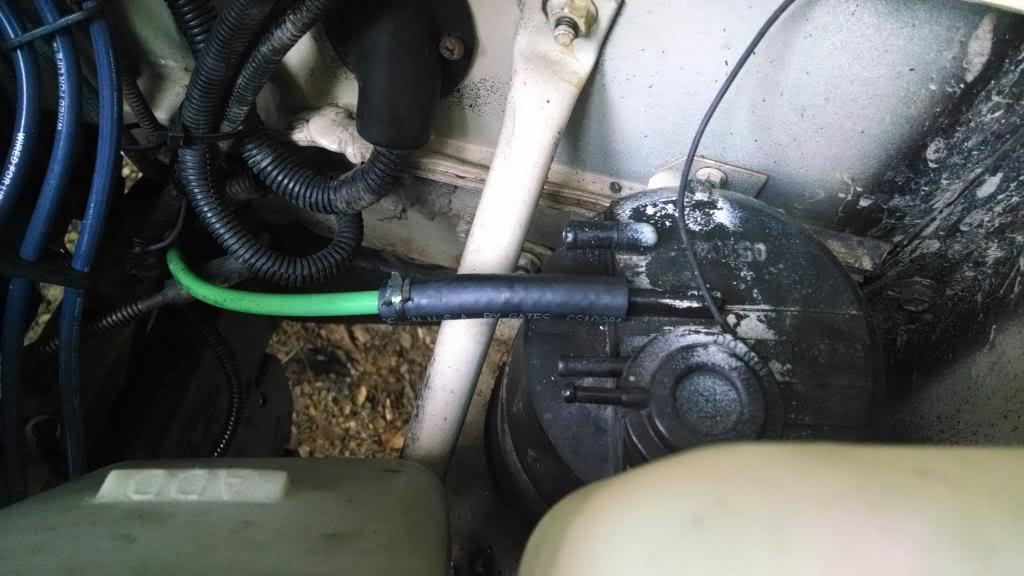
With the warmer weather, the Scrambler has been getting a bit more of the good old "gas fume stink". For now, I just temporarily hooked up the gas tank vent line to the stock charcoal canister. This will at least stop the tank from venting directly into the atmosphere. But, right now, I do not have any type of "purge" set up on it. So, this is not ideal, but should last a few days.
I ordered a new, different charcoal canister, but it wont be in until next week. Once I get it, I will detail the installation. The early model TBI systems use a simple evap canister system, so it will actually be simpler then the stock AMC set up used on the 258's.
I also installed drive flanges into the rear hubs, detailed install in the next post:
I changed the PS return hose, which became a 1 hour project!!!!!!!!! The previous owner used fuel line for the return line, so it was falling apart. Besides this it was chaffing on the steering shaft. I installed the correct "hydraulic/PS hose", which is a bit stiffer. This made it really fun to get over the giant flares someone put on the metal return lines!!!!!!!!
Anyway, ran a bit longer hose, so it arches up, and clears the PS pressure hose and the steering shaft. I also secured the two metal lines that go to the PS box to the frame. They have just been dangling down there.
One other "quick" fix, better then nothing, for now:
With the warmer weather, the Scrambler has been getting a bit more of the good old "gas fume stink". For now, I just temporarily hooked up the gas tank vent line to the stock charcoal canister. This will at least stop the tank from venting directly into the atmosphere. But, right now, I do not have any type of "purge" set up on it. So, this is not ideal, but should last a few days.
I ordered a new, different charcoal canister, but it wont be in until next week. Once I get it, I will detail the installation. The early model TBI systems use a simple evap canister system, so it will actually be simpler then the stock AMC set up used on the 258's.
I also installed drive flanges into the rear hubs, detailed install in the next post:
- City
- Dexter
- State
- MI
I was just about to post this... Only 21 hours late to the party. DAM METRIC TIME!!!!
Suuuuuuure you were. Damn Canadians.
- City
- Biloxi
- State
- MS
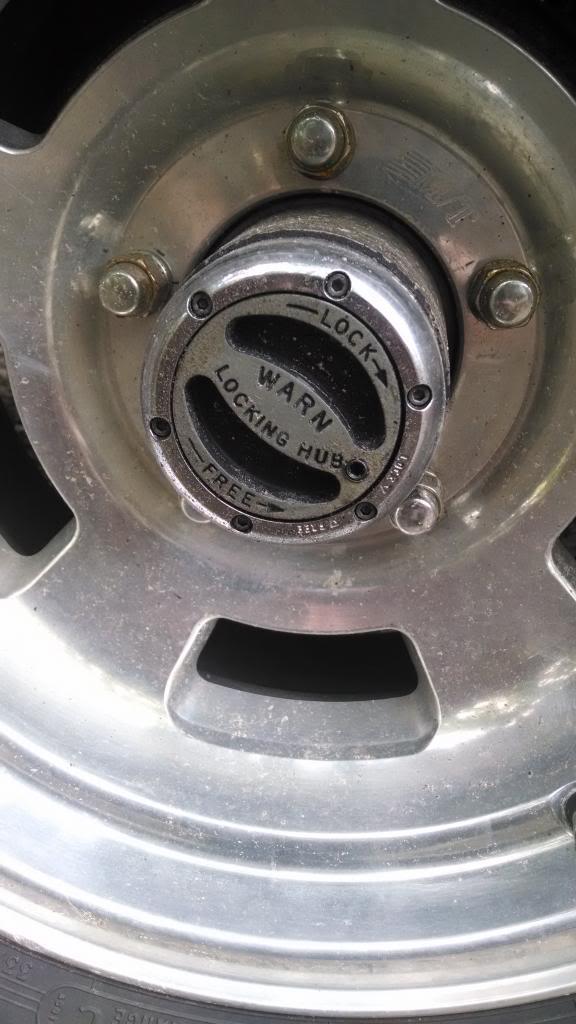
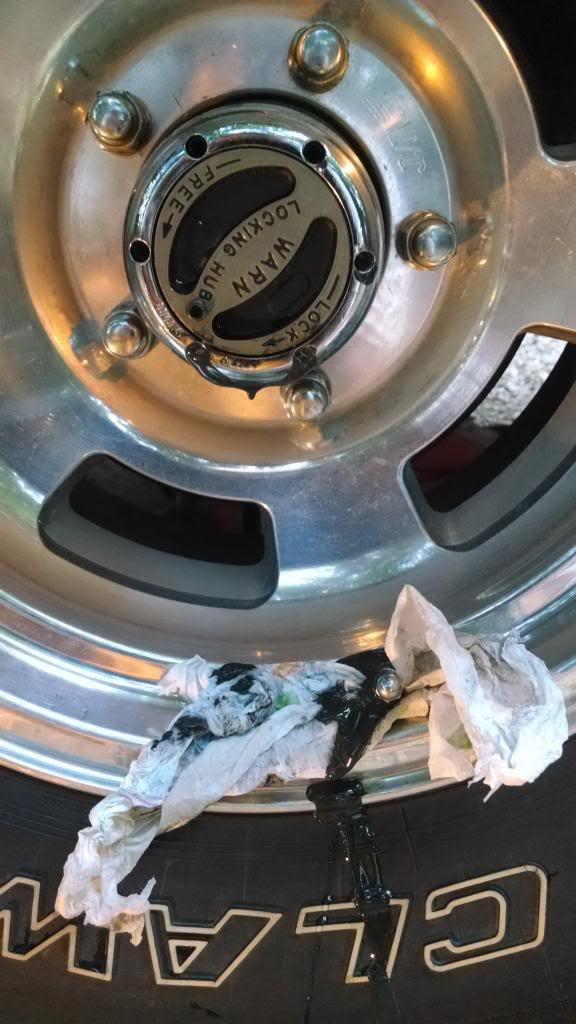
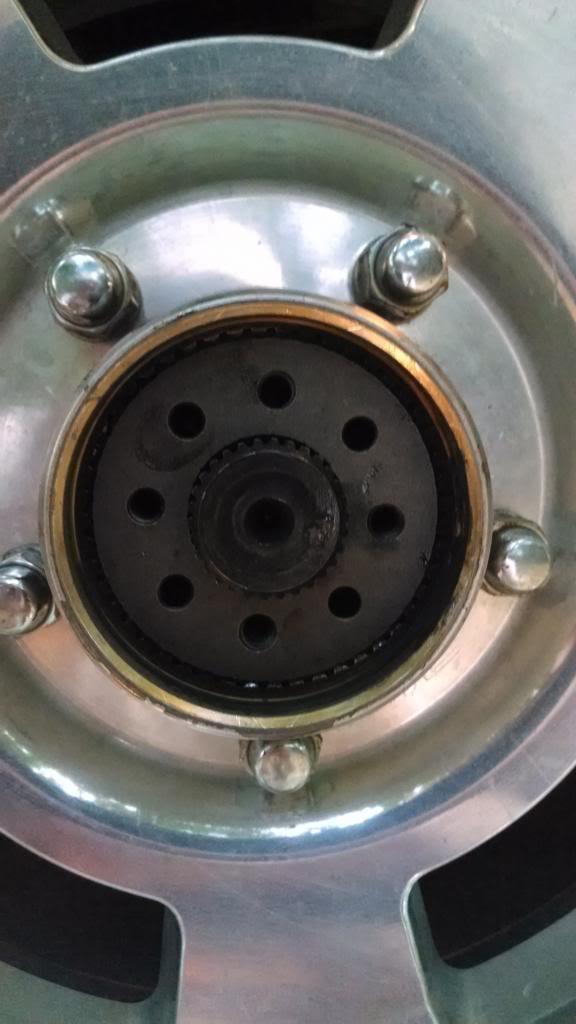
This Scrambler, like my red Scrambler, is running the discontinued Warn Full Float Axle kit on the stock AMC 20. I really like this kit. But, for some reason, on this Scrambler, gear oil is seeping into the hubs, even though I installed new axle/spindle seals. This is not a "problem", per se, since a lot of vehicles use gear oil to lube the outer axle bearings. The "problem" is that the lock in hubs are not "oil sealed", so a bit of gear lube leaks out of the dials, and sprays all over the wheels.
A close up of one of the hubs, showing the gear oil seepage:
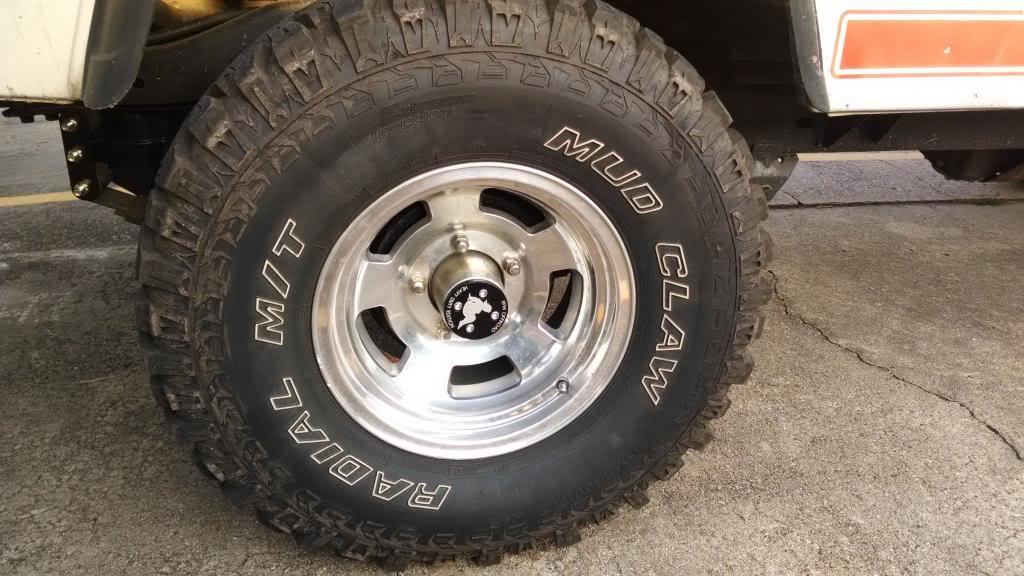
And a bit of lube on the face of the wheel:
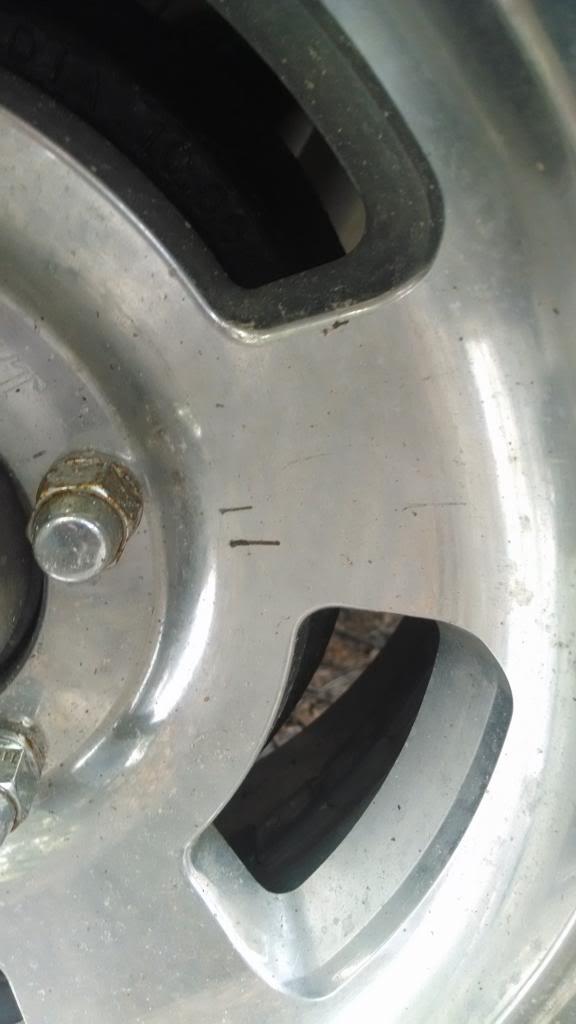
The current set up does not leak a bunch, but it is aggravating. Also, running a Detroit Locker with the lock in hubs can be a bit problematic. My buddy has been having issues with the rear hubs in my old CJ7. So, I took it upon myself to see if I could find some drive flanges that would install.
You can still find the discontinued Warn drive flanges, but they cost around $500!!!!!!!
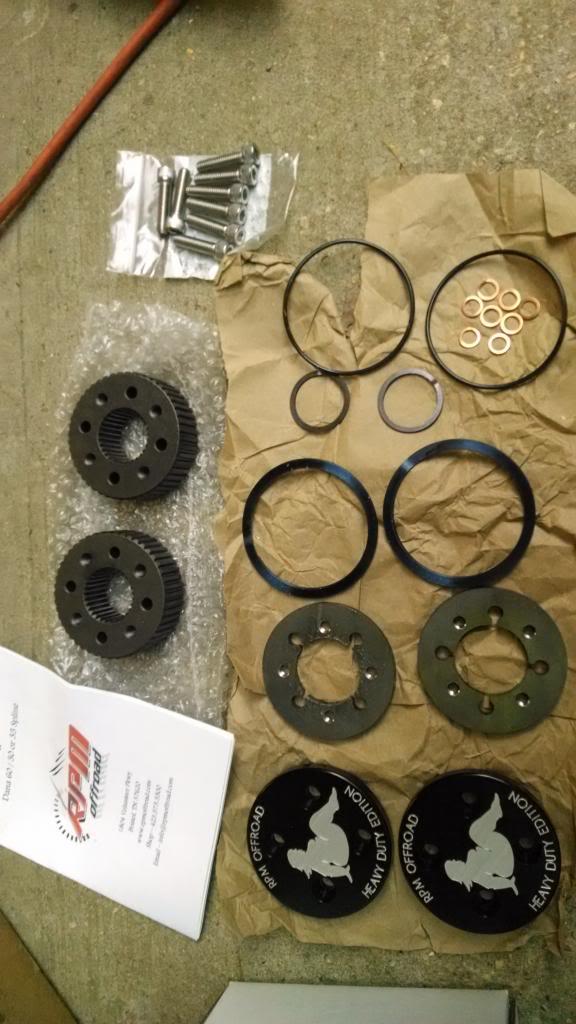
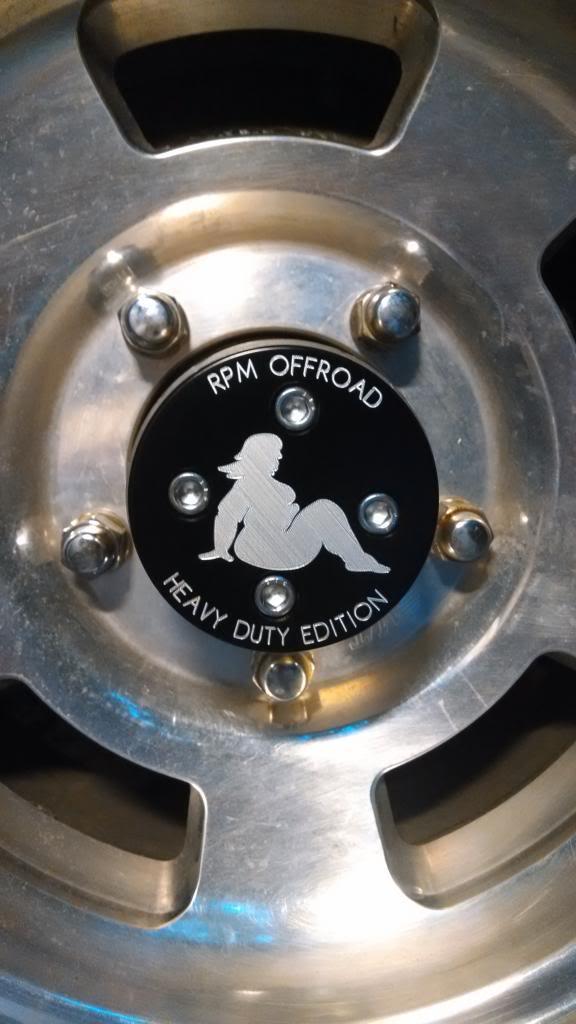
I picked up these drive flanges from RPM Offroad, Part# RPM-443001HD, $205 shipped to my door. And, more importantly, they fit perfect!!!!!! The Warn hubs/axles are the same thing as a 30 spline Dana 44 hub/axle set up.
Picture of the parts:
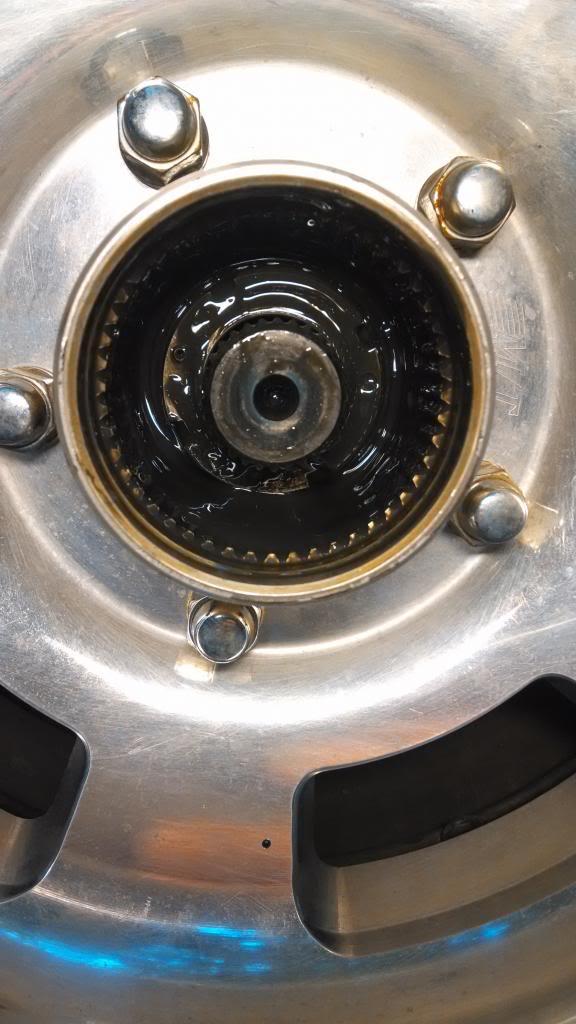
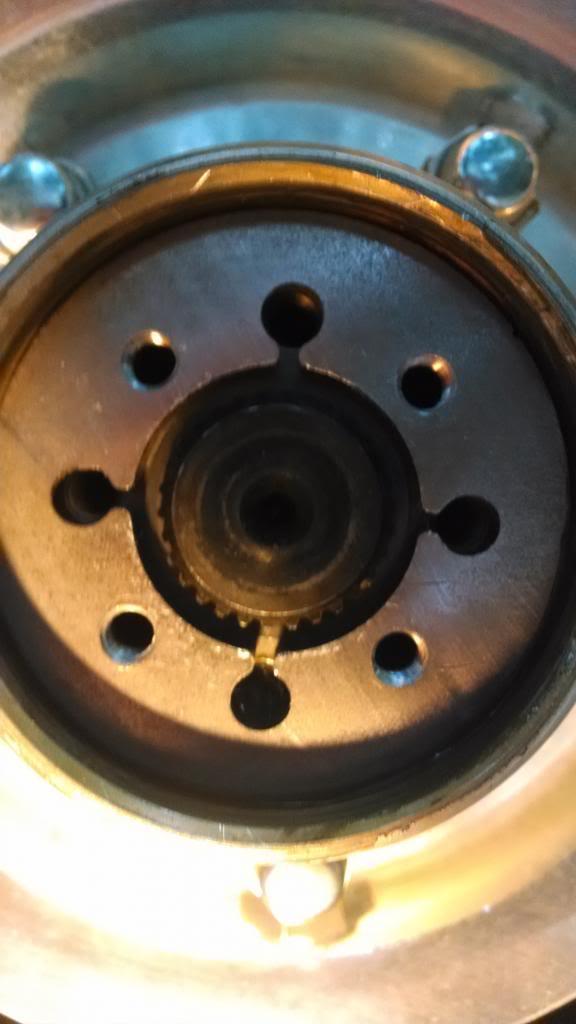
Removing the stock lock in hubs, note the good old gear oil/wheel bearing grease mixture oozing out!!!!! Besides having the entire rear axle jacked up off the ground, to enable un-locking the rear hubs (necessary with a Detroit), I also jacked up the side I was working on higher then the other, to keep most of the lube from running out.
All of the stock lock in hub parts removed. Spindle nuts are visible, still good and tight.
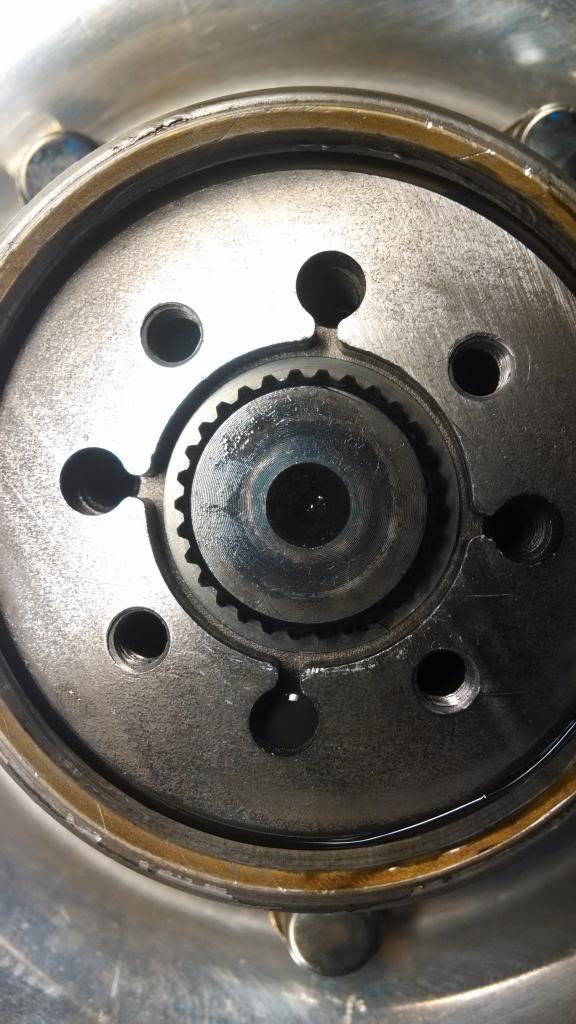
Step #1, slide in the drive flange "slug". It slides in just like the inner part of the stock lock in hub.
Step #2, slide in the other, thinner steel plate. Line up the "through holes" in this plate with the threaded holes in the "drive slugs". Quick note - for flat towing, you can remove the drive slug, just install this plate, and bolt the outer cap to it.
Step #3, install the axle snap ring thingy.
Step #4, install the big, outer snap ring thingy.
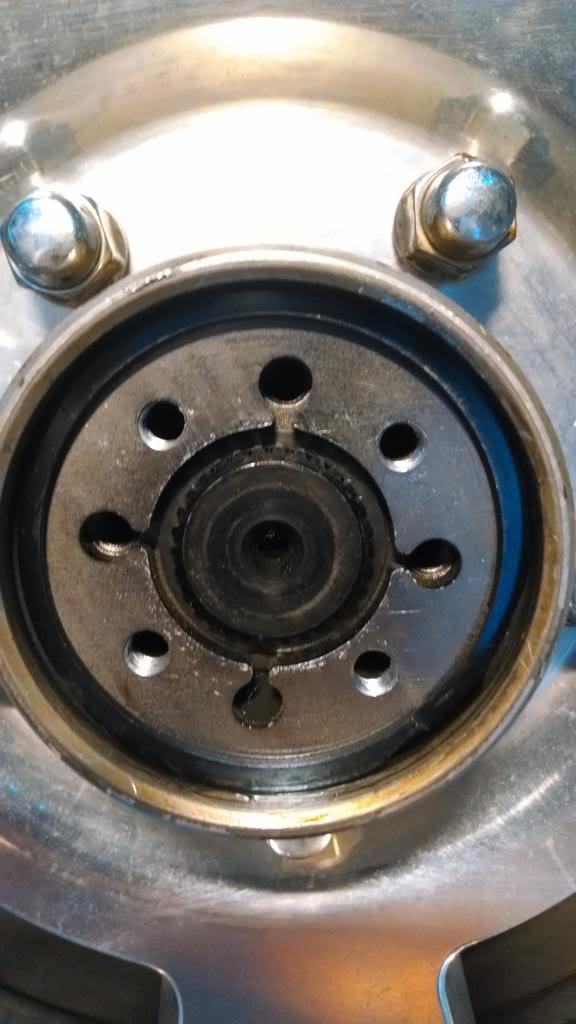
Step #5, put the o-ring on the outer cap, slide it on, bolt it to the drive slugs. The bolts will pass though the "through holes" of the thinner plate and thread into the drive slugs. I used a bit of red Lock tite on the bolts.
Finished.
So far, they are working perfect, like they should. I notice a bit less "lash" coming from the rear Detroit, too.
Quick note - they offer different styles of outer covers, so you don't have to get the "chrome naked big girl" caps. I did not notice this until after I bought them. Your GF/Wife may disapprove LOL!!!!!!!!!!!
That's it for now, time to go wheeling!!!!!!!!!!
A close up of one of the hubs, showing the gear oil seepage:
And a bit of lube on the face of the wheel:
The current set up does not leak a bunch, but it is aggravating. Also, running a Detroit Locker with the lock in hubs can be a bit problematic. My buddy has been having issues with the rear hubs in my old CJ7. So, I took it upon myself to see if I could find some drive flanges that would install.
You can still find the discontinued Warn drive flanges, but they cost around $500!!!!!!!
I picked up these drive flanges from RPM Offroad, Part# RPM-443001HD, $205 shipped to my door. And, more importantly, they fit perfect!!!!!! The Warn hubs/axles are the same thing as a 30 spline Dana 44 hub/axle set up.
Picture of the parts:
Removing the stock lock in hubs, note the good old gear oil/wheel bearing grease mixture oozing out!!!!! Besides having the entire rear axle jacked up off the ground, to enable un-locking the rear hubs (necessary with a Detroit), I also jacked up the side I was working on higher then the other, to keep most of the lube from running out.
All of the stock lock in hub parts removed. Spindle nuts are visible, still good and tight.
Step #1, slide in the drive flange "slug". It slides in just like the inner part of the stock lock in hub.
Step #2, slide in the other, thinner steel plate. Line up the "through holes" in this plate with the threaded holes in the "drive slugs". Quick note - for flat towing, you can remove the drive slug, just install this plate, and bolt the outer cap to it.
Step #3, install the axle snap ring thingy.
Step #4, install the big, outer snap ring thingy.
Step #5, put the o-ring on the outer cap, slide it on, bolt it to the drive slugs. The bolts will pass though the "through holes" of the thinner plate and thread into the drive slugs. I used a bit of red Lock tite on the bolts.
Finished.
So far, they are working perfect, like they should. I notice a bit less "lash" coming from the rear Detroit, too.
Quick note - they offer different styles of outer covers, so you don't have to get the "chrome naked big girl" caps. I did not notice this until after I bought them. Your GF/Wife may disapprove LOL!!!!!!!!!!!
That's it for now, time to go wheeling!!!!!!!!!!
- City
- Biloxi
- State
- MS
I need to do something with an evap canister on Mater, just waiting for the day Kate gets fed up with the gas smell. Come up here and do one for me when you have it all figured out. Ok? Thanks!
No problem
- City
- Halifax
- State
- UK
Vented gas cap and bin all the charcoal canister bits and pieces.
This may mean you may have to move your vehicles outside of the US, but i will look after them for you its not a problem
This may mean you may have to move your vehicles outside of the US, but i will look after them for you its not a problem
- City
- Dexter
- State
- MI
Vented gas cap and bin all the charcoal canister bits and pieces.
Exactly what I did with the Cherokee and the garage stinks as a result

- City
- Columbia
- State
- MO
I also installed drive flanges into the rear hubs, detailed install in the next post:
Perfect post for a Tech article! I have posted it in the Technical Library. Thanks for writing this up!
Last edited:
- City
- Biloxi
- State
- MS
Vented gas cap and bin all the charcoal canister bits and pieces.
This may mean you may have to move your vehicles outside of the US, but i will look after them for you its not a problem
Exactly what I did with the Cherokee and the garage stinks as a result
Yep, that's the problem - without the canister, the Jeep stinks like raw gas. Besides the garage, it stinks after driving it, too

Perfect post for a Tech article! I have posted it in the Technical Library. Thanks for writing this up!
No problem, not sure how many people it will help, but hopefully someone will find it useful
Love the fatty edition covers! Nice write up as usual.
Thanks, I think even Tiffany is starting to like the "fat girl covers"
- City
- Biloxi
- State
- MS
We went wheeling this past weekend at Sicily Island ORV in Louisiana. The rain on Friday made everything a super slick muddy mess, so we had a super time Even the easy trails/access roads were challenging
I was too busy to take pictures, this is the only one I took:
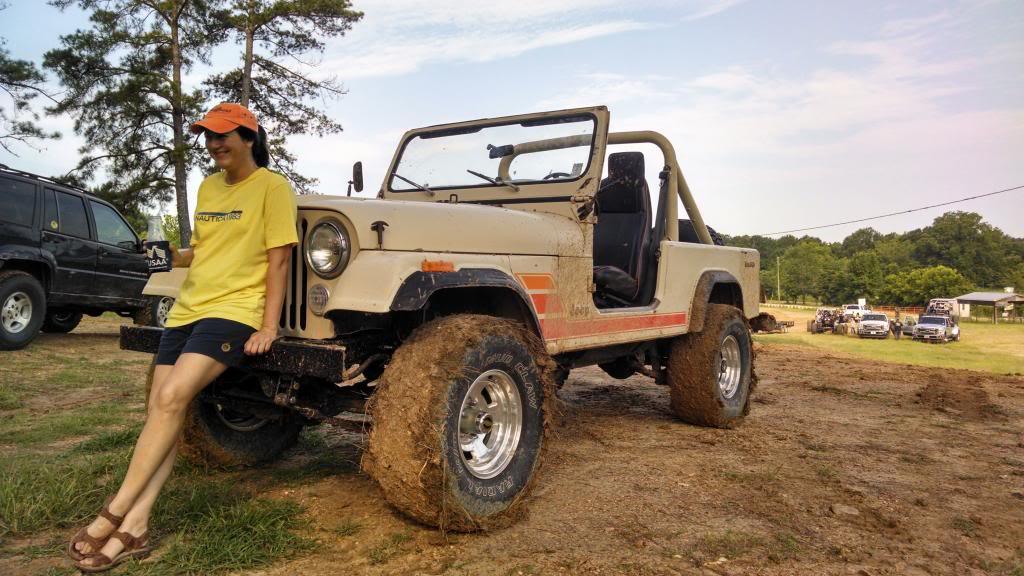
Due to the heat, we took the top and doors off. This is the first time I have ever pulled the top off, and surprisingly, it wasn't too heavy. Me and two other guys took it off, no problem.
The trails at Sicily Island are all pretty difficult when it is dry, so the recent rain added to the challenge. The Tru-Trac in the front works great, but there were times I wish it had a full locker in the front. I was glad I took this Scrambler this weekend, the V8/Automatic transmission/stock low range is better suited for muddy hill climbing The mud was not the "sink into the ground" type, it was more or less like slippery grease.
A few quick notes:
On the way there, first fuel stop, after running 75-80 mph = 14.25 mpg.
The second fuel stop on the way there, running 65 mph = 17.75mpg
The wheeling mileage, 70 miles total, 10 gallons, 7 mpg (lots of wheel spinning)
My only "problems":
1) After running at 75-80mph for 3 hours in 95 degree heat with 100% humidity, it started to vapor lock sputter. Slowing down to 65-70 mph cured this issue. The external fuel pump was cool to the touch, I think the under hood heat is causing me this issue.
2) Slight wear and tear to the old, stock tie rod ends. Two boots fell apart when we are trail riding, so they got sand/mud in them. No big deal, I have been meaning to put HD tie rod/drag links on this Scrambler, and flip them to the top of the knuckles, so I can get rid of the drop pitman arm
The engine temps never got above 200, except one time, when I was working it hard on a hill climb for about 25 minutes straight, the engine temp got to about 220. The engine ran at 185 95% of the time. The transmission never got hotter then 200, and it ran at 175 95% of the time. So, I am happy with the cooling system, for the most part.
I really need to make up my new floor plate, I don't think duct tape shifter boots are going to cut it anymore
Anyway, it was a great trip, and I was pretty happy with the Scrambler's performance. It got stuck once, when the front tires sank straight into the ground up to the hubs, so we decided to get a quick tug from behind before it got worse. The other stuck was on the "25 minute muddy hill climb". The Scrambler kept sliding side ways, and almost into trees/ravines. So, we had to pull it side ways a few times with a snatch block. I think we winched it a total of 5 different times to get it back off the hill. By the time we were done winching/sliding, the Scrambler was facing nose down hill
I have one other "short distance" ORV Park trip planned for July, right before Sand Blast. I hope to get all of the final kinks(floor plate/steering linkages/etc.) worked out before the cross country Michigan trip.
The drive flanges worked great, no leakage. I did re-torque them after the first two fuel stops, the bolts were a hair loose.
If I find some more pictures I will post them up, that's it for now!
Even the easy trails/access roads were challengingI was too busy to take pictures, this is the only one I took:
Due to the heat, we took the top and doors off. This is the first time I have ever pulled the top off, and surprisingly, it wasn't too heavy. Me and two other guys took it off, no problem.
The trails at Sicily Island are all pretty difficult when it is dry, so the recent rain added to the challenge. The Tru-Trac in the front works great, but there were times I wish it had a full locker in the front. I was glad I took this Scrambler this weekend, the V8/Automatic transmission/stock low range is better suited for muddy hill climbing
The mud was not the "sink into the ground" type, it was more or less like slippery grease.A few quick notes:
On the way there, first fuel stop, after running 75-80 mph = 14.25 mpg.
The second fuel stop on the way there, running 65 mph = 17.75mpg
The wheeling mileage, 70 miles total, 10 gallons, 7 mpg (lots of wheel spinning)
My only "problems":
1) After running at 75-80mph for 3 hours in 95 degree heat with 100% humidity, it started to vapor lock sputter. Slowing down to 65-70 mph cured this issue. The external fuel pump was cool to the touch, I think the under hood heat is causing me this issue.
2) Slight wear and tear to the old, stock tie rod ends. Two boots fell apart when we are trail riding, so they got sand/mud in them. No big deal, I have been meaning to put HD tie rod/drag links on this Scrambler, and flip them to the top of the knuckles, so I can get rid of the drop pitman arm
The engine temps never got above 200, except one time, when I was working it hard on a hill climb for about 25 minutes straight, the engine temp got to about 220. The engine ran at 185 95% of the time. The transmission never got hotter then 200, and it ran at 175 95% of the time. So, I am happy with the cooling system, for the most part.
I really need to make up my new floor plate, I don't think duct tape shifter boots are going to cut it anymore
Anyway, it was a great trip, and I was pretty happy with the Scrambler's performance. It got stuck once, when the front tires sank straight into the ground up to the hubs, so we decided to get a quick tug from behind before it got worse. The other stuck was on the "25 minute muddy hill climb". The Scrambler kept sliding side ways, and almost into trees/ravines. So, we had to pull it side ways a few times with a snatch block. I think we winched it a total of 5 different times to get it back off the hill. By the time we were done winching/sliding, the Scrambler was facing nose down hill
I have one other "short distance" ORV Park trip planned for July, right before Sand Blast. I hope to get all of the final kinks(floor plate/steering linkages/etc.) worked out before the cross country Michigan trip.
The drive flanges worked great, no leakage. I did re-torque them after the first two fuel stops, the bolts were a hair loose.
If I find some more pictures I will post them up, that's it for now!
- City
- Biloxi
- State
- MS
Did a little bit of work on this Scrambler this weekend, need to get it ready for the Michigan trip
This Jeep did not have a charcoal canister hooked up. I had the tank vent line venting under the hood, so this Scrambler would get a bit gas stinky, especially now that it is the middle of summer.
The stock AMC canister has a bunch off hook ups and controls that are not needed in my application. I am running a TBI 350. I am running an early model computer/harness, so I have no provisions for purge solenoids. But, none of this is needed. Early truck TBI systems are simple:
1) line from tank to canister
2) purge line from canister to base of TBI
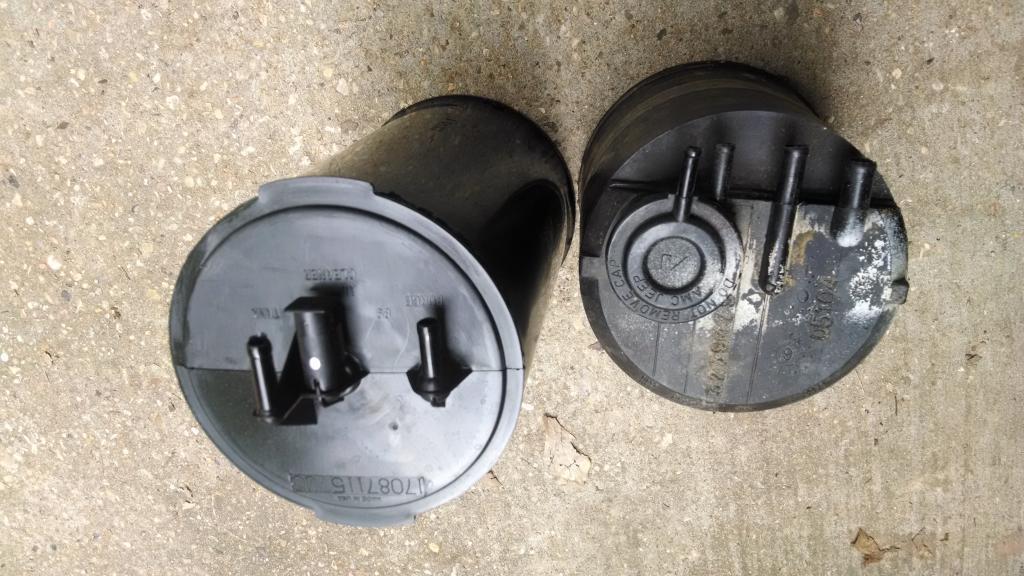
That's it. This is what I bought:
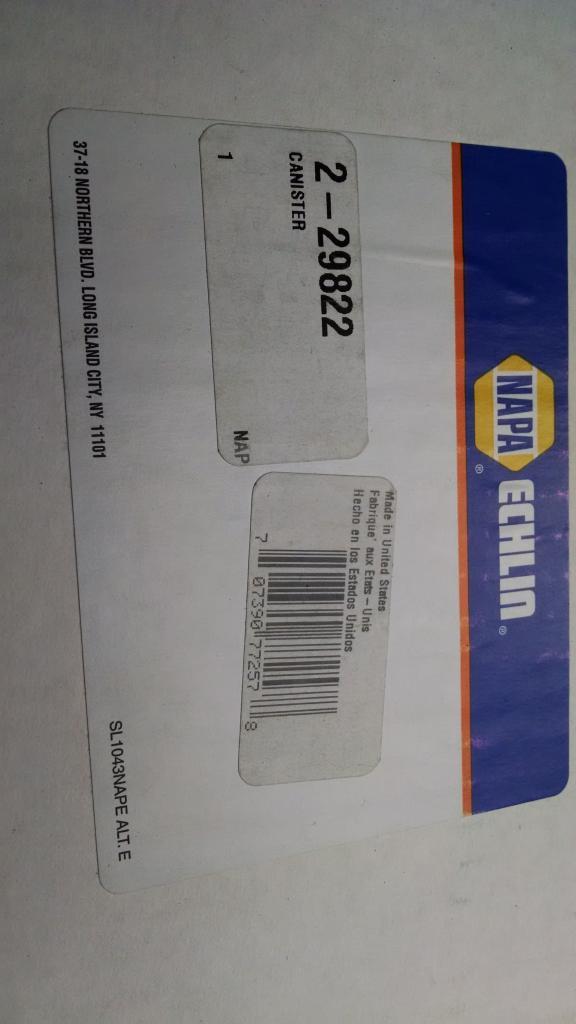
That canister fits a 1989 Suburban, plus lots of other early model TBI GM truck platforms. What it looks like:
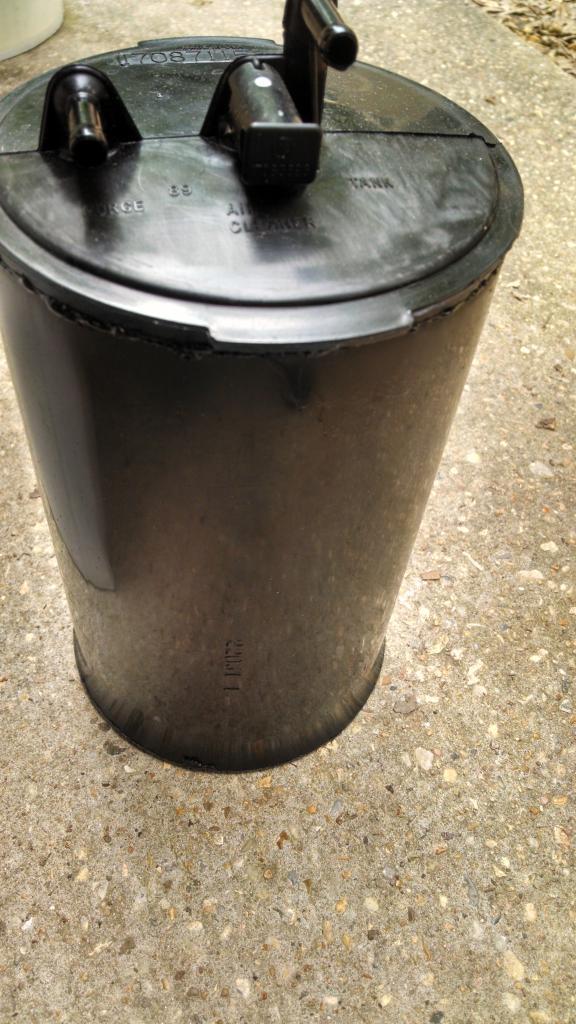
The three fittings on top are labled:
1) Tank
2) Purge
3) Air Cleaner (the way its made, it just sucks in air here)
Compared to the stock canister, same diameter, but a bit taller:

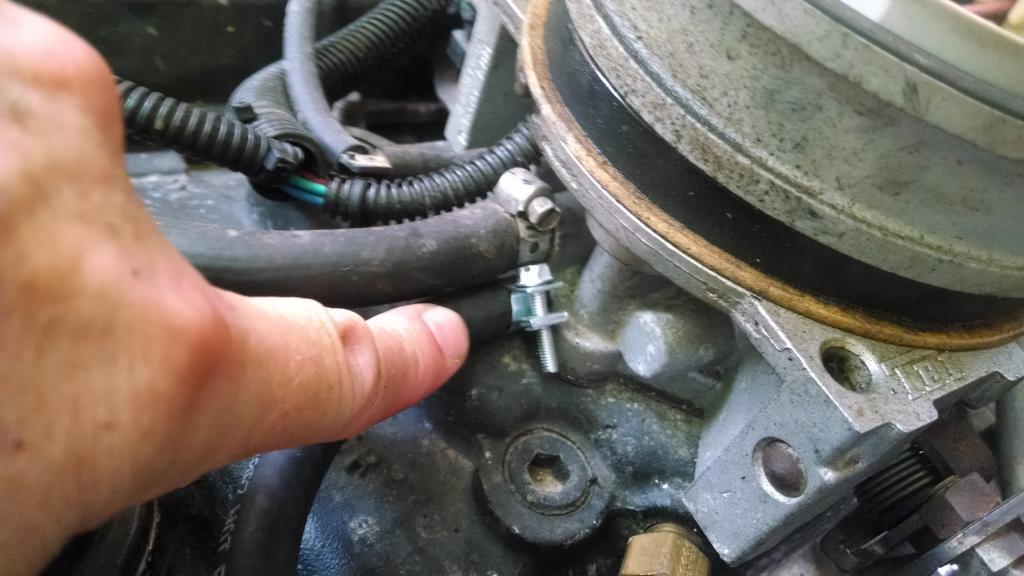
The purge line hooks up on this port on the base of the TBI. This is a "ported vacuum" line, it only "sucks" when the throttle is open. I tested it, it works. It does not suck hard, very low vacuum. The port coming out of the TBI was smooth, so I added a clamp, but probably not necessary.
And the other end of the purge line, with the new canister installed:
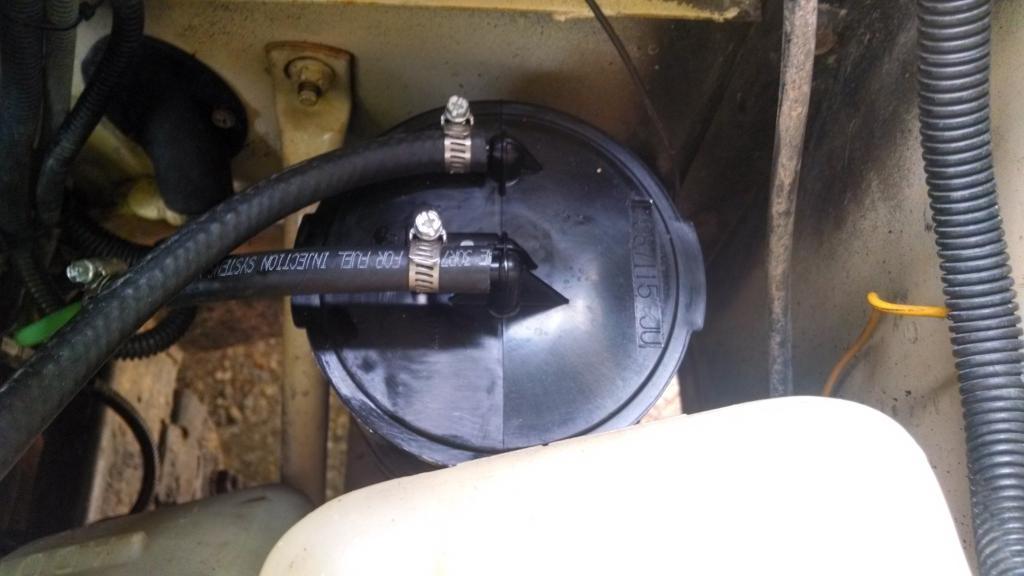
And again, I added lightly tightened hose clamps, probably not necessary. The taller canister does fit in the stock location, in the stock bracket, no modifications required. It is a tight fit, but it will fit. I had to pull the wiper squirter bottle to get it in, but it all fits.
I have not drove the Scrambler since installing the new canister, so I will report back.
I want to put my vacuum pump on the chassis mounted vent line to make sure it is clear. It has sat open for awhile. I think the line is clear, because the other day when I was working under the hood, it actually vented some gas fumes out of the line. This was with the Scramber just sitting in the 100 degree heat!!
But, with the Jeep just sitting still for a few days, if you pull the fuel cap off, it will "pfft" a bit. I guess the fumes/pressure from just sitting are not strong enough to vent through the combination valves at the top of the 20 gallon tank, but it will vent back out the cap when you open it??
That's it for now
This Jeep did not have a charcoal canister hooked up. I had the tank vent line venting under the hood, so this Scrambler would get a bit gas stinky, especially now that it is the middle of summer.
The stock AMC canister has a bunch off hook ups and controls that are not needed in my application. I am running a TBI 350. I am running an early model computer/harness, so I have no provisions for purge solenoids. But, none of this is needed. Early truck TBI systems are simple:
1) line from tank to canister
2) purge line from canister to base of TBI
That's it. This is what I bought:
That canister fits a 1989 Suburban, plus lots of other early model TBI GM truck platforms. What it looks like:
The three fittings on top are labled:
1) Tank
2) Purge
3) Air Cleaner (the way its made, it just sucks in air here)
Compared to the stock canister, same diameter, but a bit taller:
The purge line hooks up on this port on the base of the TBI. This is a "ported vacuum" line, it only "sucks" when the throttle is open. I tested it, it works. It does not suck hard, very low vacuum. The port coming out of the TBI was smooth, so I added a clamp, but probably not necessary.
And the other end of the purge line, with the new canister installed:
And again, I added lightly tightened hose clamps, probably not necessary. The taller canister does fit in the stock location, in the stock bracket, no modifications required. It is a tight fit, but it will fit. I had to pull the wiper squirter bottle to get it in, but it all fits.
I have not drove the Scrambler since installing the new canister, so I will report back.
I want to put my vacuum pump on the chassis mounted vent line to make sure it is clear. It has sat open for awhile. I think the line is clear, because the other day when I was working under the hood, it actually vented some gas fumes out of the line. This was with the Scramber just sitting in the 100 degree heat!!
But, with the Jeep just sitting still for a few days, if you pull the fuel cap off, it will "pfft" a bit. I guess the fumes/pressure from just sitting are not strong enough to vent through the combination valves at the top of the 20 gallon tank, but it will vent back out the cap when you open it??
That's it for now
- City
- Cincinnati
- State
- Oh
There's a couple pics of a pretty red Scrambler on allpar.com today.
- City
- Baton Rouge
- State
- La
That's amazing!