• Notice for iPhone users: DO NOT use the image size reduction option when uploading photos to the forum. This causes portrait images to post as landscape. We have added a warning to the image insert pop-up as well.

Spankrjs' 1984 Long Term Project

I'd be interested! I'd like to take my time building a 4:1 D300, without my Scrambler being down for the duration.... ;)
I forgot to say I have $300.00 in it and shipping that far would be high. It really need to go to someone in this area.
 
Changed the oil, greased everything, and packed up. Heading out/up to Michigan this afternoon :fingerscrossed:

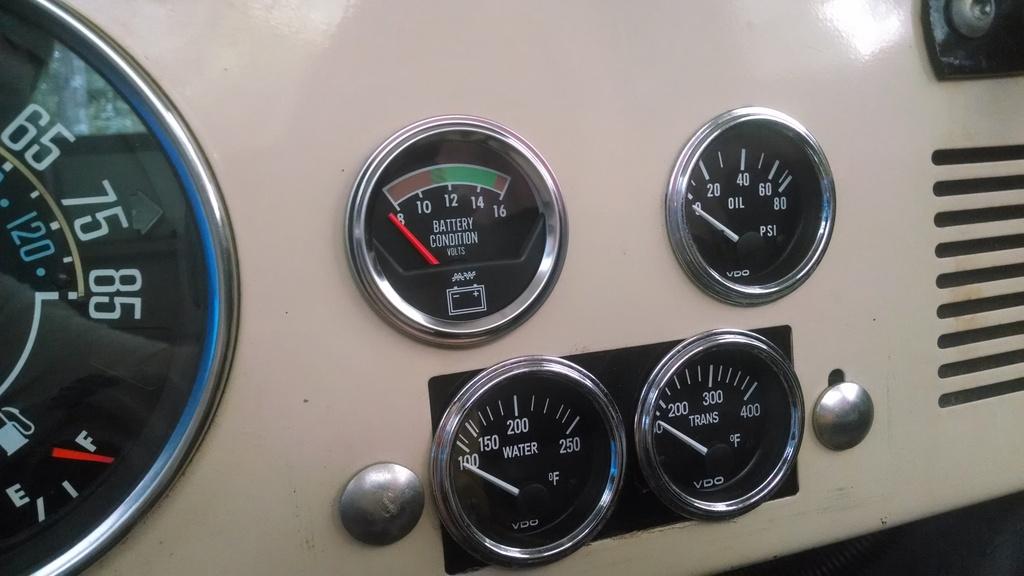
One "surprise fix" on Saturday, the OEM voltage gauge gave up the ghost, so I swapped in a replacement from NAPA, kind of nifty :

IMG_20160730_154331051_zps8ngqfhka-1.jpg


It now matches all the other replacement gauges. The Mopar fuel gauge is reading with the key off, this particular gauge does this from time to time. It should not, but it will work it self out.

Hope to see y'all in Michigan soon :wave::thumbsup::cheers:
 
Made it to Michigan, wheeled the dunes, and made it back in one piece, which is always good. However, on this trip, unlike most others, I had quite a few "issues", but nothing major. So, this update will be of the problems I encountered on this latest cross country trip.

#1) Fuel issues still occur. The new fuel lines did not fix the "hot fuel" problem. But, like usual, only occurred in MS and AL. Once I was in/north of Tennessee no problems. While down here, every two hours, like clock work, at 75-80MPH on the interstate, I would get the "slight stumble upon acceleration" problem. Ten gallons of new fuel added to the existing tank would immediately fix the issue.

My next attempt to fix this issue - move the fuel filter to the downhill side of the fuel pump. For some reason I placed the filter before the pump on this Scrambler. My red Scrambler, which does not have the "hot fuel" issue has the filter after the fuel pump. This will be a cheap/easy attempt to fix this issue. I still do not want an in tank pump, especially seeing the problems Truck had.


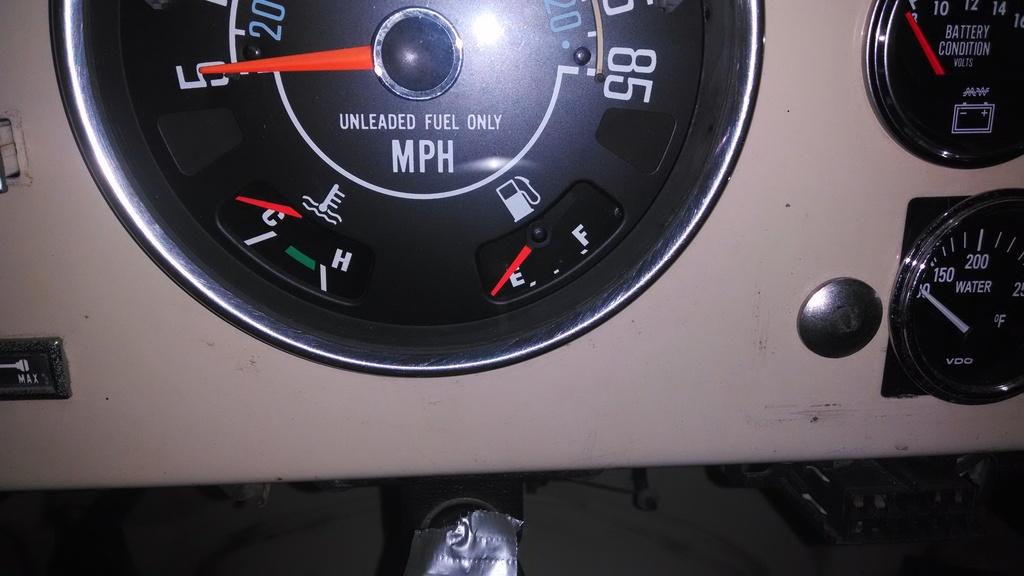
#2 Don't try to fix the gas gauge at 75 MPH!!!!!!!

IMG_20160801_190325320_zpselx6jcpg-1.jpg


The gauge was stuck on full, so I decided to pull the sender wire off the back. The only problem, I pulled the back half of the gauge off!!!!!! Easy fix, the gauges is made to come apart like this. But, I will have to pull the speedometer housing again.


#3 I had some slightly loose steering feel, which is odd, considering I had no problems on the South Dakota trip. Anyway, second gas stop in north Alabama, I checked the front wheels, slightly looses spindle nut on the passenger side. This was kind of odd, the outer nut was still super tight, the inner nut backed off a hair, but a quick easy fix:
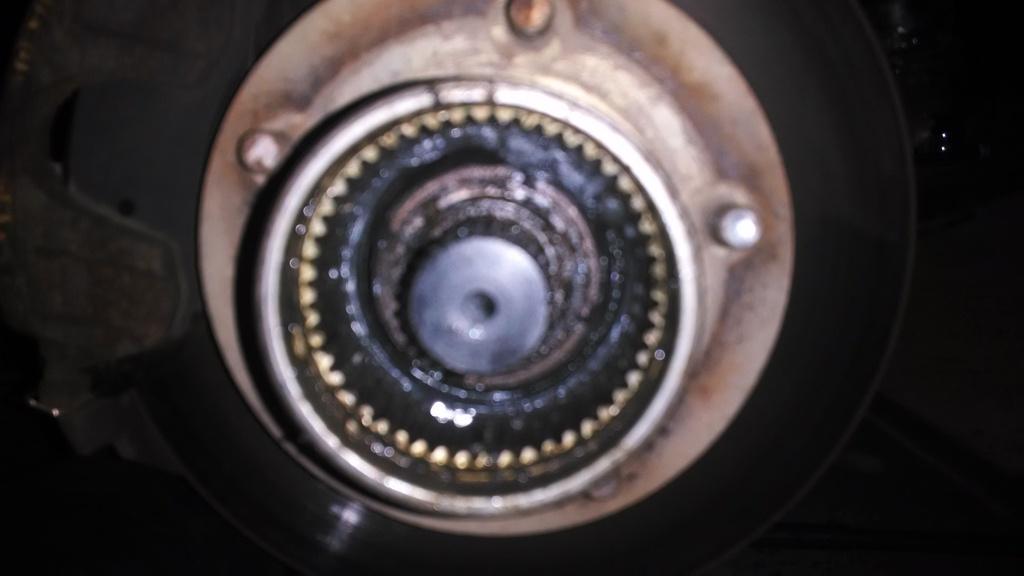
IMG_20160801_192302415_zps5u8kti7w-1.jpg


The freshly tightened/adjusted wheel bearing cured about half the looseness. This particular steering box looks original, and if it is, it has over 170,000 miles on it. So, at a gas stop north of Indianapolis, I jacked both front wheels off the ground and adjusted the steering box. This cured the remainder of the "loose steering" feel. On the adjustment, I held the center bolt still with an Allen wrench, backed off the jam nut about five turns. I would then very slightly tighten the allen bolt, then check the play at the wheel. Once I felt slight resistance, I stopped tightening the allen bolt and backed it off 90 degrees. It does not take much tightening to eliminate the lash, BE CAREFUL. Worked like a charm.


#4 Not sure where this happened, but somewhere on the trip north, my driver side motor mount parted company with the rest of the Scrambler!!!!!!

IMG_20160803_124823910_zpspvghbncn-1.jpg


I could "feel" a slight "wiggle" upon acceleration/deceleration on the road, but nothing strange, no vibrations. I didn't even know this happened until I went up Test Hill at Silverlake, heavy acceleration in 4wd, I could here a banging. This was another easy/cheap fix. I had to get an "older guy who doesn't only rely on computers" at the parts store to help me find what I needed. A $6 box contained two new round rubber mounts, and a new bolt from my spares fixed this issue. But, I think my current mounts are kind of suspect, so I will be upgrading these soon.

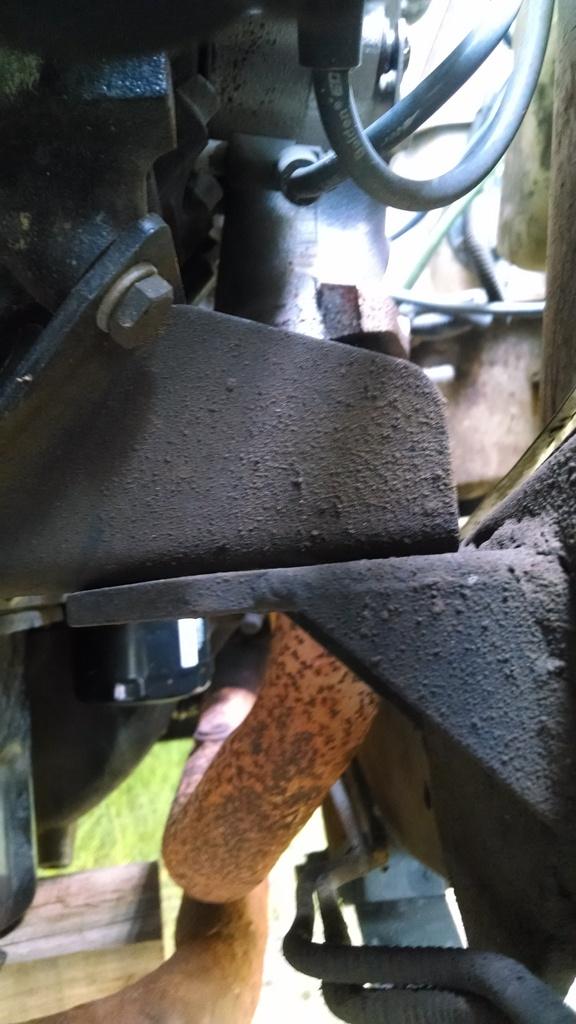
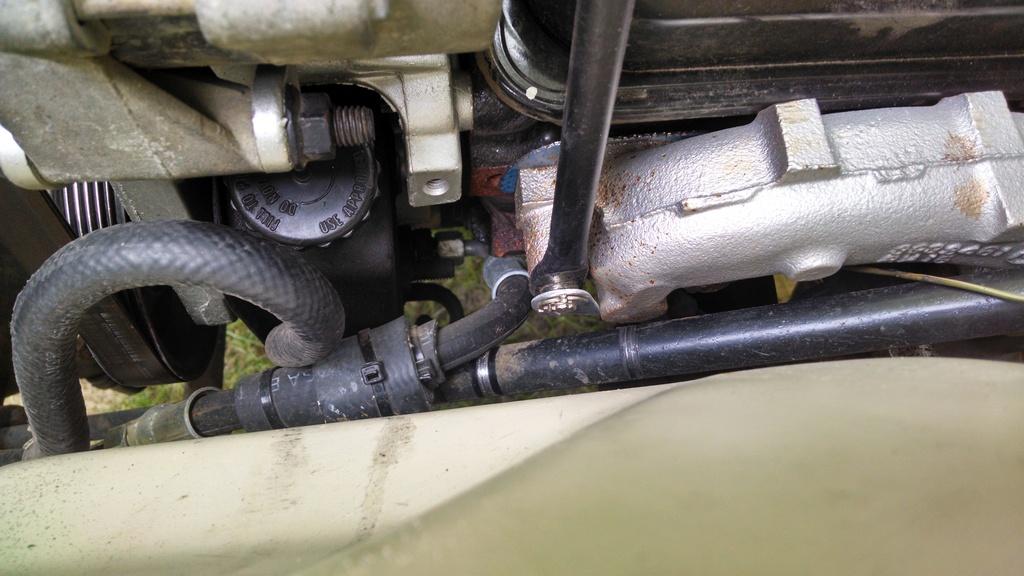
The missing motor mount caused the motor to drop some, which did cause the PS pressure line to contact the steering shaft, and the exhaust manifold also made slight contact:

IMG_20160803_124840416_HDR_zpsiiyc6qmu-1.jpg


The replacement motor mount eliminated the contact. The pressure line is not leaking, but i need to take a look at it to see how much damage happened to it. I will probably get this line remade, with a longer piece of rubber, to better clear the steering shaft.

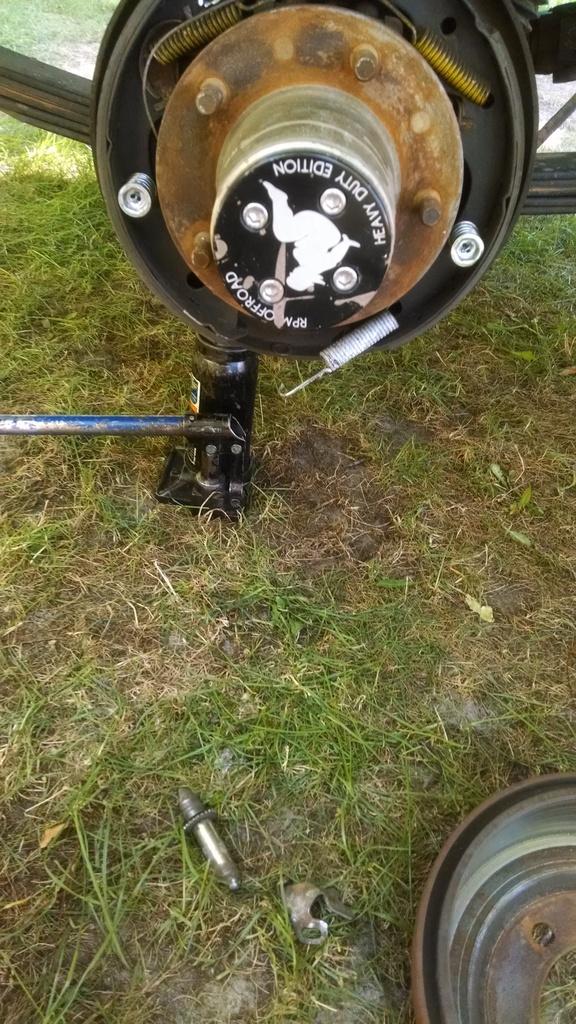
#5 This is another "mystery" problem. I put all new brake pads/drums on the back before South Dakota. All new springs, the self adjusting hardware looked fine. Well, after racing BigWalton, my brake pedal got real soft, like I blew a line. No lost fluid though. The brake booster vacuum line grommet looked "suspect", so I "borrowed" a grommet from Dustin's sister's Scrambler. That did not fix the problem. The next day, while trail riding, started hearing a grinding, sounded like it was coming from the front. After further investigation by hitting the brake pedal a bunch, something sounded strange in the PS drum, like a broke spring. Went back to camp, pulled the drum, found this:
IMG_20160805_134227391_zpsb1ogo3gv-1.jpg


The self adjusting hardware fell off? The adjuster was all the way backed in???? It DOES have the correct adjuster on this side, so I am not sure how this happened?? I had to straighten one piece out with a hammer, but it all went back together just fine, and has been holding the adjustment. So.................................. But, another cheap/easy fix.


#6 This is more of a severe aggravation as opposed to a problem, but the back suspension feels way too loose. And again, no problems at all during the South Dakota trip, and the Scrambler was hardly driven between the two trips, and was not drove hard.

After South Dakota, I actually pulled the entire rear suspension apart to check for problems. The u-bolts were fine, the shocks were fine, the spring packs looked fine, and the center pins, though very slightly "s' shaped seemed OK.

I only carried maybe an extra 100 pounds at most on this trip, but the rear is just way too loose feeling at high speeds/moderate cornering. Feels squirmy, if that makes sense. The front end is fine, sway bar good to go.

So, I will pull the rear suspension back apart and look for problems. Maybe a center pin or spring broke?????? If no problems are found, I might add an "add a leave to each pack". I am going to drive the Scrambler unloaded first, to see if this issue is load related. But, I probably only had 250-350 pounds in the back at most, not like it was overloaded. Moving the 5 gallon gas can/ice chest from the rear bumper rack to the bed did help this issue some.


All in all, a great trip. A few easy/cheap fixes and all was good.

A few "fun" pictures:

After the "midnight sand paddle tire fairy" visited/struck:

IMG_20160805_082416601_HDR_zpsh00wtyfs-1.jpg


Country Dairy:

IMG_20160803_165626928_zpsl2mczhlp-1.jpg


Tim's Scrambler next to mine at the top of Test Hill:

IMG_20160803_195239893_HDR_zpsvsjysxey-1.jpg


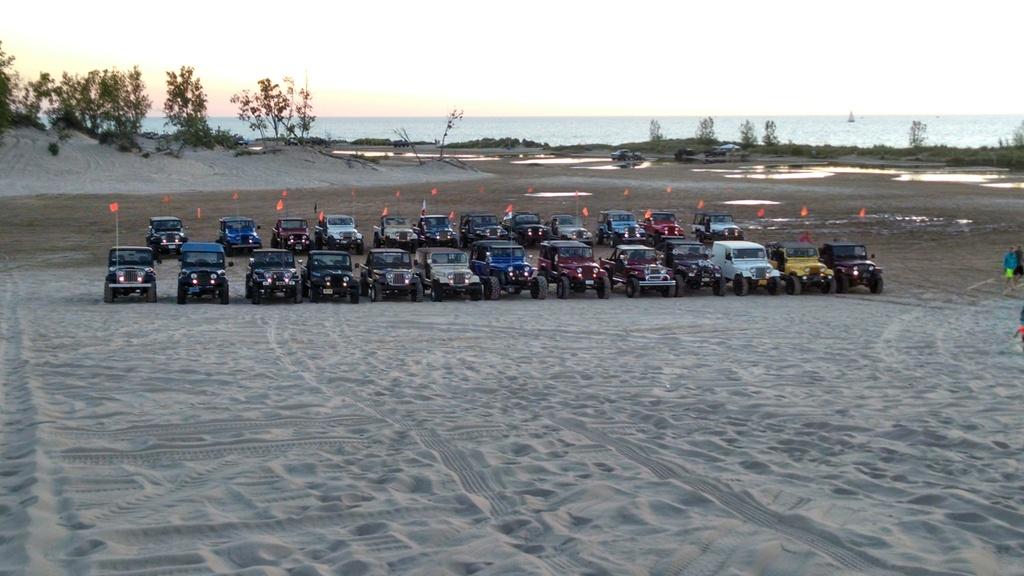
One big group shot:

IMG_20160806_210035910_HDR_zps1aqoquku-1.jpg


I will update on the fuel/suspension issues, that's it for now:wave:
 
.
.

Like always, great write-up - always appreciate your details posts.

Think it's awesome how you drive your Scramblers cross-country, wheel them and turn around and drive 'em home!

.
.
 
Awesome my friend. Pleasure seeing you again, just to short of a time frame.

Thanks for being a big part of Sand Blast. :wave:
 
.
.

Like always, great write-up - always appreciate your details posts.

Think it's awesome how you drive your Scramblers cross-country, wheel them and turn around and drive 'em home!

.
.

Thanks :cheers: Yep, I like to drive my Scramblers, but it takes just a little of this :crazy: to do it :thumbsup:

The sad thing is, I don't think I saw a single CJ on the trip up or down on the highway, poor kids these days, all they see are JK's on the highway :(


Awesome my friend. Pleasure seeing you again, just to short of a time frame.

Thanks for being a big part of Sand Blast. :wave:

Good seeing you again too, Toby:thumbsup: Agree, always short on time :(
 
I don't see how the inner spindle nut could possibly get loose with the pinned inner nut. The inner spindle nut still has the locking pin in it right?
 
I don't see how the inner spindle nut could possibly get loose with the pinned inner nut. The inner spindle nut still has the locking pin in it right?

Yes, the pin was still intact, the washer's tab was still in the groove in the spindle. Inner nut loose, outer nut still tight :shrug:

No problems on the South Dakota trip, drove it around the yard some, then it gets loose on the way to Michigan. When I found that it was loose, I thought maybe the wheel bearing(s) had an issue. I did not pull them out to inspect, everything spins/feels fine and it made it to Michigan and back again :shrug:

I had the same exact issue last year, on the driver side, fixed it in Mr. Beeps garage. Very strange :shrug:
 
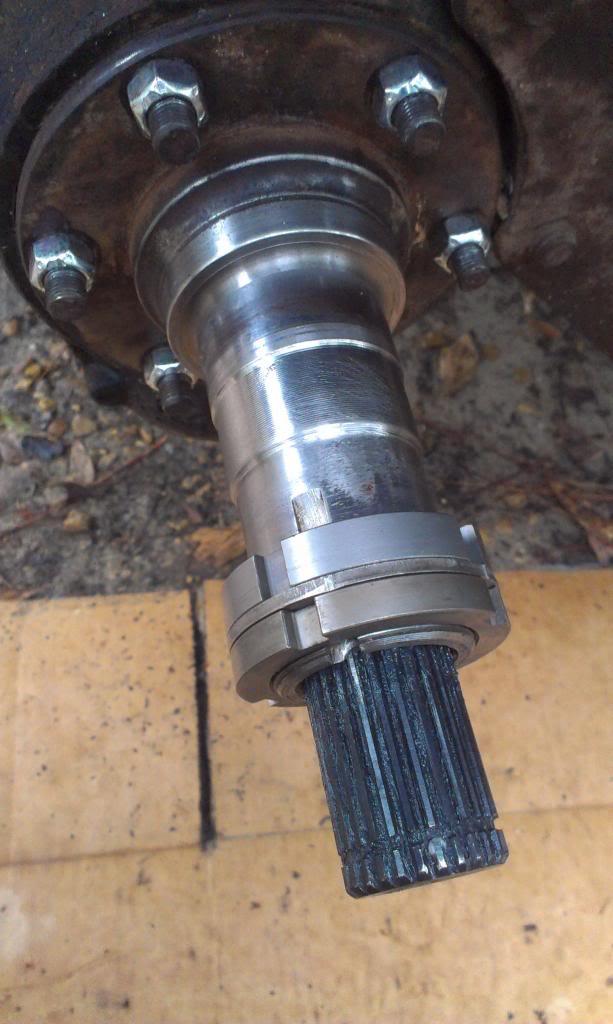
Front spindle nut set up, pictures from when I assembled them a few years ago:

Quick picture showing the front spindle nut stack. This is very similar to the rear, minus the "set screws" in the outer lock nuts.

IMAG0598_zpsf55a2557-1.jpg


Inner nut, note the "tit" at 6 o'clock.

IMAG0599_zpscf698e29-1.jpg


"In between washer", note how the "tit" fits through one of the holes.

IMAG0600_zpsa5cf06e0-1.jpg


And the outer lock nut.

IMAG0601_zpse4d7283a-1.jpg


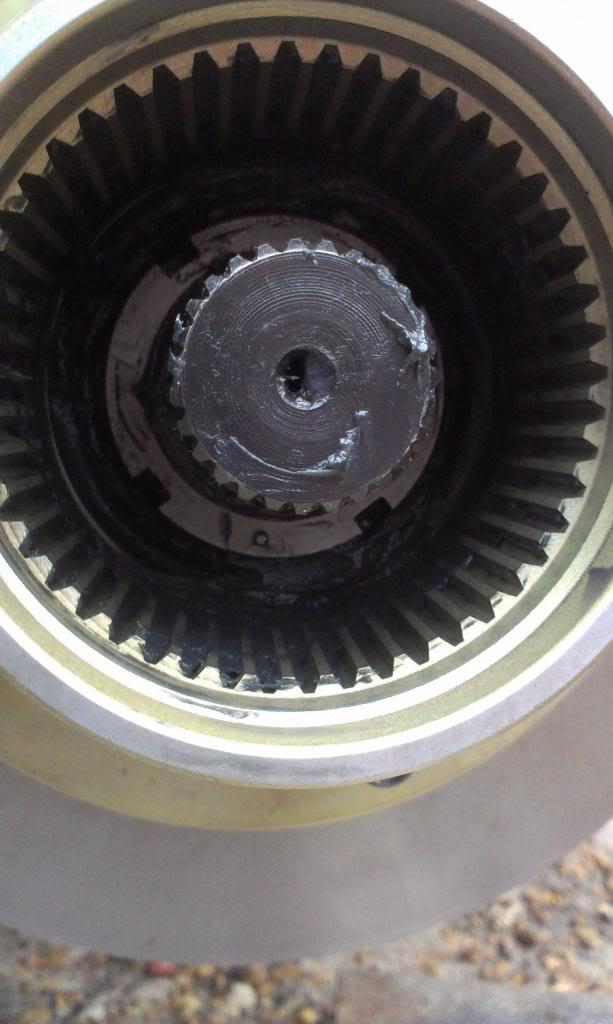
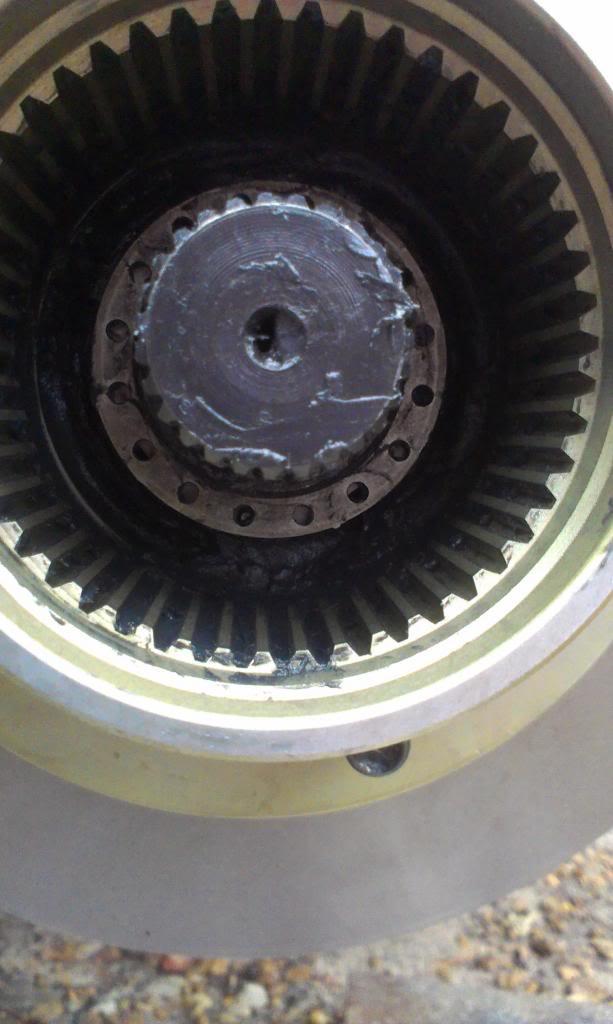
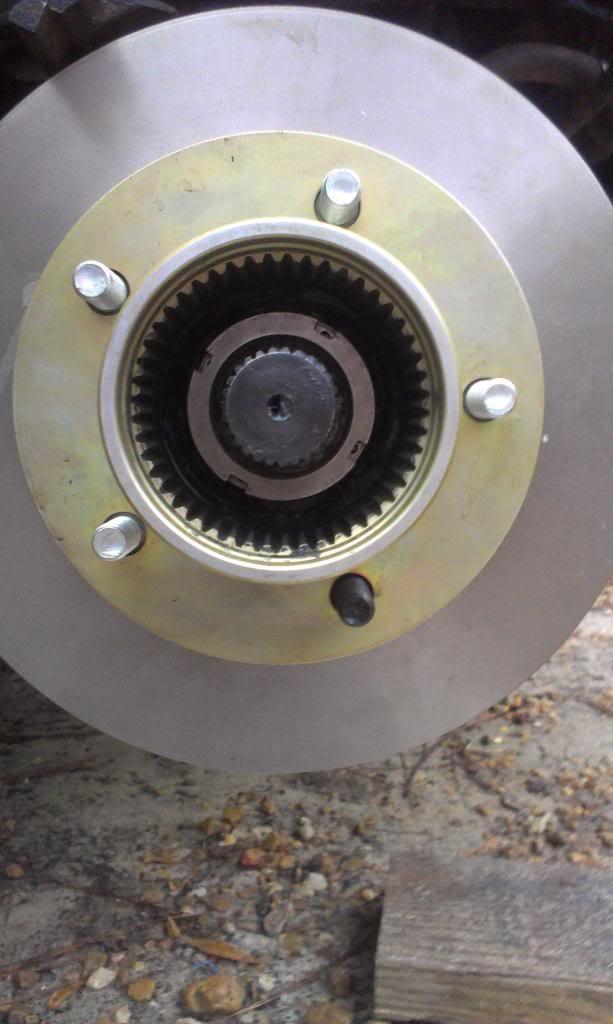
Inner hub installed, secured by small snap ring at the end of the axle shaft and large retaining clip inside the hub body. The same as the rear hubs.

IMAG0602_zps22bc1f62-1.jpg


And the hub dial installed.

IMAG0603_zps979e73d1-1.jpg
 
Any chance the bearing races weren't fully seated in the hubs?

Usually the looseness would show up pretty quickly after installing them in that case, though... and yours had a lot of miles on them.

Still, something settling in the hubs looks more reasonable than the locked nuts coming loose on the spindle. :shrug:
 
Any chance the bearing races weren't fully seated in the hubs?

Usually the looseness would show up pretty quickly after installing them in that case, though... and yours had a lot of miles on them.

Still, something settling in the hubs looks more reasonable than the locked nuts coming loose on the spindle. :shrug:


That's the only thing I can think of, loose race/bearing not seated all the way, but it sure took awhile to show up :shrug: :wave:
 
That's the only thing I can think of, loose race/bearing not seated all the way, but it sure took awhile to show up :shrug: :wave:

Have a talk with the installer.....maybe ask for a refund..:cheers:
 
Started turning wrenches on this one again, I have to get ready for an early September road trip to Missour/SMOR. At this rate, I am never going to get to work on my poor Red Scrambler :eek:

Basically, working on a few fixes/potential fixes to some of my minor problems encountered during the Michigan trip.

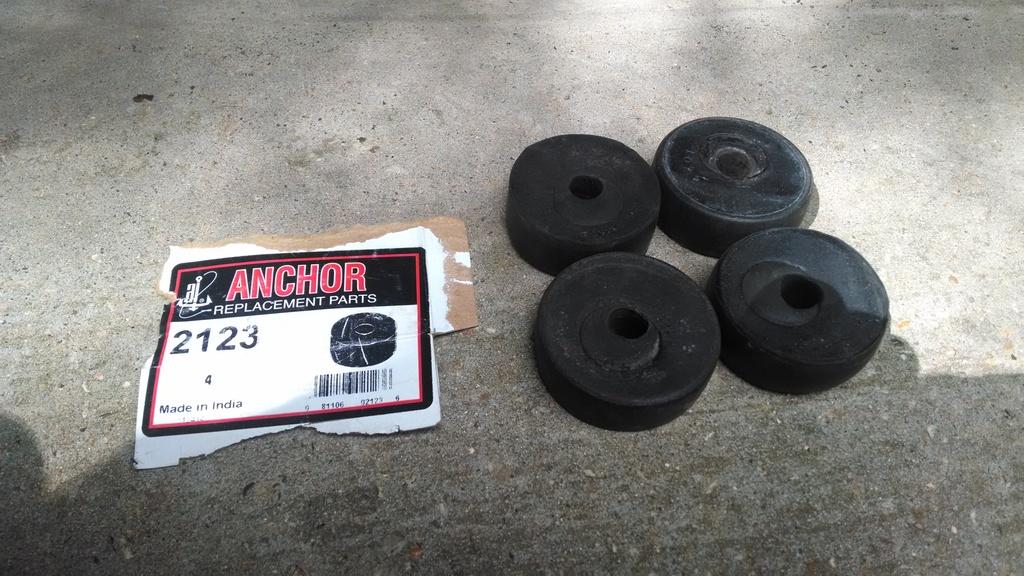
Easy fix first, new motor mounts. The new ones pictured below:

IMG_20160820_100406340_zpswtobuaca-1.jpg


One important note - the smaller lower rubber bushings have a raised lip that fits perfectly into the holes of the frame mounted brackets, locking it in place, almost like the frame mounts installed on this Scrambler were made for these motor mounts. The rubber on these new mounts is also firmer, the old/existing mounts were more squishy. The silver metal pieces enclose around the upper mount, probably more for "bling" then anything else, but I went ahead and installed them.

Not sure exactly what the old mounts were, but these cheap replacements I bought in Michigan worked pretty good, $6 a pair, pretty cheap, but softer then the new mounts. The Michigan mounts and the originals look similar:

IMG_20160820_104425834_zps8pgvhpxj-1.jpg


These "old" mounts are the same OD as body mount bushings, could be stacked up/used as replacements in a pinch.


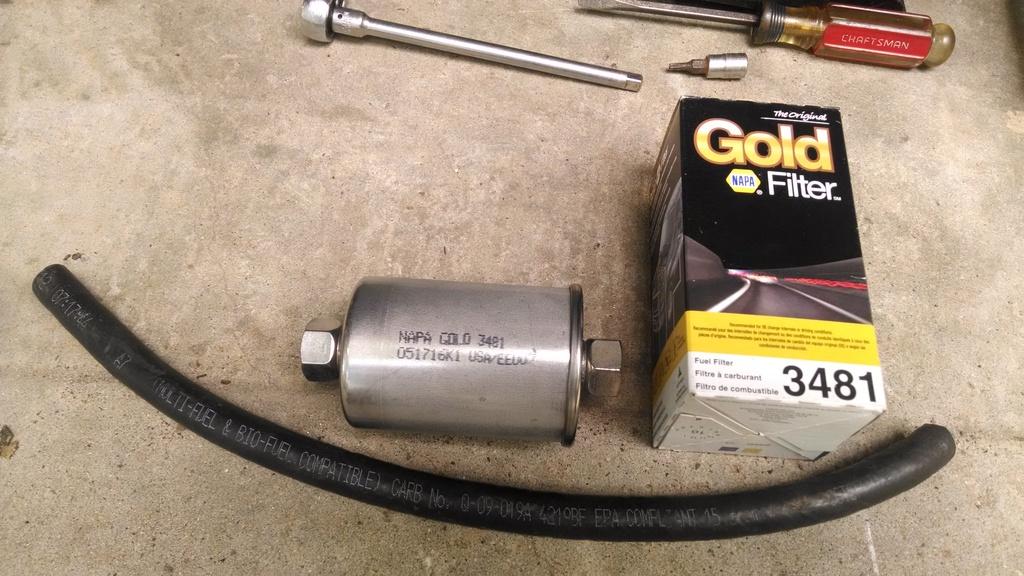
Going to try one more "easy/cheap/fast" fix for the "I think it is a hot fuel issue". I previously had the fuel filter mounted in front of the fuel pump on this Scrambler, and I have the "hot issues". On my Red Scrambler, the filter has been mounted down stream from the pump, never have had the "hot issues". Worth a shot.

Since I have the factory GM fuel lines coming off the throttle body, I decided to use a GM style filter, pictured below:

IMG_20160820_104432360_zpswnaytap6-1.jpg


From my junk yard explorations, I found that GM mounted the filter right at the beginning of the flex line that runs to the throttle body. Since that is where I connected to my frame mounted hard lines, I figured this would be a good spot to install the filter.

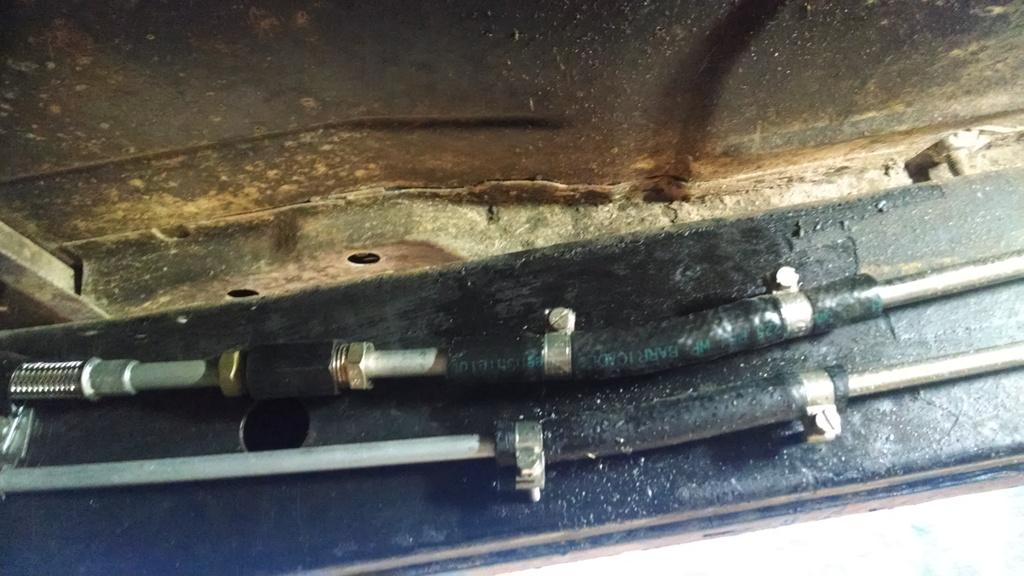
In the below picture, the upper line is the supply line. You can see my adapter piece that is threaded into a coupling; the coupling connects the Saginaw ended flex line to a short piece of metal tube. The short piece of tube has the Saginaw fitting on one end, and a bubble flare on the other.

IMG_20160820_105447638_zpsf1irwjrc-1.jpg


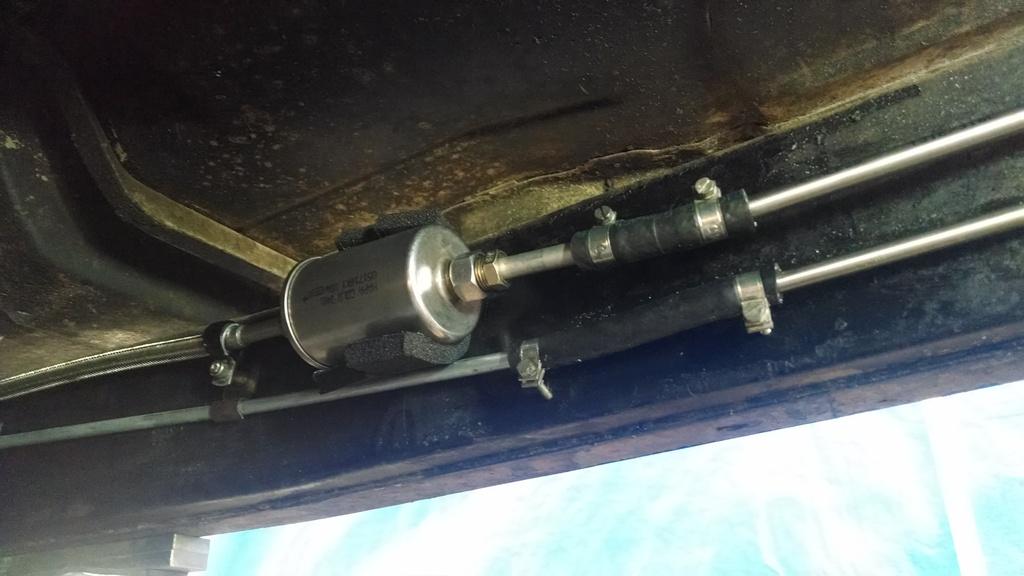
So, I simply threaded the new filter directly to the GM supply line, threaded the short piece of tube into the other end of the filter, short piece of rubber hose to tie into the frame mounted hard line, easy job:

IMG_20160820_115412936_zps1wsj3tx5-1.jpg


I temporarily stuck some self adhesive backed weather stripping to protect the metal filter from chaffing against the frame. I plan on revisiting this, either with a piece of rubber or a frame mounted bracket. I need to go back to the junk yard, see what GM did, get some ideas.

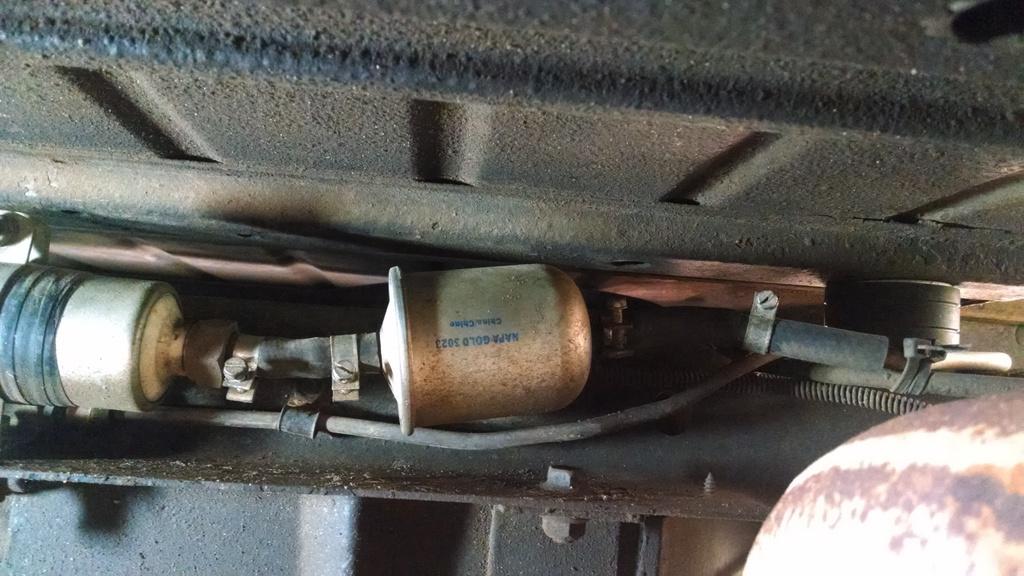
My old, pre-pump filter. It is a 5/16 in and out, the same filter I use on my red Scrambler:

IMG_20160820_120753666_zpsh2yptzaz-1.jpg


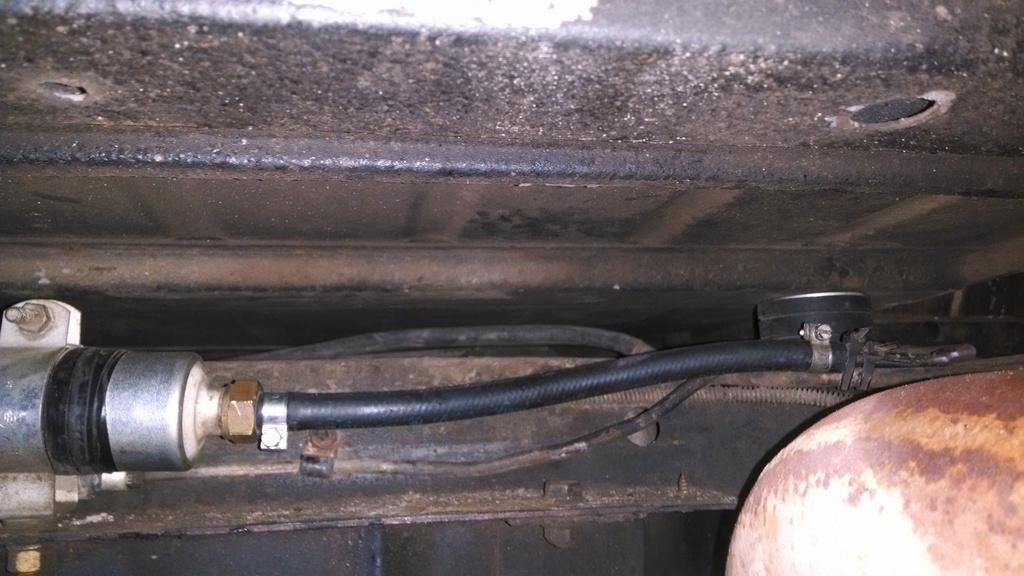
I simply removed the filter and ran a piece of new rubber hose in its place:

IMG_20160820_122803046_zpsh2zjxuwl-1.jpg


Another potential issue, that I forgot about. From the pump to the throttle body, 3/8 supply line, just like factory GM. From the throttle body back almost to the tank, 5/16 return line, just like factory GM.

Problem???: I am using the stock CJ 20 gallon sending unit. So, I have 5/16 supply from the tank to the pump. I forced the 5/16 rubber line over the 3/8 inlet on the pump, not the best, but it works. So, is this short distance of 5/16 a "choke point"??? I wouldn't think so with a stock TBI :shrug: Similar issue with the return line, stock CJ sending unit uses a 1/4" return, so another short distance of "undersized" plumbing.

Anyway, maybe the relocated filter will be my silver bullet :fingerscrossed:
 
The last "issue" I have been having with this Scrambler - The suspension/handling at interstate speeds feels a bit "loose". NOT the steering, steering is fine. Almost like the springs are too soft in the back, and/or something is broke/loose.

I put the Rubicon Express 4.5" lift on this Scrambler before the South Dakota trip. Everything felt fine on the way up and on the way home. I used the Scrambler around the house some for a few weeks, no problems. So, I packed it up for Michigan. On smooth sections of interstate/highway at 75+MPH, no problems. However, when I would hit bumps, expansion joints, uneven road surface, emergency lane changes, the Scrambler felt loose in the back. Spooky loose. Steering is fine, but the whole Scrambler just feels loose, almost like no sway bar on the front, but the looseness seems to be coming from the rear. It felt so bad on the way up to Michigan, I actually jacked the whole rear end up off the ground, and checked everything. Nothing loose, nothing broken. I tightened up the spring main eye bushings, this helped some, but negligible improvement.

To be fair, I probably had a bit more weight in the bed on the way to Michigan vs. the South Dakota trip. But not much, maybe 50 more pounds. And talking weight, two passengers up front and maybe 300 pounds in the back, and 300 pounds would be pushing it. So, not like I am "overloaded".

I have felt this same "looseness" in my Red Scrambler under the same circumstances: loaded up at interstate speeds. BUT, it is not even close to feeling as bad as this one. I think the Detroit makes this slight "bad handling" characteristic worse. In my red Scrambler, I think I have commented before, that a rear sway bar would cure this issue. On the this Scrambler, I think it needs more then a rear sway bar:twocents:

SO, lets take the whole suspension to pieces, again, and check for problems. At the rear:

1) Bilstein shocks, still good to go
2) U-bolts - still intact and torqued to spec
3) Center pins - intact, not broke or bent or twisted
4) All bushings - still intact
5) Shackle hangers/spring eyes - intact and fine
6) Rear axle - still straight, not bent

So, everything seems OK in the back. Maybe the RE Springs are just too soft for how I drive, i.e. speeds and load. After not finding any broken/damaged/bent/missing pieces, I decided to add a spring to each rear leaf pack:

IMG_20160820_130705872_zpsmh9yymhc-1.jpg


I am also installing new U-bolts and center pins. I purchased extra center pins to keep as spares, I have broke these before, and if they are broken it definitely affects handling!!!!!!!!! I added a Rubicon Express RE1400 leaf to each pack:

http://www.rubiconexpress.com/Suspe...t.aspx?t_c=1&t_s=101&t_pt=5488&t_pn=R/ERE1400

They say they are for YJ springs, but they fit the RE CJ springs, too. They are not an "add-a leave", they are actually another main leaf, minus the military wrap. They are not super stiff, seem to be the same stiffness as the main leaf in the RE spring packs. I have not drove the Scrambler yet, so I can not comment on the stiffness they add. I do not think they will make the packs "hard", I can still pretty easily push the suspension down.

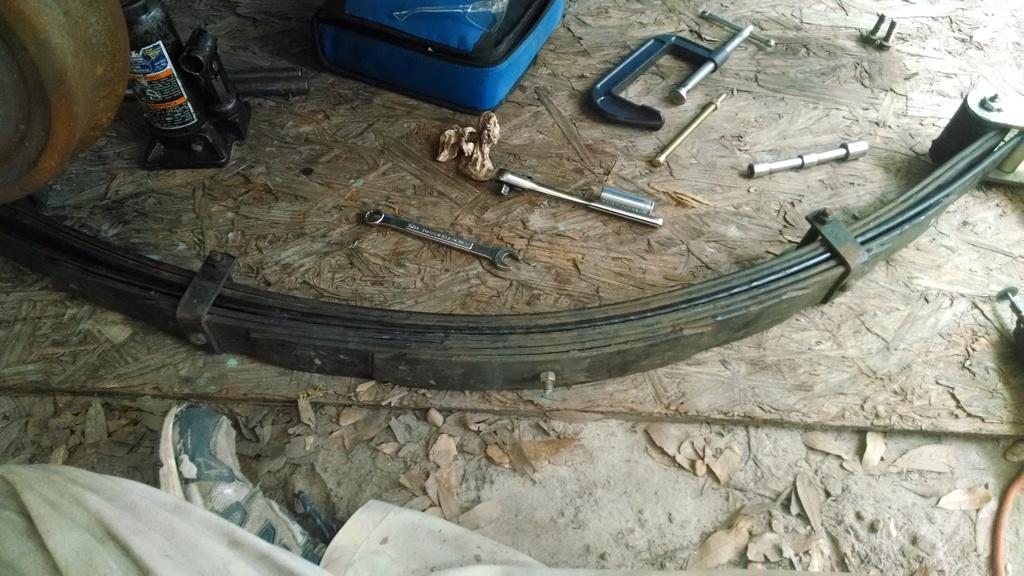
These extra leaves did not come with any instructions, but I think (hope) pretty self explanatory. I took the center pins out, after clamping the spring pack together, removed the two clamp bolts, moved the top two springs out of the way, inserted one of these springs as the "third spring" in the pack, and then reassembled the spring packs with new center pins. The extra long center pins are a big help when reassembling the spring packs, and a Dremel quickly cuts off the excess length:

IMG_20160820_150019668_HDR_zpsmrgkzvsw-1.jpg


And with the miracle of cell phone cameras, TA-DA, new 7 leaf rear spring packs:

IMG_20160820_151346437_zps2ht53h8a-1.jpg


I will report back on the affects of the extra leaf, in regards to handling/comfort, once I drive the Scrambler again. I would assume you could add one of these leafs to the front end, too.

Since I did not find anything broke in the back, I wanted to check the front end, too. So, I took the whole front suspension back off, again, to inspect.

My findings so far:

IMG_20160822_182056474_zpswq1c6chc-1.jpg


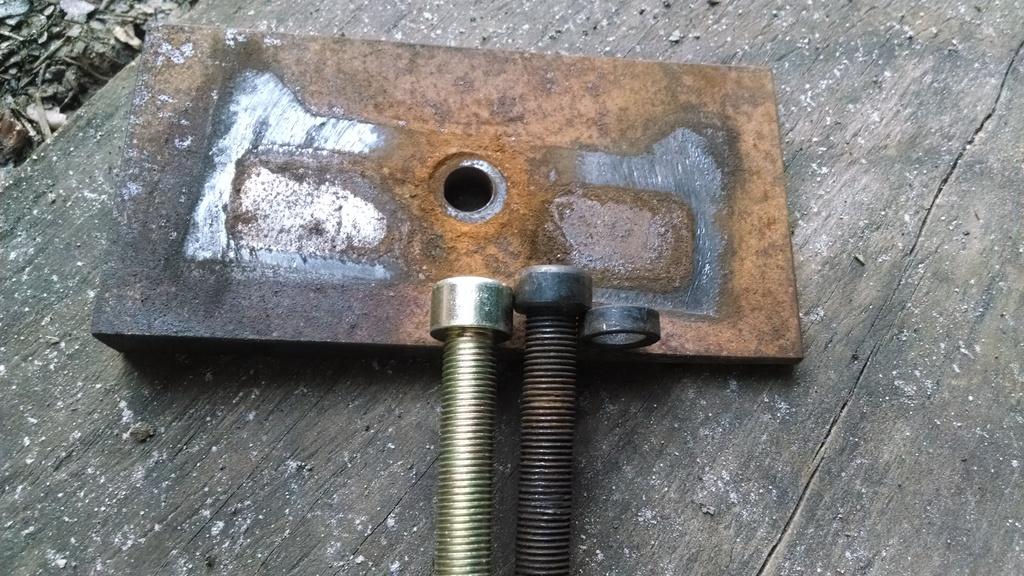
The above picture shows the driver side center pin, the black one, next to a gold colored replacement. Note the "head height", and more importantly, the impression on the steel shim. It looks like the center pin I was using, coupled with the spacer, was a hair too tall. You can see on the shim where the center of the front axle perch did not make an impression on the shim because the head of the center pin was sitting slightly below the spring perch. I remember this issue on my Red Scrambler, but I must have forgot about it on this one. The stock RE center pin/spacer height is too tall if you are not using the factory steering stabilizer bracket that fits between the axle perch and the leaf spring. Anyway, I am going to install new center pins and U-bolts on both sides. I am not sure if the above was enough of a "problem" to notice, but maybe, so new center pins will fix this.

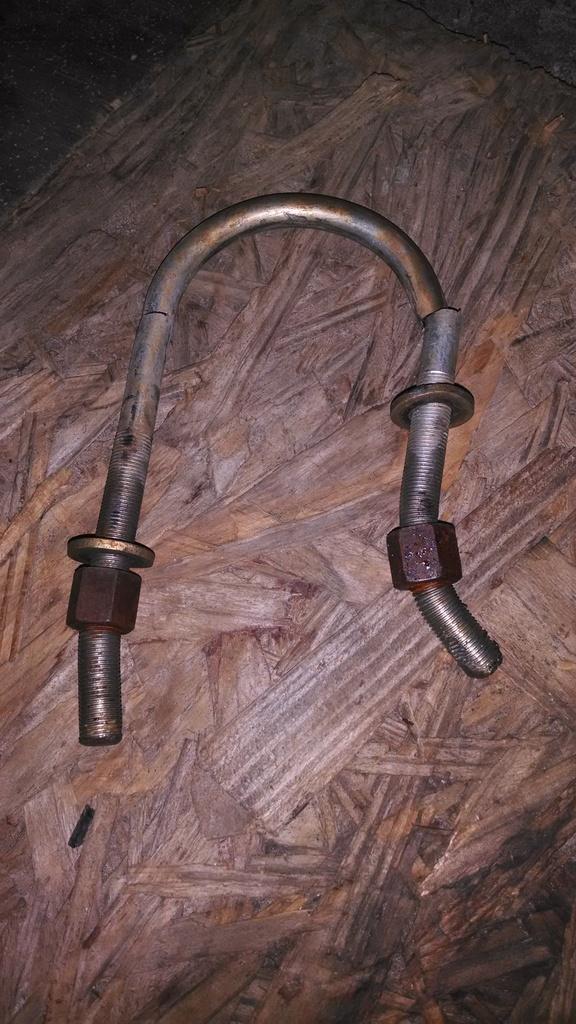
Speaking of U-bolts, I always forget to trim them, so they hang below the nifty U-bolt slider things, and get mangled. Amazingly, I only really battered the inner PS front U-bolt while in South Dakota:

IMG_20160822_191549370_zps8k6tszws-1.jpg


Dremel tool to the rescue!!!!!!!!!!!!!!!!!

IMG_20160822_192652929_zpsvhmts8hd-1.jpg


I suspected this battered U-bolt might have been contributing to the looseness, but it was not. The nuts were still torqued, and when I was cutting it with the Dremel, it broke free like a gun shot once I cut about 85% of the way through it, so it was definitely still tight/doing its job.

Anyway, new center pins and U-bolts will be installed on the front. I am also going to inspect:

1) Shocks
2) Bushings
3) ball Joints
4) Tie rod ends
5) Steering box mounts
6) leaf springs
7) sway bar sytem

So far, everything up front feels/looks/seems fine, but I will check it all anyway.

Hoping the extra leaf in the rear firms it up a bit :fingerscrossed:
 
Just an FYI they make a filter that is threaded on engine side and barbed on tank side(like you made). I believe it was for the impala. I ran it in exact same spot as you have yours. Which Bilsteins are you running? On my wifes grand it did not take much of a load to have the same kind of issues you are talking about. Drove and rode fine empty.
 
Back
Top