• Notice for iPhone users: DO NOT use the image size reduction option when uploading photos to the forum. This causes portrait images to post as landscape. We have added a warning to the image insert pop-up as well.

Another Scrambler Purchase/Road Trip - UPDATE- BODY ON FRAME AGAIN

I have had those steering mount inserts break free of the injected plastic before. I believe they need to be secured as they keep the column from moving in and out. Yes, there’s the bottom mount but that’s just thin sheet metal. Anyways, I used some 2part urethane repair epoxy to glue them back in. The epoxy sets up to a similar hardness of the plastic that was in there originally.
 
Finally found the rattle/tick that has been driving me absolutely crazy.

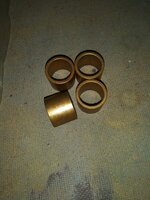
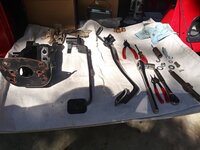
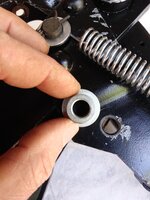
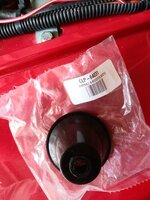
When I originally rebuilt this Scrambler 10 years ago there were a few parts I did not change for whatever reason. Four of these parts, that I never installed:

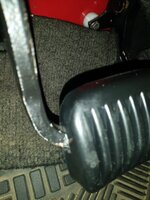
20210129_185636.jpg

These are the brake/clutch pedal bushings. They seemed OK back then, now there is some play here, and on the pedal cross shaft there is too much lateral play.

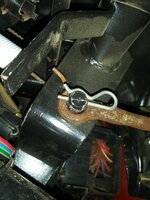
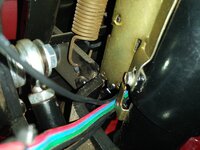
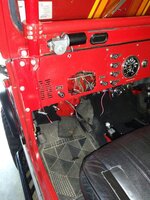
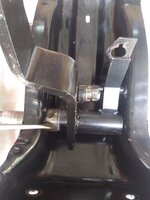
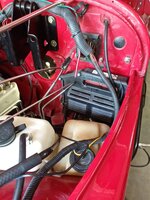
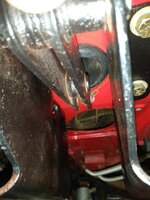
I am glad I found the source of the noise. But, it won't be easy to replace these parts, they are hidden up above the steering column, attached to the big steel plate thing that holds the pedals and connects the firewall to the dash pad, and holds the master cylinder on the engine side.

20210131_131247.jpg

20210131_131232.jpg

Since this will be a major PIA to fix, I will wait until after I can get the Scrambler back in my garage in the space that currently holds JeepAddicts red Scrambler project. Since I have to pull the master cylinder, I will also upgrade to power brakes. Nothing the matter with the non power assist, except on the trail if you have to hold a hil for a long time. I guess I'm getting soft in my old age LOL!!!

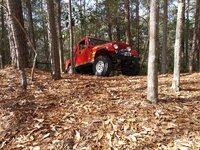
Took a break from Jeep work this weekend, did some yard cleanup since the weather was nice, that's it for now!!!

20210131_124041.jpg
 
I went from PB to non-PB, simply because when I needed a new MC/booster, they weren't available without spending $$$ on a Vancobs setup or something similar. The good thing about non-PB is when you stall it doesn't get super hard to hold the Jeep in place!

And back in the mid 90's I noticed my clutch pedal would rattle on bumps. Figured out it needed those bushings. Looked at what was going to be required to get to them....and they're still sitting in one of my toolboxes....lol
 
I went from PB to non-PB, simply because when I needed a new MC/booster, they weren't available without spending $$$ on a Vancobs setup or something similar. The good thing about non-PB is when you stall it doesn't get super hard to hold the Jeep in place!

And back in the mid 90's I noticed my clutch pedal would rattle on bumps. Figured out it needed those bushings. Looked at what was going to be required to get to them....and they're still sitting in one of my toolboxes....lol

Yeah, I can get a new, stock, booster/master cylinder from NAPA for around $150.00, plus a $50 core, but I have an old booster/master cylinder.

I need to order the lines from InLine Tube that run from the proportioning valve up to the new master cylinder, I have the booster bracket/arm.

The fuel injection has almost completely eliminated stalls, except driver error :D

Besides the bushings, there might be some missing wave washers/spacers, will have to see. Hopefully no wear on the shaft.

Won't be fun, but "ain't no hill for a stepper" 😜
 
Ol Redneck Ray knows his sh!t. I‘m fortunate enough to be good friends with him. But man this thread has been viewed 360K times. There may be threads out there with more views but 360K views and 2K replies. Impressive!
 
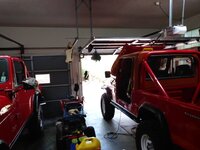
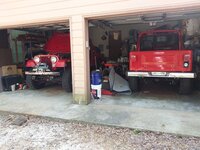
Two red Scramblers in the garage!!

20210515_161244_HDR.jpg

After about an hour, really wasn't too bad pulling it all apart.

20210515_171616.jpg

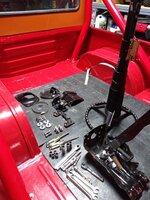
Bed full of parts and tools.

20210515_171636.jpg

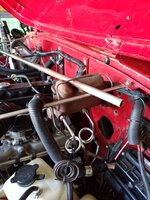
I will probably wait until after I reinstall the pedal assembly and test drive before I swap in the power brake parts. For now, I left the manual brake master cylinder hooked up. I "RedneckRay" suspended the master cylinder with a piece of electrical conduit!!

20210515_171623.jpg

This master cylinder has a very tiny leak at the back, so good time to upgrade. I painted all my power brake brackets/booster today, so I can install this stuff in a couple of days. I will probably swap the brake parts with the Jeep outside, so I can easily hose off all the paint eating brake fluid that goes everywhere!!

Anyway, will pull the pedal assembly apart tomorrow and see what I can find.

That's it for now!!
 
It's not too hard to take the pedal assembly apart, IF it is removed from the Jeep. This would be a huge PIA if it is installed:

20210516_094543_HDR.jpg

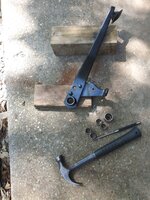
The pedal bushings did not have excessive wear, very minor actually, but I went ahead and removed them. Simple punch/hammer socket removal:

20210516_100613.jpg

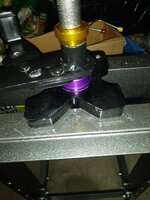
Used the Harbor Freight press to press in the new bushings:

20210516_101422.jpg

I added a thin nylon washer where the screw driver is pointing, brake pedal, to take up a little bit of slack.

20210516_110830.jpg

Same thing, this time on the clutch pedal:

20210516_133909_HDR.jpg

I was also missing the washer that sits between the clutch pedal snap ring and the clutch pedal bushing. I found a regular washer, the thickness I needed to take up the slack, and machined out the center slightly with the Dremel, to keep the washer tight fitting on the end of the pedal shaft:

20210516_133915_HDR.jpg

The new bushings did NOT magically work out of the box. On the brake pedal, I had to work the pedal back and forth repeatedly on the shaft to "free" them up. The bushings are the self lubricating type; when I pressed them into the pedal bores, they were weeping out lubricant. I added a thin coat of motor oil to the shaft. On the clutch pedal, I had to lightly hone out the bushings with some 400 grit sand paper to install the pedal on the shaft, AND get it to pivot. Only took about 5 minutes. Anyway, the new bushings definitely removed a little bit of slack.
 
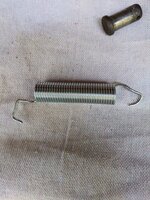
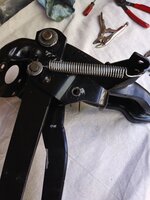
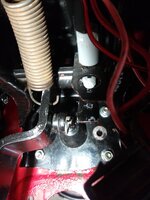
On my red Scrambler, I did NOT have a clutch pedal return spring installed on the pedal bracket. The return spring on the clutch linkage, down by the bellhousing, was enough to pull the throw out bearing back off the pressure plate. But, the pedal could use this spring.

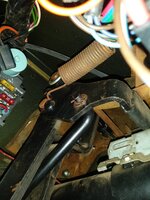
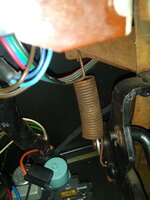
The two below pictures are the OEM clutch pedal return spring on my 1983 green Scrambler:

20210516_135822.jpg

20210516_135850.jpg

You will NOT find one of these at the hardware store/local parts houses on a Sunday morning.

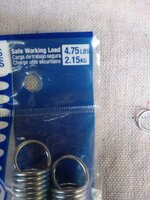
I went to Lowes, bought this spring:

20210516_143012.jpg

20210516_143023.jpg

A few minutes with some pliers:

20210516_144004.jpg

And installed:

20210516_144515_HDR.jpg

It does work, BUT could be a bit tighter. The pedal snaps all the way back up 90% of the time. The other 10%, the pedal stop misses the bracket by about a 1/4" to the "full up position". But, this spring, coupled with the bell housing spring, might be enough? I might add an additional lighter spring to this stiff one, or see if I can find a stiffer spring. I tried some old drum brake pad return springs, and they will work, but they are super stiff!!!!!!!!!!!

One other potential wear point, on the clutch pedal, that I don't have:

20210516_144546_HDR.jpg

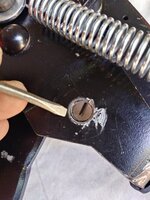
This is the hole where the clutch linkage bolts to the clutch pedal. Sometimes, this hole will get wallowed out. Mine is still perfectly round. I use aftermarket clutch linkage that uses spherical rod ends and bolts to attach it to the OEM pedal/bell crank, and the bolt is still a tight fit through the hole.

If this hole is wallowed out, something like this could repair it:

20210516_144806.jpg

This is a "reducer bushing". You could drill the hole out to 1/2", slip this in, regain your perfect 3/8" hole. I got this bushing from NAPA, I think for a pulley/idler bearing.

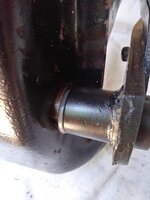
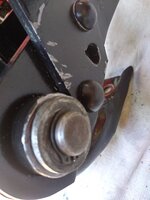
I do need to fix this bit of wear on the brake pedal stud, where the booster/master cylinder linkage connects, you can see a bit of wear:

20210516_110830.jpg
 
For some reason, my aftermarket dash board was missing a hole. Part of the pedal assembly bracketry bolts to the back of the cowl/dash board. Might as well drill it now.

Some measuring/marking/magnets to catch the ,metal shavings:

20210516_153221.jpg

Temporarily bolted the pedal assembly/master cylinder back into place:

20210516_160635.jpg

Ordered a few parts today, and need to repair the brake pedal stud. The more I think about it, I might as well install the power brake assembly now, while the steering column is out. It could be swapped later, but is so easy to get to now.

Don't know if I'm coming or going!!!!!!!!!!!!!!!!!!!!!!!!!

20210516_160652.jpg

That's it for now :wave:
 
If you cut that spring shorter and pull it back out to the length you need, it will stiffen it up. Basically over stress it to get more length after cutting it short. A bit of a game to nail the stiffness and length and you have to be sure there’s enough throw after you’re done, but I’ve done it before to get the “wrong” springs to work in an application.
 
I completed the pedal/steering column reinstallation, and power brake upgrade this weekend, mostly.

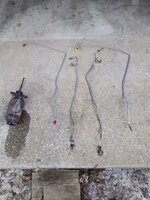
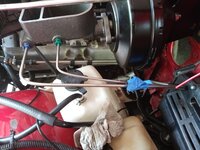
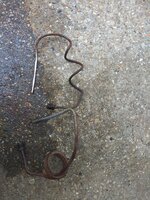
Old manual brake master cylinder and the manual brake lines that run from the master cylinder down to the proportioning valve. Also pictured, the new stainless lines I ordered that run from the master cylinder to the proportioning valve:

20210521_173758.jpg

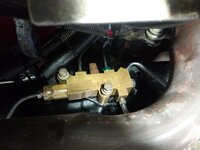
I let the new lines kind of flop around up top while I installed them into the proportioning valve:

20210521_174955.jpg

After getting the old lines loosened up from the proportioning valve, I actually loosened the proportioning valve from the frame. This little bit of play/float made getting the new lines installed much easier:

20210521_182609.jpg

I temporarily taped the line clips to the lines, in the correct orientation, to keep them from sliding down the lines when I was trying to tighten them up into the proportioning valve. Getting the two lines installed into the proportioning valve is fun!!!!!!!!!!

20210521_182651.jpg

Even more fun then getting the lines installed into the proportioning valve, installing the little clips/bolts that secure these two lines to the thin sheet metal mounting plate approximately 2-3" above the valve!!!!!!!!!! All the while trying to minimize paint eating brake fluid off the frame!!!!!!!

20210521_193502.jpg

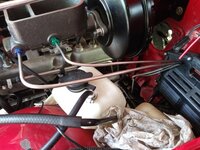
Tweaking the lines roughly how they will go. I had to remove my Mopar MPI computer from the firewall, temporarily, to install these two lines.

20210521_193533.jpg

I went ahead and painted the new master cylinder with some VHT engine enamel paint. I am not sure if any paint will endure brake fluid, but it will look pretty for now. The old master cylinder on the ground was never painted, brake fluid and time made it extra crispy looking.

20210522_104055_HDR.jpg

I bought the below seal from Summit. Not advertised for a Jeep applications, but it works perfectly to seal the brake booster rod hole in the fire wall!!!!!!!!!!!!!

20210522_104244.jpg

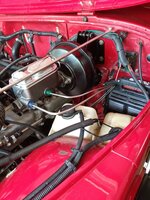
Reinstalled the Mopar MPI computer to the firewall, you can see the two brake lines pressed hard up against it. Also pictured, the brake booster bracket installed on the firewall, loosely at the point.

20210522_115414.jpg

I ended up pulling the brake booster bracket off the firewall, installing the seal over the rod first, then reinstalling the brake booster bracket. No other way to install this firewall seal, it is a tight fit over the rod, I used some lube:

20210522_115423.jpg
 
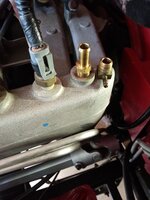
I removed the fitting on the right from the intake, installed the straight connector, to eventually hook up the vacuum hose:

20210522_121221.jpg

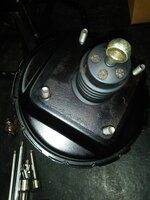
The old OEM booster I had came with a thin metal plate. This plate is needed to keep the booster seal in place/tight fitting.

20210522_121556.jpg

I actually kept the master cylinder loose on the studs, screwed in the two brake lines, then tightened up the master cylinder.

20210522_133234.jpg

20210522_134157.jpg

After snugging up the master cylinder, I did a final "tweak" to the two lines that run down to the proportioning valve. I "tweaked" them so that they would not be rubbing up against the Mopar MPI ECM.

20210522_134205.jpg

Mostly assembled and installed:

20210522_142439.jpg

I then took off the two brake lines from the master cylinder, installed my old set of "bleeder lines", bench bled the master cylinder:

20210522_142515.jpg

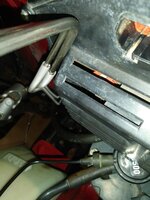
Don't forget to hook up/adjust the brake light switch BEFORE reinstalling the steering column, super easy to get to now!!!!!!!!!!!!!

20210522_143435.jpg

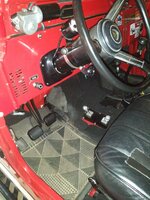
Interior mostly back together:

20210522_163709.jpg

I put some new Omix/Crown rubber pads on the brake/clutch pedal. Had to cut a notch in the side of the brake pedal for the pad to fit correctly:

20210522_163717.jpg
 
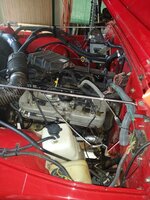
Under hood mostly complete, will clean up the wiring soon:

20210522_163727.jpg

Finished:

20210522_163736_HDR.jpg

Nope!!!!!!!!!!!!!!!

20210523_102001_HDR.jpg

I needed to bleed the brakes, and time for a tire rotation, two birds, one stone.

I usually do the old "pump pump pump spray brake fluid everywhere" brake bleeding method.

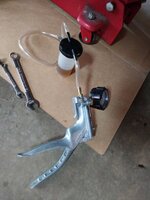
I have had my vacuum pump for years, used it to bleed the brakes for the first time ever the other day, worked super awesome:

20210523_113536.jpg

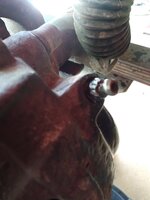
And then the tears:

20210523_113553.jpg

I was more concerned about my SSBC rear calipers, but they bled out fine/easy. On my stock front calipers, had to use the vice grips on a bleeder.

Bigger issue, the bleeders will NOT reseal, they keep weeping.

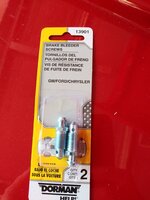
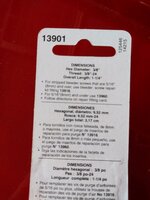
Swapped them out for these bleeders, they leaked worse. These are POS soft like butter metal:

20210523_120750.jpg

20210523_120803.jpg

Slowed the brake leakage to just a tiny hair on one side, so "finished for now":

20210523_150832.jpg

I ended up reusing the original boogered up front caliper bleeders. BUT, I am going to install two new front calipers, I am not going to waste any more time/effort on 10 year old calipers.

Before I bled the brakes, i flushed them. The master cylinder fluid looked bad, and the caliper fluid did not look much better. The rear caliper fluid looked OK, just old. On the front calipers, lots of rust/sediment came out of them, so another good reason to just install some fresh calipers up front. Easy enough.

So, with the brakes at 99%, it was a worth while upgrade. Even with non-power assist, I could lock up the brakes, just took some effort with my right leg. The power brakes will just make it easier to get the same amount of brakes, if that makes sense.

As for the "mystery rattle", NOPE, still there. Will have to dig deeper, just not sure where.

That's it for now!!
 
I have been spoiling myself working inside the garage, so decided to go play outside in the dirt, so I don't get too "soft" LOL:

20210525_190013.jpg

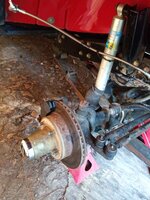
Driver side caliper installed:

20210525_190022.jpg

Waiting on the passenger side caliper to get here tomorrow, but went ahead and removed the old caliper, install the new pads, and change out a slightly damaged brake line on this side. I have had a spare set of these Rubicon Express brake lines, finally installed one. I ran a bolt through the end of the brake line, suspended it up high, no leaks.

20210525_190040.jpg

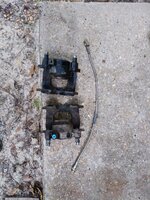
Two cores and a damaged brake line:

20210525_190101.jpg

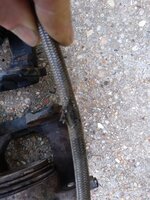
Close up of the damage. No leaks, but not very confidence inspiring, especially with the National trip fast approaching!!

20210525_190115.jpg

Hope to finally finish this brake "upgrade" tomorrow.

I had about 48,000 miles on the front brake pads, they were probably about 50% wore down.

That's it for now :wave:
 
The missing brake caliper showed up yesterday, installed it/bled the system last night, been driving the Scrambler today.

Brakes are working fine, no leaks, no soft pedal :headbang:

Kind of funny, I have power brakes in my green Scrambler , so I am used to power brakes in that Jeep. Same thing with my Gladiator. What is strange, I still have "muscle memory" when I drive this red Scrambler, thinking it has manual brakes, so I keep getting whiplash/stopping about 3 car lengths short of stop signs/red lights LOL!!

Quick picture:

20210528_114949.jpg

I think I am going to call this one "done/ready" for the National trip :fingerscrossed::fingerscrossed::fingerscrossed:

I had two other "concerns", but I think they are good to go:

1) Earlier this year, when it was cold outside, I would get a sniff of anti-freeze right before the engine hit operating temperature, just like clock work. I thought that maybe the heater core was leaking, but I never got anti-freeze in the cab, and we know these heater boxes will drip on the floor if the heater core is leaking. I found a slight leak at the upper radiator hose, added a second clamp here, no more anti-freeze smell, no more "mystery lost coolant". I have a 5/8" to 5/8" coupler in the center console, so if the heater core starts gushing, simple road side repair to just loop the two heater hoses together.

2) My clutch release bearing (aka "throw out bearing") has been "talking" since the 2019 trip home from Michigan. Not bad, but you can hear a slight sound with the clutch pedal pushed down. I remember it started making this noise on Highway 31, around Kokomo, Indiana. There was road work, so lots of stop and go traffic. Don't ask me how I remember the specifics LOL. Anyway, after more "research", I "discovered" that this SKF HD release bearing has been "talking" since I installed it back in May of 2016: Post #1373:


Anyway, the clutch still works fine, engages/disengages fine/smooth. If it has been like this for 5 years/22,000 miles, I think it will be OK a little while longer. The sound is not "terrible" like the bearing is tore up, not even a "whirring/grating" sound. Basically, you can hear the throw out bearing spinning/turning when the clutch pedal is depressed. I am going to drive it around some more this weekend, but it seems fine. I do not feel it is worth the trouble of pulling the transmission to install another release bearing at this time. I'll throw a spare release bearing in the center console, just in case. I am curious, though, if the annoying "tick" sound I keep hearing is just some reverberation of the clutch arm/pivot ball/natural mechanical noise through the metal linkage, into the cab? I might investigate this some more.

That's it for now :wave:
 
I did some more "digging" into the clutch release bearing noise issue on Friday afternoon.

I pulled the clutch linkage out of the way, removed the bell housing rubber boot, took a look. Release bearing looks fine, slight oil/grease film on the front transmission collar it rides on. The release arm ball/spring are still in place and functioning. I can easily slide the release bearing back and forth with the release arm, no rough spots. Using a long screwdriver, I can spin the release bearing around the shaft. It has one little "rough spot", but even that "spot" is not that bad. I am going to say the release bearing is good to go for awhile longer.

I have a very slight clutch "shudder/grab" upon initial engagement in first gear. Not terrible, but it is not perfectly smooth like my green Scrambler (new clutch), or Tommy's '84 (unknown clutch condition/age). The clutch does not slip, it fully releases and engages as it should, no problems there. I just can not get a perfectly smooth first gear take off.

On Saturday, checked all the usual suspects:

1) clutch pedal free play is correct
2) no wore out/sticking/binding clutch linkage
3) no bad motor mounts (removed both and inspected) (added the OEM steel plates to slightly raise motor for fan to fan shroud clearance on bottom driver side)
4) transmission mount/torque arm mount good to go, all bolts tight
5) engine block to bellhousing bolts tight
6) transmission to Dana 300 bolts tight
7) skid plate bolts tight
8) no way to check transmission to bellhousing bolts, they thread from inside the bellhousing into the AX15 adapter, no reason to suspect they are loose
9) u-joints/rear drive shaft/reap pinion bearings all good to go

The current clutch is just a regular NAPA replacement clutch, nothing exotic. It only has around 25,000 miles on it, BUT that is a bunch of trail riding, and yard work/pulling trailers. I am not hard on the clutch, I do not slip it. That might be part of the problem. I typically ease off the clutch without giving the engine any throttle pedal. I don't need to, with 4.10's and 33" tires. When pulling the trailer, same thing. In four low, same thing. So, maybe this clutch just has some high/rough/glazed over spots from my driving style :shrug:

I had a valve cover leak a few years ago, but I did not let it go too long, but maybe the disc is contaminated?

Anyway, I decided to "Redneck Ray" "fix it".

With engine running, 2wd, eased the front bumper into a big pine tree. Kept the RPM's around 2,000, eased off the clutch and deliberately slipped it for about 5 seconds. Smoked the clutch briefly, worked perfect after this. No more "slight shudder". Maybe it had some contamination/high spot/humidity caused rust on the flywheel/pressure plate from being parked outside recently. Who knows, but now it works fine again. When I slipped the clutch, I could only smell clutch burning, NOT engine oil like the disc is saturated.

On Sunday, used the Scrambler in the yard all day pulling the trailer around. So, lots of low speed, four wheel drive usage. After about 6 hours, and I assume the clutch and everything else getting pretty hot from the work out, the slight clutch shudder returned, less then before, but still noticeable. A quick "Pine tree fix" , good to go again LOL.

I am going to say the clutch is good enough for the National/Sand Blast trip. I will pull it all apart later this fall/winter and take a look/swap it out, or sooner if it fails/new symptoms show up. For now, i am calling it good to go.

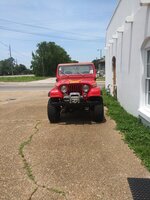
Quick yard picture:
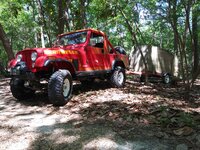
20210530_143005_HDR.jpg


That's it for now :fingerscrossed:
 
Back
Top