• Notice for iPhone users: DO NOT use the image size reduction option when uploading photos to the forum. This causes portrait images to post as landscape. We have added a warning to the image insert pop-up as well.

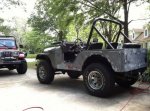
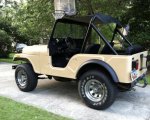
New Scrambler owner! YeeHaa!

I just had to replace the 30 year old motor on my Craftsman 5HP 30 Gal rig. Lent it to a painter buddy to spray texture on a ceiling and it came back with a bad winding. Took it to the local electric motor shop, verified it was bad and he directed me to go get a HF replacement for $172. I had a 25% off so I ended up at $135 and she's like new. Love that old thing!

What are your plans. I know you have a clean rig so how far down the rabbit hole you going to go?
 
That compressor is a workhorse isn’t it? I hate loaning certain things out for that specific reason (getting it back with issues)!!! Seems to happen with everything I loan.

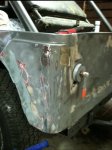
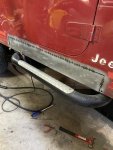
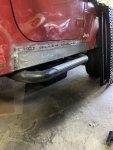
Once I finish up this rocker panel, I’ll fill in any remaining pinholes on the different welded panels with a thin coat of body putty, put seam sealer on the panel joints remove the decals and start sanding the whole thing down to repaint. Well, now that I think about it I’ve still got to fix the common cracks on the hard doors, SO, after that I’ll paint. Oh, the power steering box sprung a leak in the interim, and the seals on the Warn 8274 decided to go as well. It’s always something.
 
Nice work !
Thanks Belizeit! It’s still looking “raw” at this point (pinholes from the stitchwelding, etc) but it should look much better once I go back over everything prior to painting.
 
I went for many years on a 5 hp/30 gal Sears compressor. I finally retired it, it’s still here in a closet. I got a 60 gal/2 cylinder Ingersol Rand, it’s awesome by comparison. Spend it once and get the right tool, I use it a lot.
 
John- I just wired the garage for 230v and installing a Quincy 60 gal in the next couple of weeks. Can’t wait!!!
 
I went for many years on a 5 hp/30 gal Sears compressor. I finally retired it, it’s still here in a closet. I got a 60 gal/2 cylinder Ingersol Rand, it’s awesome by comparison. Spend it once and get the right tool, I use it a lot.
I've got an old IR also, probably 60 gal horizontal that I've had 30 years that my buddy had gotten, well used at a paint shop probably 50-60 years old. Flywheel is like 30-40 lbs. think the motor is 1 hp and probably is 50 lbs. Built for 2 life times
 
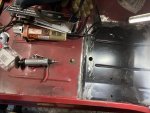
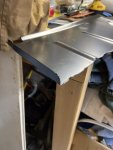
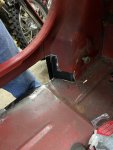
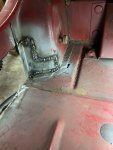
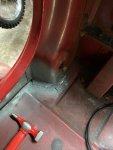
Another rainy, muggy weekend so it gave me the chance to pick at the Scrambler this morning. Put some extra touches on the passenger floorpan, then moved on to the “B” pillar on the same side. It had a concentrated section of rust (thankfully the rest of the pillar was very solid-pretty critical area since the seatbelt attaches here) that I cut out and replaced. I found a scrap piece of floor pan that had a perfect “lip” on it that the original section had. All I needed to do was use a dolly/buck to create a slight radius on one side-that picture is at the end and out of sequence on this post, obviously. Everything is still a bit “roughed in”. Once I get the rocker panel stitched in, I’ll go back around and “pretty” everything up.
 

Attachments

  • F92E60F6-D4D6-4B88-9851-F97CB40B8638.jpeg
    F92E60F6-D4D6-4B88-9851-F97CB40B8638.jpeg
    157.3 KB · Views: 44
  • A5487FA6-CCA3-4673-9925-554E0B6B8AA3.jpeg
    A5487FA6-CCA3-4673-9925-554E0B6B8AA3.jpeg
    90.3 KB · Views: 43
  • 999023CC-E03C-4272-B7FF-DB1716C3D6A8.jpeg
    999023CC-E03C-4272-B7FF-DB1716C3D6A8.jpeg
    131.9 KB · Views: 44
  • A2EF0D21-161C-4B43-BEF8-FEBCAF3A2171.jpeg
    A2EF0D21-161C-4B43-BEF8-FEBCAF3A2171.jpeg
    143.2 KB · Views: 45
  • 08DC2BD6-43F4-4977-BFA1-800EF19EA7A4.jpeg
    08DC2BD6-43F4-4977-BFA1-800EF19EA7A4.jpeg
    118.7 KB · Views: 45
  • 43E02DE4-D94D-4604-86B4-A88776191D7A.jpeg
    43E02DE4-D94D-4604-86B4-A88776191D7A.jpeg
    181.2 KB · Views: 45
  • 0670401B-48CA-405A-AFDB-A1366D3563C6.jpeg
    0670401B-48CA-405A-AFDB-A1366D3563C6.jpeg
    124 KB · Views: 45
  • C2B04C5C-3079-4586-BCB9-DBEA4920F597.jpeg
    C2B04C5C-3079-4586-BCB9-DBEA4920F597.jpeg
    95.4 KB · Views: 43
1. Great to see this back in action, awesome work!

2. For the sake of folks who are reading this and wondering (maybe you mentioned it in an earlier post, but still) what was your level of experience with sheet metal work going in? Helps keep everything in context relative to the work you're doing (which is great!)

3. These last few posts on the sheet metal work should be required reading for the folks that see Jeeps for sale with the rocker rust bubbles like yours. Lots of misinformation on FB in particular where people try to say "grind it out, bondo, paint -- no big deal"
 
1. Great to see this back in action, awesome work!

2. For the sake of folks who are reading this and wondering (maybe you mentioned it in an earlier post, but still) what was your level of experience with sheet metal work going in? Helps keep everything in context relative to the work you're doing (which is great!)

3. These last few posts on the sheet metal work should be required reading for the folks that see Jeeps for sale with the rocker rust bubbles like yours. Lots of misinformation on FB in particular where people try to say "grind it out, bondo, paint -- no big deal"

BW- Thanks for the kind words! Obviously amateur grade work, but I'm learning as I go along. A little background context is certainly in order-My first sheet metal experience was only 7 years ago (I'm 54, so not long in the scheme of things), when I picked up a 1976 CJ5 from a neighbor. That Jeep had sat out in the weather for years with only a bikini top. As you can imagine, I ran a roll or two of wire on that one! I picked up some autobody books and watched loads of videos, and purchased a Hobart 140. My first "weld" (after practicing on scrap) was a patch on the rusty gas tank skid plate I had removed. I was using .035 flux core. Quickly thereafter, I realized I needed to move to .023 solid wire and 75/25 Argon if I was to get serious on the bodywork, which definitely made a huge difference. I had a build thread on JeepForum.com, and received great advice and encouragement from folks that were much more skilled than I was. These forums are an absolute blast, and an indispensable resource!
 
Perfect, thanks. I think I'll be looking to find a free scrap tub or part of a tub from a trashed CJ to practice on. figured I could just cut it up any way I wanted and put pieces back together to work out the best settings for my little Lincoln. Interesting comment on the wire size, I'll have to get a new spool (already running gas).
 
Perfect, thanks. I think I'll be looking to find a free scrap tub or part of a tub from a trashed CJ to practice on. figured I could just cut it up any way I wanted and put pieces back together to work out the best settings for my little Lincoln. Interesting comment on the wire size, I'll have to get a new spool (already running gas).
That’s a great idea! And yes, .023 wire is MUCH more forgiving than the larger diameters. Amazon has “Arcraft” wire for about 15.00 for a 2lb spool and it’s worked well.
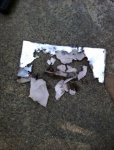
Here are a couple of pics to give you an idea at the number of holes I was filling! Check out the bondo in the last pic!!
 

Attachments

  • 71A0A539-07A2-4EC8-824F-FBA04D2C7863.jpeg
    71A0A539-07A2-4EC8-824F-FBA04D2C7863.jpeg
    523.4 KB · Views: 29
  • 4224D663-BE87-462F-BECB-0AF3D1B78EF9.jpeg
    4224D663-BE87-462F-BECB-0AF3D1B78EF9.jpeg
    90 KB · Views: 29
  • BC3B33D3-946D-444B-8A7E-AD23B38852DE.jpeg
    BC3B33D3-946D-444B-8A7E-AD23B38852DE.jpeg
    121.6 KB · Views: 30
3. These last few posts on the sheet metal work should be required reading for the folks that see Jeeps for sale with the rocker rust bubbles like yours. Lots of misinformation on FB in particular where people try to say "grind it out, bondo, paint -- no big deal"

Completely agree. If you bondo over, you will surely be repeating the repair over and over. Cutting out and welding in new metal is the only way to go.

Pman has a good handle on the metal repair from the pics. I second using .023/.024 wire for sheet metal. I've used .035 flux core, but it seems to use more heat (warping) and needs more grinding. I personally use .030, but am mostly done with the sheet metal work. .030 can do thick or thin, just a bit more versatile.
 
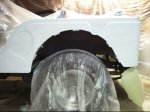
You'll also notice something awry with the wheelwells on the CJ5. The PO decided at one point to put TJ flares on it (the HORROR). It looked like hell. I put new fenders on the front and, rather than try to replace the entire arch of the rear wheelwell, I welded tabs on what was left of it. These matched up to the screw holes on the inside of the flares and hid the TJ cut.
 
Here’s a better view of the tabs I was talking about and the end product. Btw, painting in a garage with poor light is a nightmare, but doable (I’ve painted 3 Jeeps now). Welding and painting are definitely satisfying activities!
 

Attachments

  • 99360FA6-4AFE-4FD1-A492-DB176B101A10.jpeg
    99360FA6-4AFE-4FD1-A492-DB176B101A10.jpeg
    396.3 KB · Views: 23
  • F5A55562-FAB2-47DD-A802-50C1970D9251.jpeg
    F5A55562-FAB2-47DD-A802-50C1970D9251.jpeg
    580.9 KB · Views: 23
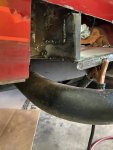
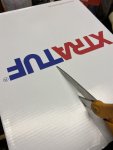
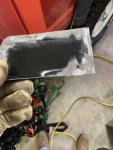
Did a little more “picking” at the Scrambler today. Had to fabricate a replacement section and lip under the B pillar that was rusted out. Shoe boxes make great templates! ? I wasn’t real impressed with the “flange” function on the Harbor Freight tool (but I really bought it to punch holes for my plug welds). Very close to getting that rocker panel on! Only major thing left to do is to replace the lower section of the cowl support. Hope to get to that tomorrow if I don’t go fishing.
 

Attachments

  • 71762C99-8040-4F80-88B9-FF9AF0EB9730.jpeg
    71762C99-8040-4F80-88B9-FF9AF0EB9730.jpeg
    119.7 KB · Views: 22
  • 1DCE3F79-2CE9-4140-A963-276337F382F0.jpeg
    1DCE3F79-2CE9-4140-A963-276337F382F0.jpeg
    77.2 KB · Views: 21
  • 5DF1936D-D720-4483-8C6E-260B655EC49C.jpeg
    5DF1936D-D720-4483-8C6E-260B655EC49C.jpeg
    123.3 KB · Views: 22
  • 19422A12-3908-4625-8800-284ACF054440.jpeg
    19422A12-3908-4625-8800-284ACF054440.jpeg
    129.6 KB · Views: 22
  • C498F762-03A0-4EB1-858F-D31E5482B459.jpeg
    C498F762-03A0-4EB1-858F-D31E5482B459.jpeg
    116.9 KB · Views: 22
  • 0E47A2B3-B464-433F-B91E-A196EE8186B3.jpeg
    0E47A2B3-B464-433F-B91E-A196EE8186B3.jpeg
    95.5 KB · Views: 23
  • 9A96A3B5-6503-431D-BE89-58AD0C2548C5.jpeg
    9A96A3B5-6503-431D-BE89-58AD0C2548C5.jpeg
    131.9 KB · Views: 23
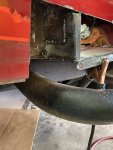
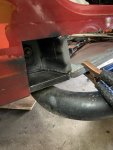
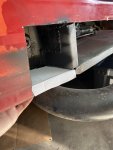
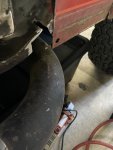
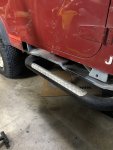
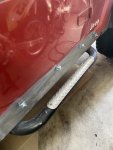
Found some spare time to get that passenger side rocker panel on! Felt like a huge milestone after completely walking away from this thing a couple of years ago. Next step is approaching the minor body putty, seam sealer and then paint (now that the pollen is flying and the trees/bushes are budding out and things can fly into my garage and stick to the clear coat). There are still a couple of things I need to pick at in the cab before I coat it, then I’ll move topside. Still need to make a proper repair to the famous “cracks” in the upper part of the hard doors as well.
A799D306-CFB5-4BF7-AF69-CFFCD0E021C4.jpeg
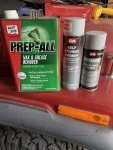
I use the Scotchbrite red discs on my air angle grinder to scuff up the panels prior to installation so the metal has some “teeth” for the paint the paint to stick to. I then sprayed “weld through” primer on the edges that would get MIG’d, as well as the areas were I would plug weld this piece to the floor pans. The rest gets “self etching” primer. I always clean the panel with wax and grease remover, so that there are no contaminants under the primer that could haunt me later.
65C7BADE-6728-4677-88BB-F9D45ECB9E9D.jpeg
 
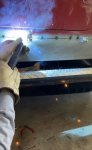
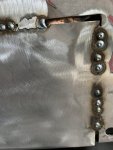
Tacking it in. This part takes more patience than I normally have. Go too fast and build up heat and I’ll have a big, warped mess. I quench each weld with a shot of compressed air to quickly cool it down. BD03EAEE-0EF3-4BA4-8118-563C6971697D.jpeg
 
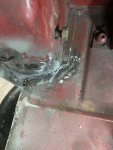
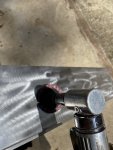
Once I have a pretty heavy series of tack welds, I grind them down with a flapper disc. That helps me see the remaining pinholes, and I go back over the panel and fill those.7AD6EFDE-6A93-46A8-B58F-69B231CB8BBD.jpeg1C33D158-F44B-4BC1-8BD9-8F47B7C16895.jpeg
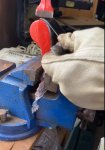
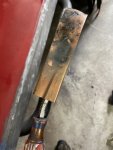
You’ll note that my panel “fit up” was too gappy toward the front. This will be hard to tack weld. The solution is to use a copper “spoon”, as the weld won’t stick to it, but acts as a sort of “filler/backer” for your weld puddle. You can buy one at Harbor Freight, or just do like me and put a piece of copper pipe on the end of an old, bent Craftsman screwdriver and hammer it flat.
FA8CB371-25FB-43CE-94BE-4AD61300BA45.jpeg
Here you can see I’ve positioned it behind the panel so I can fill in these gaps.


D977CF73-490A-412D-9252-B285D63E94F8.jpeg
 
Last edited:
Back
Top