

You are using an out of date browser. It may not display this or other websites correctly.
You should upgrade or use an alternative browser.
You should upgrade or use an alternative browser.
Spankrjs 1985 Spring Special CJ-7
- Thread starter spankrjs
- Start date

Damn, I get a headache just keeping track of all you had to do to get a valve cover off. Almost as bad as the dash wiring. Nice prep work with the valve cover. If you're cover doesn't seal, we don't have a chance with ours. Fingers crossed for success. If anyone can do it, it's you.


- City
- Biloxi
- State
- MS

- City
- Biloxi
- State
- MS
Damn, I get a headache just keeping track of all you had to do to get a valve cover off. Almost as bad as the dash wiring. Nice prep work with the valve cover. If you're cover doesn't seal, we don't have a chance with ours. Fingers crossed for success. If anyone can do it, it's you.
I did everything in my power for a successful seal, thanks for the compliment


- City
- Biloxi
- State
- MS
Take that broken screwdriver back to Sears (if you can find one that’s still open) or Lowe’s and get a new one.
Hell no, you know how long it took me to get it broken "just right"


- City
- Biloxi
- State
- MS
A few more picture to finish up the valve cover work.
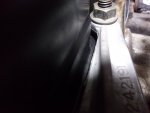
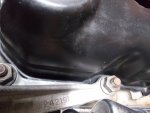
Two pictures that show how close the idler pulley bracket sits to the valve cover. If you needed to, you can space it upward off the head stud nits with washers to clear an aftermarket valve cover:
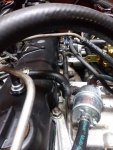
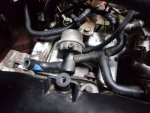
This Jeep originally came with the "PCV shut off valve", which was removed via a factory recall. I am pretty sure the PCV valve lines are the factory/dealer replacement parts, judging by the part numbers on them. This Jeep, since it is California emissions, also has this "deceleration valve" plumbed into the PCV system.
Anyway, finished hooking everything back up. The last thing I went to plug in, the temperature gauge sending unit. And what happens, it breaks LOL:
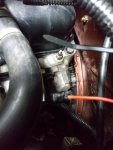

I installed a "used/unknown condition" sender into the engine for now. If it does not work, no big deal, I still need to re-drain the radiator/engine some to install a new heater core.
I still have not started up the Jeep/drove it yet to see if the valve cover seal worked or not. A little bit "chicken", but more "removed the OEM steering shaft to rebuild it".
That's it for now!!!
Two pictures that show how close the idler pulley bracket sits to the valve cover. If you needed to, you can space it upward off the head stud nits with washers to clear an aftermarket valve cover:
This Jeep originally came with the "PCV shut off valve", which was removed via a factory recall. I am pretty sure the PCV valve lines are the factory/dealer replacement parts, judging by the part numbers on them. This Jeep, since it is California emissions, also has this "deceleration valve" plumbed into the PCV system.
Anyway, finished hooking everything back up. The last thing I went to plug in, the temperature gauge sending unit. And what happens, it breaks LOL:
I installed a "used/unknown condition" sender into the engine for now. If it does not work, no big deal, I still need to re-drain the radiator/engine some to install a new heater core.
I still have not started up the Jeep/drove it yet to see if the valve cover seal worked or not. A little bit "chicken", but more "removed the OEM steering shaft to rebuild it".
That's it for now!!!
- City
- Biloxi
- State
- MS
Since we have been having crappy weather lately, I have just been knocking items off my "to do list" on this Jeep.
The lower coupling on the steering shaft had a bit of play, not terrible, but it also had a torn boot. So, I decided to rebuild the steering shaft and upgrade the lower steering column bearing.
Steering shaft hidden from view:
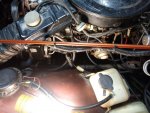
Upper bolt:
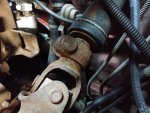
Lower bolt:

I jacked the front tires up off the ground to make it easier to turn shaft/access the two attaching bolts.
Upper bolt out. Note the "square hole" on this end, keeps the bolt from spinning when you take the nut off.

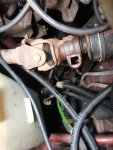

This looks like the same "lock tite" stuff I found on the rear diff cover screws, OEM perhaps?
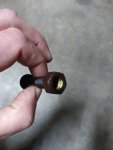
The lack of rust made taking this apart super easy. If rusty, they can be a PIA.
The lower bolt requires two wrenches to remove. With the front tires off the ground/steering column unlocked, it was easy to turn the shaft to get at this lower bolt.
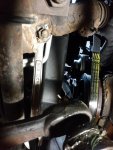
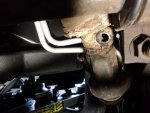
The lower coupling on the steering shaft had a bit of play, not terrible, but it also had a torn boot. So, I decided to rebuild the steering shaft and upgrade the lower steering column bearing.
Steering shaft hidden from view:
Upper bolt:
Lower bolt:
I jacked the front tires up off the ground to make it easier to turn shaft/access the two attaching bolts.
Upper bolt out. Note the "square hole" on this end, keeps the bolt from spinning when you take the nut off.
This looks like the same "lock tite" stuff I found on the rear diff cover screws, OEM perhaps?
The lack of rust made taking this apart super easy. If rusty, they can be a PIA.
The lower bolt requires two wrenches to remove. With the front tires off the ground/steering column unlocked, it was easy to turn the shaft to get at this lower bolt.
- City
- Biloxi
- State
- MS
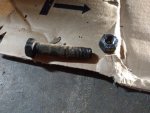
The lower bolt uses a "metal lock nut" to secure it.
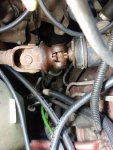
Upper coupling, groove in shaft where bolt slides over:
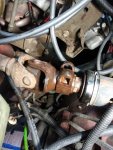
To remove the steering shaft from the steering column, I lightly tap on the shaft where the screw driver is pointing. Power brake boosters make this a much bigger PIA:

After tapping downward on the shaft, the lower coupler will collapse in to itself. BUT, not far enough to remove the steering shaft.
So, I removed the four bolts that secure the steering column to the fire wall:

Loosen these two steering column bolts, the grey colored bolt with the washer underneath it, pointing straight at you. The picture shows one, the other one is on the other side of the column:
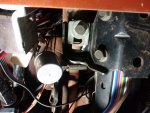
Loosen/remove the plastic trim piece from the dash board:
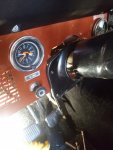
Pull steering column inward, about this far:

And then you can remove the steering shaft from the column:
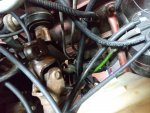
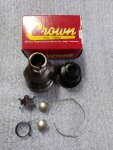
Unfortunately, I believe Crown is the only company making a lower coupler rebuild kit, so that's what I installed.
Upper coupling, groove in shaft where bolt slides over:
To remove the steering shaft from the steering column, I lightly tap on the shaft where the screw driver is pointing. Power brake boosters make this a much bigger PIA:
After tapping downward on the shaft, the lower coupler will collapse in to itself. BUT, not far enough to remove the steering shaft.
So, I removed the four bolts that secure the steering column to the fire wall:
Loosen these two steering column bolts, the grey colored bolt with the washer underneath it, pointing straight at you. The picture shows one, the other one is on the other side of the column:
Loosen/remove the plastic trim piece from the dash board:
Pull steering column inward, about this far:
And then you can remove the steering shaft from the column:
Unfortunately, I believe Crown is the only company making a lower coupler rebuild kit, so that's what I installed.
- City
- Biloxi
- State
- MS
Steering shaft removed from the vehicle. I find it easier to "fish it out" from underneath the Jeep near the front axle. NOTE - the lower coupler clamp bolt hole is exactly 180 degrees rotated from the upper coupler clamp bolt hole. Before removing the steering shaft from the column, lock the steering wheel. This will keep everything aligned.
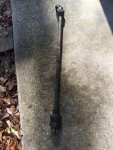
The rubber boot is torn, allowing grease to leak out, dirt to get inside:

I carefully loosened/removed this small clamp from the boot. I left it on the shaft and reused it. I like it better then the replacement Crown boot clamp.
On the larger boot retaining ring, dig all the dirt out to expose it:

On the side of the coupler, there are two slots. Depress the retaining clamp inward at one of these points:

Then use an old screw driver to work the retaining ring off/out:
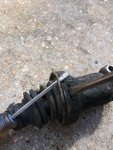
Slide the boot backwards off the coupler, and you should see a nice mess like this:

I then spent about an hour cleaning up all the old parts, and the steering shaft assembly.
The rubber boot is torn, allowing grease to leak out, dirt to get inside:
I carefully loosened/removed this small clamp from the boot. I left it on the shaft and reused it. I like it better then the replacement Crown boot clamp.
On the larger boot retaining ring, dig all the dirt out to expose it:
On the side of the coupler, there are two slots. Depress the retaining clamp inward at one of these points:
Then use an old screw driver to work the retaining ring off/out:
Slide the boot backwards off the coupler, and you should see a nice mess like this:
I then spent about an hour cleaning up all the old parts, and the steering shaft assembly.
- City
- Biloxi
- State
- MS
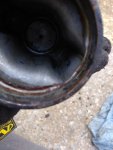
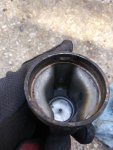
The OEM coupler acts like a "plunging u-joint". Besides allowing turning motion like a u-joint, it also allows for a "plunging" motion to allow for body/frame movements.
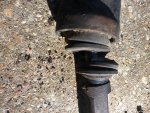
The coupler will wear where the "square u-joint things" slide back and forth on it:
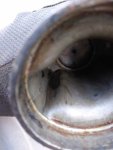
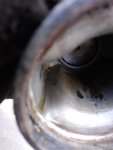
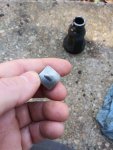
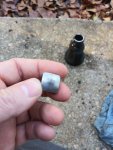
And the square "u-joint thingies" will wear where they slide on the coupler:


The OEM steering shaft is about equal in strength to the rear 2 piece axles - OK for stock tires/no front locker/no hard core trail riding. If any of those things are in your future, I would not even waste my time rebuilding the lower steering coupler. I have had great results using the Borgeson replacement steering shafts. They are way stronger, and less prone to wear, compared to the OEM steering shaft.
The OEM steering shaft is two pieces. It is designed to slide in to itself if you get in a bad crash, instead of spearing you through the steering column. The two pieces are held together with melted plastic/nylon:
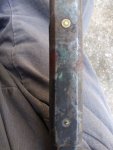
Some people will tell you to melt this stuff out, then you can slide the shaft in and out (and you won't have to loosen the steering column to remove the steering shaft). I think this is a TERRIBLE idea. If you melt this stuff out, the shaft will slide in and out. BUT, the two shaft pieces will also wear and get loose. I had a 3" body lift on a CJ-7, the previous owner melted the plastic out so that the shaft would extend out enough to reach the steering box. The shaft was so loose at the joint that you could shake it around. IMO, leave the plastic in place if you are running the stock shaft, let the coupler slide in and out. If you have a body lift, bite the bullet and install an aftermarket steering shaft, like the Borgeson units.
After cleaning the shaft up, I went to install the new rubber boot.
I should have tried to get it on WITHOUT moving/removing the cross pin first. I have tapped the cross pins out before without any drama. Not this time. I had to use a torch to heat up the shaft, and a five pound hammer to move the cross pin. A press would be a better option.
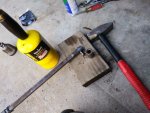
After hammering on the cross shaft, the edges got little "mushroom ledges" around the edges. Two hours with a file/emery cloth, i cleaned the edges back up. You do NOT want to make the OD of the cross shaft smaller. if you do, the little "square u-joints" will be loose on the cross shaft, causing play in the steering.
So, DO NOT USE A HAMMER ON THE CROSS SHAFT.
The coupler will wear where the "square u-joint things" slide back and forth on it:
And the square "u-joint thingies" will wear where they slide on the coupler:
The OEM steering shaft is about equal in strength to the rear 2 piece axles - OK for stock tires/no front locker/no hard core trail riding. If any of those things are in your future, I would not even waste my time rebuilding the lower steering coupler. I have had great results using the Borgeson replacement steering shafts. They are way stronger, and less prone to wear, compared to the OEM steering shaft.
The OEM steering shaft is two pieces. It is designed to slide in to itself if you get in a bad crash, instead of spearing you through the steering column. The two pieces are held together with melted plastic/nylon:
Some people will tell you to melt this stuff out, then you can slide the shaft in and out (and you won't have to loosen the steering column to remove the steering shaft). I think this is a TERRIBLE idea. If you melt this stuff out, the shaft will slide in and out. BUT, the two shaft pieces will also wear and get loose. I had a 3" body lift on a CJ-7, the previous owner melted the plastic out so that the shaft would extend out enough to reach the steering box. The shaft was so loose at the joint that you could shake it around. IMO, leave the plastic in place if you are running the stock shaft, let the coupler slide in and out. If you have a body lift, bite the bullet and install an aftermarket steering shaft, like the Borgeson units.
After cleaning the shaft up, I went to install the new rubber boot.
I should have tried to get it on WITHOUT moving/removing the cross pin first. I have tapped the cross pins out before without any drama. Not this time. I had to use a torch to heat up the shaft, and a five pound hammer to move the cross pin. A press would be a better option.
After hammering on the cross shaft, the edges got little "mushroom ledges" around the edges. Two hours with a file/emery cloth, i cleaned the edges back up. You do NOT want to make the OD of the cross shaft smaller. if you do, the little "square u-joints" will be loose on the cross shaft, causing play in the steering.
So, DO NOT USE A HAMMER ON THE CROSS SHAFT.
- City
- Biloxi
- State
- MS
I was able to get the new boot on over the cross shaft without tearing it. It is a PIA, but it is possible. BEFORE putting the new boot on, make sure the smaller boot retaining clip is on the shaft.
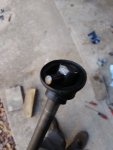
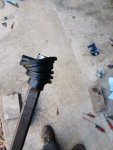

One the new boot was on, time to grease everything up. This coupler/joint does not really spin like a u-joint/wheel bearing. It just slides. I used a packet of 5th wheel grease to lube all the parts up. The 5th wheel grease is very sticky, so it wont wash out easy, and should provide sufficent lubrication.
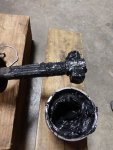
The above picture shows the new square bits on the cross shaft, but NOT the little metal spring clamp. Make sure you install the little metal spring clamp. It keeps outward pressure on the square things, keeps them tight against the coupler.
Small boot retaining clamp on:
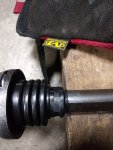
I wore glove while putting this thing together, that 5th wheel grease gets everywhere/hard to wash off.

And the large boot retaining clip installed:


The reason why these things are always greasy: there is a "relief" hole in the coupler to allow the grease to squirt out, instead of blowing off the boot. Over time, grease leaks out this hole. If you pack the coupler with grease, then install the shaft, grease will go everywhere.
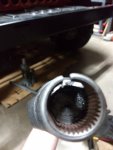
And the completed steering shaft:

I chose not to repaint the shaft, it is not rusty, looks OK. If I were to repaint the shaft, I would do it AFTER I rebuilt/reinstalled the lower coupler.
Note the orientation of the upper and lower clamp bolt holes, 180 degrees apart.
One other word of wisdom - IF the upper joint has slack, it can NOT be replaced. Don't waste time/money rebuilding the lower coupler, or buying a replacement steering shaft. Buy a new Borgeson steering shaft.
One the new boot was on, time to grease everything up. This coupler/joint does not really spin like a u-joint/wheel bearing. It just slides. I used a packet of 5th wheel grease to lube all the parts up. The 5th wheel grease is very sticky, so it wont wash out easy, and should provide sufficent lubrication.
The above picture shows the new square bits on the cross shaft, but NOT the little metal spring clamp. Make sure you install the little metal spring clamp. It keeps outward pressure on the square things, keeps them tight against the coupler.
Small boot retaining clamp on:
I wore glove while putting this thing together, that 5th wheel grease gets everywhere/hard to wash off.
And the large boot retaining clip installed:
The reason why these things are always greasy: there is a "relief" hole in the coupler to allow the grease to squirt out, instead of blowing off the boot. Over time, grease leaks out this hole. If you pack the coupler with grease, then install the shaft, grease will go everywhere.
And the completed steering shaft:
I chose not to repaint the shaft, it is not rusty, looks OK. If I were to repaint the shaft, I would do it AFTER I rebuilt/reinstalled the lower coupler.
Note the orientation of the upper and lower clamp bolt holes, 180 degrees apart.
One other word of wisdom - IF the upper joint has slack, it can NOT be replaced. Don't waste time/money rebuilding the lower coupler, or buying a replacement steering shaft. Buy a new Borgeson steering shaft.
- City
- Biloxi
- State
- MS
While the steering shaft was out, I replaced the wore out OEM lower steering column bearing with a unit from Wolfe Engineering. I am trying to keep this Jeep "stock", BUT the OEM lower column bearing is a crap design, even when new. The parts from Wolfe are top notch.
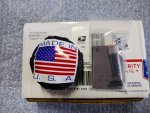
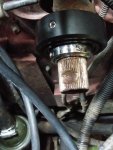
Post #1545 details how I installed the Wolfe Engineering lower steering column bearing in my red Scrambler:
https://www.cj-8.com/threads/anothe...trip-update-body-on-frame-again.24692/page-78
Once the lower column bearing was replaced, i reinstalled the steering shaft.
Upper groove/notch lined up:
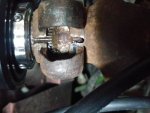
Lower groove/notch lined up:
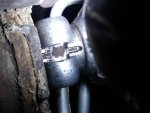
Once the two end were installed, I tightened up the steering column to the fire wall.
Upper bolt back in, with Lock-Tite on the nut:
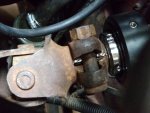
Lower bolt reinstalled:
That concludes this little project.
Since the weather is still crappy, I will swap in a new heater core next.
That's it for now
Post #1545 details how I installed the Wolfe Engineering lower steering column bearing in my red Scrambler:
https://www.cj-8.com/threads/anothe...trip-update-body-on-frame-again.24692/page-78
Once the lower column bearing was replaced, i reinstalled the steering shaft.
Upper groove/notch lined up:
Lower groove/notch lined up:
Once the two end were installed, I tightened up the steering column to the fire wall.
Upper bolt back in, with Lock-Tite on the nut:
Lower bolt reinstalled:
That concludes this little project.
Since the weather is still crappy, I will swap in a new heater core next.
That's it for now
- City
- Biloxi
- State
- MS
Since the weather is still kind of crappy, I decided to replace the heater core. This Jeep came to JeepAddict with the heater core disconnected, I am just assuming it is bad, could be wrong?
Heater hoses not connected, one less thing to do:

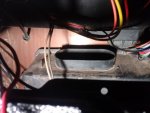
Missing the defrost duct, another thing I didn't have to disconnect:
Removing the three control cables:


I used pliers to pull off the little round things that secure the cables to their posts. The cable next to the passenger side body, I pried/slid it off with a long screw driver.

Unplug the blower motor resister wiring:

Some sources say to remove the passenger seat and glove box to remove the heater box. I did neither, had no issues. Pulling the passenger seat would give you some more room, might be necessary if you have AC.


That should be all the interior items that need to be removed.
Heater hoses not connected, one less thing to do:
Missing the defrost duct, another thing I didn't have to disconnect:
Removing the three control cables:
I used pliers to pull off the little round things that secure the cables to their posts. The cable next to the passenger side body, I pried/slid it off with a long screw driver.
Unplug the blower motor resister wiring:
Some sources say to remove the passenger seat and glove box to remove the heater box. I did neither, had no issues. Pulling the passenger seat would give you some more room, might be necessary if you have AC.
That should be all the interior items that need to be removed.
- City
- Biloxi
- State
- MS
Under the hood, there are four nuts that secure the box to the firewall. I soaled the studs in penetrating lubricant to ease their removal. You do NOT want to break off the studs.
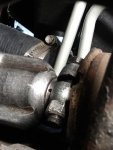
Nut 1 behind the valve cover:
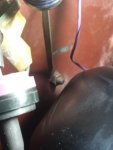
Nut two near the computer harness wiring grommet/heater hoses:

Nut three over near the passenger side fender/battery tray:

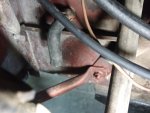
Nut four, down under the battery tray, near the drain hose elbow:
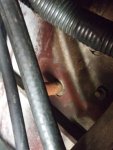
Unplug the blower motor wire, my plug looked like this:


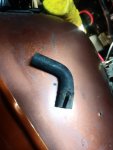
Remove the drain hose elbow, mine is dried out and split:
That should be all the under hood stuff that needs to be disconnected.
Nut 1 behind the valve cover:
Nut two near the computer harness wiring grommet/heater hoses:
Nut three over near the passenger side fender/battery tray:
Nut four, down under the battery tray, near the drain hose elbow:
Unplug the blower motor wire, my plug looked like this:
Remove the drain hose elbow, mine is dried out and split:
That should be all the under hood stuff that needs to be disconnected.
Last edited:
- City
- Biloxi
- State
- MS
Once everything is loose, you kind of pull outward while rolling the box upward, and it should come out. If your computer is not screwed into its attachment bracket, it will be swinging in the breeze.

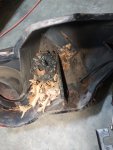
Looks like mice to me!!

Random picture: One thing I have noticed, as you go up in years from say '81 to '86, the factory used a lot more seam sealant. Neither of my '83's, or the '84 I sold, had this much seam sealant. This is an example, body tub where front passenger fender bolts on.
Heater box on the ground:

I removed the fan first:

Orange RTV, my favorite, someone has been in here before:

Missing one of the heater core attaching screws:

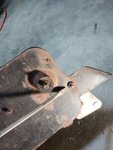
To remove the back plate off the box, you take out all the perimeter screws, and this nut/bolt thing:
Question: California/Nevada desert mice, or Louisiana/Mississippi warehouse mice? I'm going to say southern, since the previous desert owner removed this heater box in the past!!
Looks like mice to me!!
Random picture: One thing I have noticed, as you go up in years from say '81 to '86, the factory used a lot more seam sealant. Neither of my '83's, or the '84 I sold, had this much seam sealant. This is an example, body tub where front passenger fender bolts on.
Heater box on the ground:
I removed the fan first:
Orange RTV, my favorite, someone has been in here before:
Missing one of the heater core attaching screws:
To remove the back plate off the box, you take out all the perimeter screws, and this nut/bolt thing:
Question: California/Nevada desert mice, or Louisiana/Mississippi warehouse mice? I'm going to say southern, since the previous desert owner removed this heater box in the past!!
Last edited:
- City
- Biloxi
- State
- MS
This Jeep had a replacement copper heater core in it. But, the little metal bracket was rattling around in the box. I know people prefer the copper heater cores, but if this solder joint is any indication of the rest of the construction, I'm not impressed. You fail #4!!!!!!!!!!!!!!!!!!!!

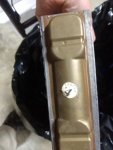
This little flap pulls out, after removing it's cable. IIRC, there is a plastic washer on each end of the post:
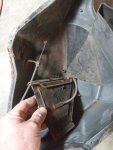
I left this flap in place, it is a PIA to remove:
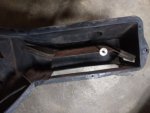
I removed the front blower cover, which was missing its flap/rod assembly, which is really random??

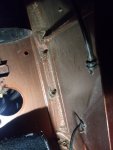
The rear metal plate has some surface rust, and lots of RTV. It will require some sanding/paint work. I was kind of surprised to see this much surface rust on this plate, the rest of the Jeep has zero rust? Maybe this heater box assembly was swapped in at some point in the past?


The plastic portion of the box is in good shape, it will just require a thorough cleaning:

I had already secured the missing blower motor cover flap/rod assembly from Jeeperdd, thanks again!!!!!!!!
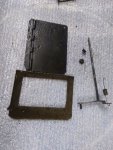
So, about an hour to remove the heater box, and about 8 hours of cleaning/paint work LOL.
That's it for now!!
This little flap pulls out, after removing it's cable. IIRC, there is a plastic washer on each end of the post:
I left this flap in place, it is a PIA to remove:
I removed the front blower cover, which was missing its flap/rod assembly, which is really random??
The rear metal plate has some surface rust, and lots of RTV. It will require some sanding/paint work. I was kind of surprised to see this much surface rust on this plate, the rest of the Jeep has zero rust? Maybe this heater box assembly was swapped in at some point in the past?
The plastic portion of the box is in good shape, it will just require a thorough cleaning:
I had already secured the missing blower motor cover flap/rod assembly from Jeeperdd, thanks again!!!!!!!!
So, about an hour to remove the heater box, and about 8 hours of cleaning/paint work LOL.
That's it for now!!

- City
- God's Country
- State
- AR
Are you leaving it stock or putting the PM102 blazer motor upgrade in? I did the upgrade on both of my CJ7's. Definitely worth it for the defrost, but when I got the unit back in my green Jeep apparently I didn't do something right because with the fan and controls off, cold air pours out of the floor duct in the winter. It's an AC Jeep and I don't drive it much in the winter so I haven't gone to the trouble of pulling the unit again to see what the problem is.

- City
- Cave Creek
- State
- AZ
Question: California/Arizona desert mice, or Louisiana/Mississippi warehouse mice? I'm going to say southern, since the previous desert owner removed this heater box in the past!!
View attachment 79038
Looks like black oak leaves, not found in AZ/CA but is common in the SE.
The rear metal plate has some surface rust, and lots of RTV. It will require some sanding/paint work. I was kind of surprised to see this much surface rust on this plate, the rest of the Jeep has zero rust? Maybe this heater box assembly was swapped in at some point in the past?
The sealant was probably an effort to keep any leaks from spilling all over the floor next time. The rust...well, they were never really painted well to begin with, and a leaky core with hot air blowing around would be a good place for it to start.
- City
- Biloxi
- State
- MS
Are you leaving it stock or putting the PM102 blazer motor upgrade in? I did the upgrade on both of my CJ7's. Definitely worth it for the defrost, but when I got the unit back in my green Jeep apparently I didn't do something right because with the fan and controls off, cold air pours out of the floor duct in the winter. It's an AC Jeep and I don't drive it much in the winter so I haven't gone to the trouble of pulling the unit again to see what the problem is.
No, I am leaving the stock fan, I do not want to cut out the firewall on this one.