• Notice for iPhone users: DO NOT use the image size reduction option when uploading photos to the forum. This causes portrait images to post as landscape. We have added a warning to the image insert pop-up as well.

spankrjs's Biloxi, MS '83 Scrambler

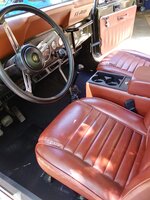
Finished up my carpet install.

This is what the ACC installed edge band looks like. Vinyl, machine sewed.
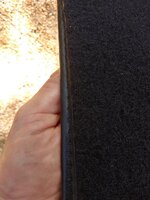
20210515_093556_HDR.jpg

This is what I got my dear mom to do for me for free. Cloth and hand sewed. I would prefer vinyl and machine sewed, would have to take it to an upholstery shop for that. For now, this will work, still looks better then the raw cut edge IMO.
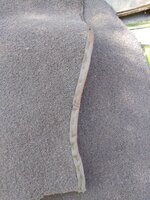
20210515_093601.jpg

And installed:

20210515_105136_HDR.jpg

20210515_105147.jpg

20210515_105155.jpg


Drove it around some today, the carpet makes a huge difference. It kind of absorbs all the sounds, much quieter drive. It also greatly reduces floor board heat. No AC test today, weather was too nice for AC. I am sure the carpet will help the AC cooling, too.

This Scrambler has an older Bestop center console. It simply screws to the floor, three little feet, four little sheet metal screws. I might revisit this attachment method in the future, kind of a pain finding the holes in the carpet/feet/floor to get it screwed back down.
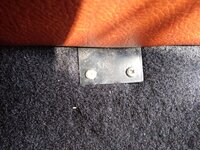
20210515_105203.jpg

All in all, I give myself a B rating on this. I am happy with it, well worth the effort to cut and install it. One more picture, time to start on my red Scrambler!!

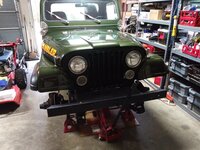
20210515_105212_HDR.jpg
 
I have owned this Scrambler for 12 years, and finally tackled the last major "maintenance" item I wanted to address - the front wheel bearings and associated parts. I have not had any problems out of this area of the Scrambler, but sometimes you "just got to know".

I don't know why I decided to work on this Scrambler right before the long Michigan trip in my red Scrambler, maybe just to have a "Plan B".

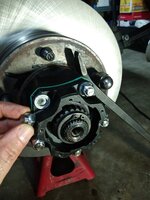
Anyway, assume the position:

1.jpg

Not going to do a "step by step", just some highlights.

New parts:

2.jpg

3.jpg

Basically, from the "inside" to "out":

1) New axle shaft Spicer Non-Greaseable u-joints (the original axle metal dust shields were still perfect so I left them)
2) New spindle bearings, seals, plastic thrust washers
3) New inner and outer wheel bearings and hub seals
4) New rotors and pads
5) New spindle nuts (more on this in a bit)
6) New lock in hubs (more on this in a bit)
7) New lug nuts all the way around to replace the dingy/rusted beat up ones I have been using with my "pretty" wheels LOL!!
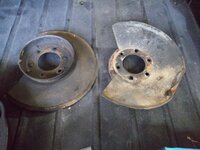
Old parts:

6.jpg

4.jpg

Surprisingly, nothing was in terrible shape, except the spindle nuts. All the bearings were still OK, but the grease was very watery. Not contaminated, just very thin/fluid/brown. The u-joints and spindle bearings were probably OEM, and still in good shape, but I went ahead and replaced them.

On the spindle nuts, some previous "mechanic" used a screwdriver/chisel to tighten the nuts, ruining them.

I did not reuse these:

5.jpg

One is slightly bent, but they are both in great rust free shape. I typically do not reinstall them, just personal preference.

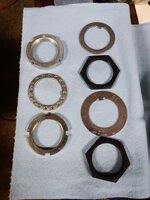
On the spindle nuts, I use/prefer the Dana 44 "tits and hole" style vs the OEM "bend the washer over the nut" style. The Warn Full Float axle kits and the front hub conversions use the Dana 44 style, and I love them.

Dana 44 style on left, OEM on right:

7.jpg

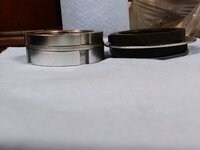
One thing to note - stack height. The Warn/Dana 44 style is thicker then the OEM style:

9.jpg

There is just enough room on the OEM front spindles to use the Warn/Dana 44 style, barely. I have used this same set up for over 50,000 miles on my red Scrambler with no issues, BUT, the outer spindle nut is about one hair to wide.

You can not just buy Dana 44 spindle nuts. They have to be the Warn parts, or advertised to work on a Dana 30. On a 44, both spindle nuts are "fat". On the Warn/Dana 30 compatible kits, the outer "jam nut" is machined thinner than the inner "lock nut":

8.jpg

Nothing the matter with the OEM style, I just prefer the "tits and hole" style.
 
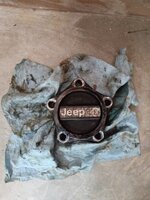
Unfortunately, my OEM lock in hubs aluminum bodies are ruined. The 5 bolt holes on each hub are damaged.

10.jpg

Someone previously used these bolts, without any washer between the steel bolt head and the aluminum hub:

12.jpg

They tightened the crap out of the bolts, which actually "cratered" the aluminum around each bolt hole:

11.jpg

There is really no way to salvage these hub bodies. I have another set of black OEM hubs with perfect outer bodies and bad guts. So, I can use the good guts out of these hubs and put them in the good outer bodies and have a perfectly fine/functioning set of OEM hubs. I did not have time to do that this weekend, future project.

I also have these hubs:

13.jpg

14.jpg

These hubs are identical to the OEM black hubs except:

1) chrome outer bodies
2) dials say "Warn" instead of "Jeep

They also have the same weakness - cast aluminum bodies. I decided not to use these hubs, either.

But, very interesting notes/parts included with these hubs.

These hubs came with "special washers" similar to the "Nordlock" washers I bought:

15.jpg

Look at the instructions:

16.jpg

So, maybe the "dish lock" washers, similar to the "Nordlocks", coupled with the correct length/shouldered bolts, will work??
 
I also have these Mile Marker Hubs, but I chose not to use them, either. I do not think the OEM wheel center caps will work with them?

32.jpg

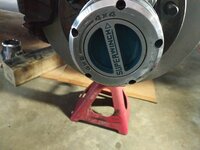
I ended up using these lock in hubs:

20.jpg

21.jpg

I am pretty sure that Superwinch does not make these hubs anymore. But, they can still be found new, I bought this set off of eBay for like $60 shipped. I chose these hubs for several reasons:

1) The hub bodies are steel, NOT aluminum (the dial housing is aluminum, but not too concerned about strength in this area)
2) The internet said they will work with the OEM center caps, the internet doesn't lie (they will, more on this in a bit)
3) I used these same hubs, except the 6 hole style, on both of my 1978 CJ-7's. I used/beat on those Jeeps pretty good (high school/college), never broke one. When I upgraded to a front locker, I did upgrade to internal mount hubs, because I could no longer keep the 6 bolts tight!!!
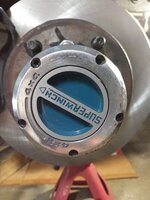
4) I have two used hubs just like this, so I do have some spare parts for them
5) The dials only take a 1/4 turn to lock/unlock, which is pretty nice

The only thing I do not like about these hubs:

1) Blue dial is not to every ones tastes (it reminds of my younger days, so I am going to rock them!!!!!!!)
2) The screws that hold the dial to the hub body use a T15 torx bit
 
This is where things get interesting, and I think that I should have used a different stud.

IIRC, the depth of the wheel hub threaded holes (5 bolt holes) is 1-3/4" deep. Using a 2" long grade 8 bolt:

17.jpg

18.jpg

The shoulder length on these bolts from Lowes is a hair too long. BUT, you want the long shoulder for two reasons IMO:

1) The threaded part of the wheel hub holes does not start at the surface, the threads start 1/4"-3/8" deep. So, the fat shoulder fits tight in the non threaded portion of the wheel hub bolt holes.
2) The "shoulder" of the bolt has a slightly fatter OD than the threaded part of the bolt, thus fitting tighter into the lock in hub holes

I ended up using studs from McMaster Carr, part #91563A132:


IN HINDSIGHT, I THINK THAT THERE ARE BETTER OPTIONS OUT THERE. THE DIMENSIONS OF THESE STUDS ARE PERFECT, HOWEVER, THEY ONLY HAVE A TENSILE STRENGHT OF 60,000psi AND THEY ARE NOT HARDENED. USE AT YOUR OWN PERIL!!!!!!!!!!

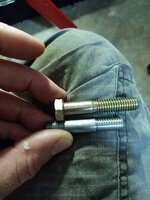
Stud next to bolt:

19.jpg

With the bolts, you will get more thread engagement inside the wheel hubs. The studs I used are shorter than what they could be on the portion that threads inside the wheel hub. But, it is hard to find a stud with the perfect threaded length on both ends AND the correct "fat shoulder" in the middle.

Nice, thick, fat steel Superwinch wheel hub body. A little fatter than OEM, and steel vs aluminum:

22.0.jpg

Studs loosely installed for mock up:

23.jpg

At this point, the studs have not been fully tightened down inside the wheel hubs, so a little too much "fat shoulder" stick out:

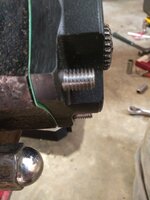
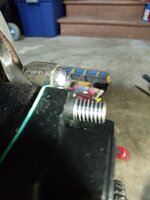
24.jpg

With the studs fully tightened down, still some fat shoulder stick out:26.jpg

BUT, the NordLock washers extend past the smooth shoulder into the threaded portion of the stud, so they will work:

27.jpg

Using 5 studs, WITH the "fat center shoulder", makes for a very nice/good/snug fit. There is very little "wiggle room" between the lock in hub bodies and the 5 hub studs.

28.jpg
 
Like I mentioned previously, I think a stronger stud would be worth looking into. But, I decided to go for broke.

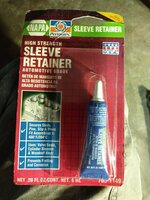
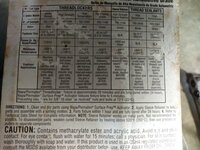
I used the stuff pictured below to secure the studs to the wheel hubs:

29.jpg

It puts Red Lock-Tite to shame, for good and bad:

30.jpg

For good and bad, these studs are in.

I had to use two thin "jamb" nuts to install the studs.

31.0.jpg

Both wheel hubs, 10 studs installed:

31.5.jpg

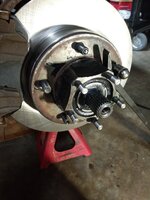
While I had the rotors and wheel bearings out of/off the wheel hubs, I thoroughly cleaned out and tapped all 10 of these holes. I probably spent 3 hours cleaning the crap out of these holes. All the threads were still perfect, no "egging" or other damage to the wheel hub bolt holes/threads.
 
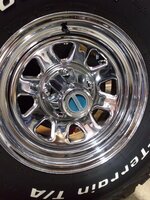
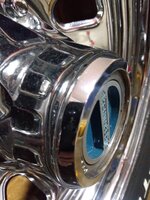
Now, the internet said these lock in hubs will work with the OEM center caps. Mostly, yes.

35.jpg

Face of lock in hub touches the inner face/race of OEM center cap:

36.jpg

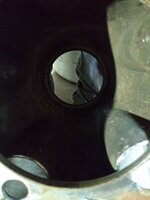
The offending part of the center cap:

37.jpg

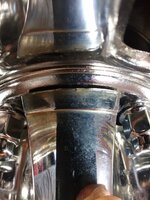
You can see the contact ring mark here:

38.jpg

39.jpg

Just pushing the wheel/center cap on over the wheel hub, the interference causes about a 1/8" gap between center cap and face of the wheel:

40.jpg

You could:

1) machine the outer ends of the center caps
2) space the center caps off of the wheels
3) do like I did, say "F-it", snug up the lug nuts slowly, and it all fits and works fine:

41.jpg

Torqueing the lug nuts to 90 foot pounds will pull the wheel to the wheel hub. The center caps screws did not pop out or break, so I assume tightening the lug nuts down, which pulled the center caps even tighter against the lock in hub, either smooshed that inner ridge, or slighly changed the shape of the center cap end? No idea. No damage to the center cap that I can see. The center cap is still tight to the wheel. Wheel is tight to the wheel hub.

I am not going to question it, it works. I am sure these lock in hubs will have nice "rings" on the faces when you remove the center caps, but you can't see them with the caps on!!!!!!!!!!!

That's my choice, I'm sticking with it :twocents::shrug:
 
Did everything go perfect?

That would be a big NO :eek:

42.jpg

I am going to blame this on ME.

I do not know why, but I decided to "torque" these nuts to 30 foot pounds. Bad idea for several reasons:

1) I already had snugged the hell out of the nuts with a 1/2" ratchet, they were tight
2) I am using "top lock" nuts, no real need to torque them in this application
3) The Nord lock washers will NOT compress
4) The "top lock" nuts were not going to really "stretch" the stud threads
5) My 1/2" torque wrench with a 30" handle that goes to 280 foot pounds sometimes does not like to work at low torque values, like 30 foot pounds.
6) Using a deep well socket with the torque wrench, putting excessive shear on the stud
7) Sometimes, poop happens

Pretty sure I must have been putting 50-60 foot pounds on this stud when it snapped.

Not worried about it for now, the Scrambler is back together and drivable.

Getting this stud off I imagine will be a huge PIA due to the "sleeve retainer" thread lock I used.

6 choices:

1) Use my torch, heat up the broken stud, try to twist it out with vice grips (long shot)
2) Try to drill out the broken stud (even longer shot)
3) Say "f-it" and leave it (my OCD will not allow this LOL)
4) Find another 5 bolt wheel hub, buy a new hub seal and five new studs (easiest)
5) Install the spare set of Warn internal mount wheel hubs I have in my garage on this Scrambler and never worry about bolts (too easy)
6) Get a long 3/8" nut, drill out the threads, hammer it over the broken stud. Weld nut to stud. Hope the heat from welding loosens the sleeve retainer, remove stud using the welded on nut and impact wrench (best choice)

I'll worry about it later.

That's it for now :wave:

NOTE - this Scrambler is still my "Plan B" for Sand Blast IF something happens to my red Scrambler. I figure four good studs in one wheel hub is still way better than the 5 crappy/non graded bolts holding on mangled aluminum lock in hubs LOL!!!!!!!!!!!!!!!!!
 
I would think the stud would back out if you remove the hub and weld a larger nut to the stud. The heat of the weld will hopefully be enough to break the sleeve retainer down. I've never hammered a nut on a broken stud, just MIG welded extra material to fill any gap.

If not, another hub might be the easiest.
 
I would think the stud would back out if you remove the hub and weld a larger nut to the stud. The heat of the weld will hopefully be enough to break the sleeve retainer down. I've never hammered a nut on a broken stud, just MIG welded extra material to fill any gap.

If not, another hub might be the easiest.

This is what I am thinking :cheers:
 
Instead of packing up the red Scrambler the other night for the long trip to Michigan. I completed a small project on this Scrambler.

Every once in awhile, this Jeep will smell "gassy" back by the fuel tank, driver side corner. The passenger side was smelling a bit "gassy", a new fuel cap to replace the cap that had a smooshed rubber seal cured that sides "stink". But, the driver side was still stinky, sometimes.

On the OEM 15 gallon tanks, they use an external rollover check valve and an external liquid check valve. Two separate devices, that are hard to find new replacement parts for. I much prefer the OEM 20 gallon tanks set up.

Anyway, this is the OEM components: yellow plastic thing is the liquid check valve, the silver metal thing is the roll over check valve. They both hide up behind the driver side tail light:

20210728_181313.jpg

I had previously (a few years ago) cleaned these parts up and inspected them for any obvious damage. That is why they are so clean, and they have newer looking attaching hardware.

A better picture of the two components:

20210728_191600.jpg

20210728_191610.jpg

How it works:

1) the two vent lines from the fuel tank plug into the bottom of the liquid check valve (the yellow thing). Inside of this thing, there is a float. Gas fumes will go past the float, through the rollover check valve (metal thing) and then to the charcoal canister under the hood. IF liquid fuel makes it into the yellow thing, its float will rise, plugging up the top hole, preventing liquid fuel from flowing all the way down stream into the charcoal canister. In theory. The yellow thing can be taken apart, there is a rubber seal that seals the two halves.

2) If the Jeep rolls over or goes on its side, liquid fuel will probably overwhelm the liquid check valves ability to stop the flow of liquid fuel. So, inside the metal roll over check valve, there is a ball. If you flip this valve over, the ball is supposed to seal tight and prevent liquid fuel from flowing downstream into the charcoal canister. In theory.

All this stuff is fine and good, and probably worked well when new. It is now 40 years old. I decided to swap these parts out for new, "just because". I also have an "inside the gas tank fuel pump" in this Scrambler, and I am "speculating" that MAYBE this internal pump is sometimes causing more pressure/vapor then the original carburetor set up, and more then what these 40 year old parts are designed to handle. Speculation on my part, BUT since I changed the fuel cap (new factory style that will vent if the pressure gets to high) I have noticed two things:

1) If I remove the fuel cap, the back side valve always has liquid gas on it/in it. Normal driving, not standing the Jeep up on its back end or anything crazy. So, how is liquid fuel being pushed all the way back up the fuel fill/vent hoses to the back of the gas cap? Too much vapor pressure, perhaps?

2) I will get a gas fume smell from this "cubby hole" where the original liquid/roll over check valves mount. I am speculating that MAYBE the liquid check valve is no longer air tight allowing gas fumes to pass through it, maybe the roll over check valve has some small rust pin holes in it and is starting to leak vapors?

I could go through the trouble of "smoke testing" the system, and I still might, But I decided to just throw some new parts at it for now.

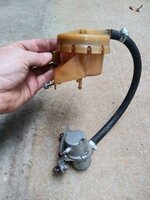
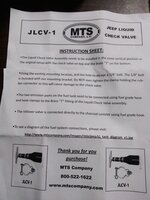
I bought a new, combination valve set up from MTS:

20210728_181217.jpg

This thing takes the place of the original two valve set up, pretty easy install:

20210728_181225.jpg

I drilled out one hole in the original metal mounting bracket:

20210728_185424.jpg

And installed:

20210728_191633.jpg

Basically:

1) two vent lines from the gas tank plug into the brass "T" at the bottom of the valve
2) the line that runs to the charcoal canister ties into the upper plastic fitting

That's it, pretty simple. I had to lengthen my rubber hose that goes to the charcoal canister, that is why it has a plastic "T" with one end capped off right now. I will remove this plastic "T" and install a brass 1/4-1/4 barb.

Only been on two days, but no more gas smell!!!
 
I had all mine out a couple of months ago when installing my new tank and intank Sniper pump. Mainly for replacing all new hoses. I assume mine is good because I have no smell. I had a locking cap on my tank for a lot of years and finally went back to original cap. What did you replace yours with ?
 
Instead of packing up the red Scrambler the other night for the long trip to Michigan. I completed a small project on this Scrambler.

Every once in awhile, this Jeep will smell "gassy" back by the fuel tank, driver side corner. The passenger side was smelling a bit "gassy", a new fuel cap to replace the cap that had a smooshed rubber seal cured that sides "stink". But, the driver side was still stinky, sometimes.

On the OEM 15 gallon tanks, they use an external rollover check valve and an external liquid check valve. Two separate devices, that are hard to find new replacement parts for. I much prefer the OEM 20 gallon tanks set up.

Anyway, this is the OEM components: yellow plastic thing is the liquid check valve, the silver metal thing is the roll over check valve. They both hide up behind the driver side tail light:

View attachment 95916

I had previously (a few years ago) cleaned these parts up and inspected them for any obvious damage. That is why they are so clean, and they have newer looking attaching hardware.

A better picture of the two components:

View attachment 95918

View attachment 95919

How it works:

1) the two vent lines from the fuel tank plug into the bottom of the liquid check valve (the yellow thing). Inside of this thing, there is a float. Gas fumes will go past the float, through the rollover check valve (metal thing) and then to the charcoal canister under the hood. IF liquid fuel makes it into the yellow thing, its float will rise, plugging up the top hole, preventing liquid fuel from flowing all the way down stream into the charcoal canister. In theory. The yellow thing can be taken apart, there is a rubber seal that seals the two halves.

2) If the Jeep rolls over or goes on its side, liquid fuel will probably overwhelm the liquid check valves ability to stop the flow of liquid fuel. So, inside the metal roll over check valve, there is a ball. If you flip this valve over, the ball is supposed to seal tight and prevent liquid fuel from flowing downstream into the charcoal canister. In theory.

All this stuff is fine and good, and probably worked well when new. It is now 40 years old. I decided to swap these parts out for new, "just because". I also have an "inside the gas tank fuel pump" in this Scrambler, and I am "speculating" that MAYBE this internal pump is sometimes causing more pressure/vapor then the original carburetor set up, and more then what these 40 year old parts are designed to handle. Speculation on my part, BUT since I changed the fuel cap (new factory style that will vent if the pressure gets to high) I have noticed two things:

1) If I remove the fuel cap, the back side valve always has liquid gas on it/in it. Normal driving, not standing the Jeep up on its back end or anything crazy. So, how is liquid fuel being pushed all the way back up the fuel fill/vent hoses to the back of the gas cap? Too much vapor pressure, perhaps?

2) I will get a gas fume smell from this "cubby hole" where the original liquid/roll over check valves mount. I am speculating that MAYBE the liquid check valve is no longer air tight allowing gas fumes to pass through it, maybe the roll over check valve has some small rust pin holes in it and is starting to leak vapors?

I could go through the trouble of "smoke testing" the system, and I still might, But I decided to just throw some new parts at it for now.

I bought a new, combination valve set up from MTS:

View attachment 95921

This thing takes the place of the original two valve set up, pretty easy install:

View attachment 95922

I drilled out one hole in the original metal mounting bracket:

View attachment 95917

And installed:

View attachment 95920

Basically:

1) two vent lines from the gas tank plug into the brass "T" at the bottom of the valve
2) the line that runs to the charcoal canister ties into the upper plastic fitting

That's it, pretty simple. I had to lengthen my rubber hose that goes to the charcoal canister, that is why it has a plastic "T" with one end capped off right now. I will remove this plastic "T" and install a brass 1/4-1/4 barb.

Only been on two days, but no more gas smell!!!
How timely! I was just looking at my original 2 piece setup and wishing for a more compact, newer setup. Bingo! Thanks! Now I just need to find another rectangular Ford canister- it can mount in that back corner too and clear up some real estate up front!
 
Sent this link down to my son in NC. He was asking me if there was something better. He is getting ready to do ball joints on the 5. Sent a few tools down to help it along.
 
Looks to me like a 20 gallon tank roll over valve and a bunch of plumbing furncos that can be bought at the local hardware store (if construction supplies were not unavailable due to market extortionists).

Held up by an electrical conduit support bracket.
 
Looks to me like a 20 gallon tank roll over valve and a bunch of plumbing furncos that can be bought at the local hardware store (if construction supplies were not unavailable due to market extortionists).

Held up by an electrical conduit support bracket.
Maybe/probably :shrug:
 
I am going to chalk this one up to it is better to be lucky then good:

20210817_183801.jpg

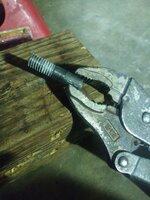
I was able to easily extract the broken stud. For some reason, luckily, and only on this stud, the sleeve retainer did not take hold. It was still a PIA, and took a bunch of effort to get the initial "break free" to occur, but I was able to simply twist the stud out with Vice Grips, clamped down as tight as i could get them!!

The Nord Lock Washers outer teeth really dig into the adjoining surfaces:

20210817_185017.jpg

20210817_185028.jpg

I inserted a new stud, after applying sleeve retainer, and reassembled:

20210817_185910.jpg

After consulting the Nord Lock website, and examining the washers, I reused four of the washers, and installed a new washer on the new stud.

I am going to call this little project complete :thumbsup:
 
I have been working on this one the past week, I will do the "easy/fun" update first!!!!

My OEM rear step bumper still has the original plastic end caps, which are still in perfect shape. BUT, they are fragile, and I always worry about breaking them when I am moving lawn mowers and other stuff around in the garage.

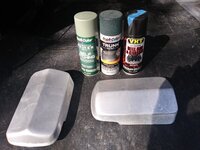
After working with and installing a set of @Kim Dawson cast aluminum rear replacement end caps, and being very happy with them, I bought a set for my Scrambler a few months ago. I just got around to painting them this weekend.

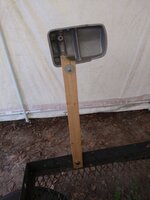
I went ahead and painted them the same as I did on JeepAddicts Red '84 SL: self etching primer, trunk paint (to give a bit of texture), VHT Gloss Black as a top coat. It was over 100 degrees yesterday, with humidity around 66%, so good painting weather!!!

1.jpg

Using the painting rigs I cobbled together a few months ago:

2.jpg

Ready for paint, good old hitch rack to the rescue again!!!

3.jpg

4.jpg

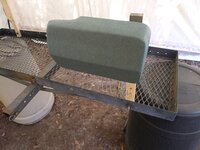
Primed with self etching primer:

5.jpg

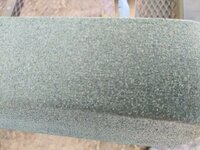
Trunk paint applied:

6.jpg

A light coat, sprayed from a distance, will give a very light grain/texture, similar to OEM:


7.jpg

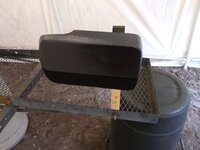
And top coated with the VHT Gloss Black, fairly heavy coats to smooth out the texture:

8.jpg

9.jpg

They are probably already dry, but I will leave them to "bake" outside on the front porch for a day or two to fully cure before installing them.

Pretty easy upgrade, way stronger then the OEM plastic end caps!!
 
Last edited:
Back
Top