• Notice for iPhone users: DO NOT use the image size reduction option when uploading photos to the forum. This causes portrait images to post as landscape. We have added a warning to the image insert pop-up as well.

1983 frame off refresh - finally

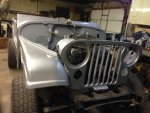
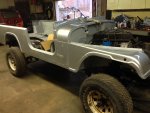
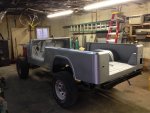
Well, I hope all had a Merry Christmas or great holiday celebration of their choice. I had a buddy stop by that was able to help me get the tub off of the trailer and set it on the frame after way too long. It was an exciting time and monumental at the same time. I couldn't help but bolt on the front fender I have. I also placed the flares on to see what they looked like and I like! I had bought a pair of stainless steel side steps and held them in place and decided that I need to either get some OE ones powder coated in black or PC these.

I was kind of taken aback by the height that this thing sits..............34" to the lower door sill and 26" and change to the bottom of the rocker. The bottom of the front fender above the front tire measures 40 1/2", the rear wheel measures 41" to the wheel opening. I'm going to go with 33"x10.50-15" BFG At's and I'd be curious as to what the rest of you guys have for lift and measurements. For reference the Cooper tires on it are 31"x 10.50-15".

I put a few small pieces on it while the kids were behaving. I think I'm going to go ahead and replace the front signal lights, side markers and tail lights because what I have are old and faded.
IMG_0048.JPG

IMG_0049.JPGIMG_0049.JPG

IMG_0050.JPG

IMG_0051.JPGIMG_0051.JPG

IMG_0055.JPG

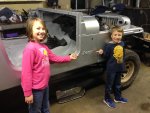
Here's the little people pointing at the JEEP logo! He's 3'-11"(47") tall for reference
IMG_0056.JPG
 
Looks great!

I'm guessing once its all together it will settle an inch or two. Plus another inch once the springs settle into their happy place.
 
Did you put anything between the fender and firewall, or is it metal on metal?

I've wondered about putting a strip of something in there as a buffer. Not sure what would work best to NOT trap moisture, but protect the paint from rubbing off from vibration.
 
wm69, I haven't put anything between the pieces yet. I'd thought of it but don't think it's all that necessary.

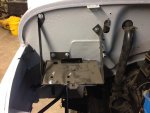
I've gotten a little bit further along in the assembly process. The heater box and its components are installed as is the battery tray. I utilized the support braces I acquired from Chop Shop for these needed parts. I put the cowl grill on, headlights in, front turn/marker lights and tailgate braces too. Just about too hit Amazon for the clutch shaft seal boot and clutch linkage bushings coming Prime!

IMG_0058.JPG

IMG_0060.JPG

IMG_0061.JPG

The door striker plates I had to tap out the 10-24 threads as the liner clogged the threads.

IMG_0062.JPG

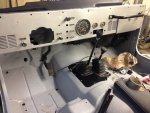
Here's a shot of the dash in place. I'm going to take it out, it's only in with 4 bolts, to install the wiring harness back.

IMG_5902.jpg

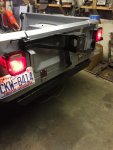
And the tailgate on with the tire carrier.

IMG_5901.jpg
 
Scrambled,
You know if I'd have bought yours I'd have missed out on all this "fun" I'm having. Still think of yours when I'm assembling this one. Man was yours in good shape. Hope it sold and the new owners are taking care of it for us.
 
I got a set of taillights and a wiring harness I could adapt to my CJ8 harness that had been butchered by the infamous PO! I know it was him because he had owned it since 1985-86! Obviously 12 volt direct current is just a weeee bit much for some to wrap their heads around. Just imaging how these people would do as plumbers!
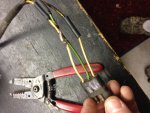
Anyhow, many thanks for the lights and harness. I added a weather sealed plug I had on a broken light to the newly acquired one. This was soldered and then marine shrink tube wrapped. Should be good to go from here on out. Have a look, more to follow.

IMG_5919.jpg

IMG_5917.jpg

IMG_5920.jpg
 
Scrambled,
You know if I'd have bought yours I'd have missed out on all this "fun" I'm having. Still think of yours when I'm assembling this one. Man was yours in good shape. Hope it sold and the new owners are taking care of it for us.

What will you do w/ your time when you are finished? It sold to a fellow down in Beaufort SC about a week after you looked at it. He drove the old girl all the way home one night...last time i checked, he was loving it... your Jeep looks great.
 
I'm not too sure what I'll do with my time. I don't really set aside time to work on the jeep, it's more of a piddling type project. I can always do what all the other guys on here have done, buy another one! If the opportunity presented itself I would, but this one has to be complete.
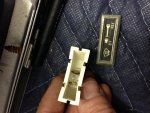
Anyways I have a heater light that's burnt out. Are these serviceable or do I just need a replacement? Maybe a little more done today. I will add that I googled CJ7 dash wiring and the best image return was from this site. Just shows what a great resource all you guys are to the rebuild process.

Here's the dash light that needs a new bulb


IMG_5922.jpg
 
I'm not too sure what I'll do with my time. I don't really set aside time to work on the jeep, it's more of a piddling type project. I can always do what all the other guys on here have done, buy another one! If the opportunity presented itself I would, but this one has to be complete.
Anyways I have a heater light that's burnt out. Are these serviceable or do I just need a replacement? Maybe a little more done today. I will add that I googled CJ7 dash wiring and the best image return was from this site. Just shows what a great resource all you guys are to the rebuild process.

Here's the dash light that needs a new bulb


View attachment 57198

I've used replacements, and they didn't match the existing ones. The plastic backs are opaque and leak light, and the display was the wrong color.

It will be a PITA but I'd try to either find a used OEM light that works, and if need be, swap your old face onto it, or try swapping a bulb out of an aftermarket one into your old housing.

I guess if someone was really handy they might be able to find a replacement bulb at radio shack or similar to put in there. I live in BFE so all my uncommon stuff has to be ordered online, so I didn't do much experimenting.
 
I'm working on a go 'round for the dash light. Where there's a will.........

At any rate I installed new bushings and boots on the clutch linkage. I used Crown repair parts. I know some of you guys are down on non OEM, but it's what's available. A few pics below, really a straightforward fix and I hope it returns the linkage to like new feel.

IMG_5980.JPG

IMG_5981.JPG

IMG_5982.JPG

IMG_5983.JPG
 
Well I got the bell tank in and functioning as well as the fender braces. Went in good and no hitches.

image.jpg

image.jpg

Drove myself crazy looking for the inspection plate. Finally found it on the intake near the carb. You can see how much dust it accumulated.

image.jpg

image.jpg
 
And on to the flares. What I had to do was to template the right side as I had replaced the left side wheel well opening so the holes for the flare were non existent. So I used the kids pep signs from the Duke / Wake Forest game last weekend so I had the coverage. I then located the front corner and rear rolled lip, I then used a sharpie from the back side through the existing holes to mark them on the poster board. So for the left side I just moved it putting the outside from the right side to the inside on the left. Then I marked the holes on the wheel opening with the sharpie and checked them with the new flare. Looked very very close so out came the drill! 8 holes later and we're mounting a flare. Here's the action shots

image.jpg

image.jpg

image.jpg

image.jpg

image.jpg

image.jpg

image.jpg

image.jpg

image.jpg

Here's the slight modification I had to do to the front edge of both rear flares to get them to snug up tight against the body

image.jpg

More updating to come
 
Used the ScatBlast soda attachment to clean the Motorcraft 2150 1.08 Venturi 2v carb. If you've never used a soda blaster prepare to be amazed. I've got the rebuild kit coming in the morning.

image.jpg

image.jpg

image.jpg

More coming
 
Also stripped the engine harness down to the bones and placed it in the engine compartment. There must have been some type of "incident" near the bulkhead connector as there were bare wires with, hold on, liquid electrical tape on them! Cleaned that whole mess up and cleaned up a few splices and add shrink tube here and there. Also did the headlights and turn signals. My takeaway from the whole Jeep wiring thing is grounds, grounds, grounds.

image.jpg

image.jpg

image.jpg

image.jpg

image.jpg

image.jpg

Still more to come for you picture addicts
 
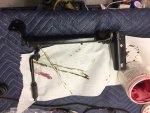
If you remember I replaced my tub corners and with that went away the little ramps that the tailgate latches pinch against. Well, I had to fabricate my best attempt at a 3 Hoppyum engineering exercise involving some fabricating equipment. Below is what I came up with. These have been painted prior to installation. The light grey self etching primer is a very close match to the Raptor lined tub and a silver metallic rattle can is very close to the Ford ingot silver paint. I used plain old rtv silicone to adhere these to the sheetmetal since welding them was out of the question.

image.jpg

image.jpg

image.jpg

More to come
 
Back
Top