• Notice for iPhone users: DO NOT use the image size reduction option when uploading photos to the forum. This causes portrait images to post as landscape. We have added a warning to the image insert pop-up as well.

Another Scrambler Purchase/Road Trip - UPDATE- BODY ON FRAME AGAIN

I had the exact same carport which was fine but I did have to go out during storms to clear snow off it. The ice killed the frame and caved it in while we were away but the scrambler luckily was tucked away inside my mechanic's storage building in its usual winter spot. It was great for the warm New York months but I would not trust it if the Jeep was under it over the winter here.
 
And here I was hoping my garage would hold up to the storm. You got a lot of faith in tin poles and cloth. I always drive mine to the NO international airport concrete superstructure. This was the first time I was unable to since my engine/transmission/t-case are out. That is cheap protection. Cost me $20 for 6 weeks storage for H-Katrina because they didn't start charging until they opened back up after the storm.

I have no faith in the Harbor Freight garage in a hurricane. I just forgot to pull the fabric off the frame, and park the Scrambler next to the Gladiator, If I would have done those two simple things, no damage to canopy or Scrambler :shrug:
 
I had the exact same carport which was fine but I did have to go out during storms to clear snow off it. The ice killed the frame and caved it in while we were away but the scrambler luckily was tucked away inside my mechanic's storage building in its usual winter spot. It was great for the warm New York months but I would not trust it if the Jeep was under it over the winter here.

Even if you added more supports, bringing it from 5' centers closer to 2' centers, it would probably still collapse. The tubes are so thin.

I thought about beefing it up, just not worth it for a $175 item LOL. No snow to speak of here, so it should last a couple of years.
 
Even if you added more supports, bringing it from 5' centers closer to 2' centers, it would probably still collapse. The tubes are so thin.

I thought about beefing it up, just not worth it for a $175 item LOL. No snow to speak of here, so it should last a couple of years.
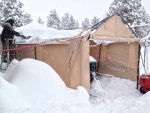
Yeah, even the Costco garages don’t like snow. Of course this was 2 feet worth. No Jeeps harmed- it was my son-in-law’s 70 Bronco. Luckily not even a scratch. 1606268808354.jpeg1606268808354.jpeg
 
Right before the trip up to Michigan last July, I swapped out all my cooling hoses, thermostat and thermostat housing, swapped in a new 2 core radiator/shroud/fan clutch. Ever since then, I have had two annoying little drips, plus another strange phenomenon.

1.) Radiator drain cock always has a drip on it.

2.) Little leak on top of water pump after it cools down.

3.) This started the other day, but if I start it up and go straight out to the interstate before it fully warms up, it runs at 220 and will NOT drop unless I shut the engine off for 10 seconds (I throw it in neutral and coast). Upon restart, it has dropped to 195/200 and stays there. I thought this might just be the VDO gauge, but the speedo temp gauge and the scan tool confirm this phenomenon.

Finally got tired of smelling anti freeze when I walk around the front of the Jeep, so I worked on my Red Scrambler this morning and fixed all three issues.

Some new parts, only one of them is interesting, and it explains a problem I had when I reassembled this stuff before the Michigan trip.

20210103_112235.jpg

The two new hose clamps fixed the little leak below the thermostat/above the water pump. When I pulled the two installed clamps off, the screws backed out of both clamps, so they were NOT maintaining torque. Pretty sure these two clamps came out the used/spares box. Simple fix.

I also removed the short bolt I had at the lower thermostat housing bolt hole and installed a stud, just to make reinstalling the thermostat housing easier. I should have done this BEFORE SandBlast, better late then never.

A new drain cock in the radiator fixed the annoying drip. The one I installed before SandBlast was one I pulled out a junk radiator. I assume it had some very slight damage at the sealing lip causing the little annoying drip. Easy fix, since I needed to drain the coolant to mess with the other parts.
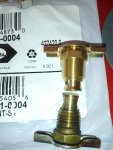


20210103_112250.jpg

The only "interesting" part:

20210103_112329.jpg

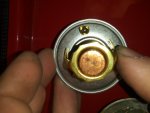
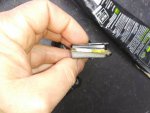
A genuine Mopar replacement thermostat that comes with a little "air bleed hole/check valve thing". This style thermostat came with both my Mopar MPI kits and I never had a problem with them. Even when I pulled the 4.2 out of this Scrambler and swapped in the 4.0, I reused the original Mopar thermostat. Never had an issue until I swapped in a regular NAPA 195 degree thermostat.

NAPA on left, Mopar on right.

20210103_112315.jpg

Now, back before SandBlast when I swapped in all of the new cooling hoses/parts, AND thermostat, I had a hell of a time bleeding air out of the cooling system. I never had so much drama. I burnt myself multiple times, wasted gallons of coolant, before it finally bled out. It took me like two hours to get all the air out!!.

On a 4.2, I will usually start up the engine with the upper heater hose loose, let it warm up some, gently pull the top of the hose barely off the heater core, let the air/some coolant out, slide it back on, done. A stock 4.2 has the two extra heater hoses plus the heated intake.

You would think a 4.0, or 4.2 with a 4.0 intake would be easier, less hoses and a not heated intake. Not for me, with the NAPA thermostat.

Now, is this miracle thermostat the reason for my phenomenon and major coolant air bleed issue? I no longer have the issue, and the coolant system bled itself out simply by letting the engine idle up to temp with the coolant cap off. No drama, done.

You could probably save yourself some money and drill a little 1/8" hole in the NAPA thermostat and get the same result. On a carbureted 4.2 I have always used regular thermostats and never had a problem. On a 4.0 or Mopar converted 4.2, I will use a "holy" thermostat. Lesson learned for me.

Miracle thermostat installed, the hole at the top/12 o'clock position, secured in place with a bit of aviation sealant to keep it from slipping out of position.
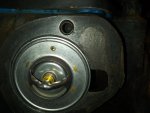
20210103_113923.jpg

Verifying that the thermostat housing is "true/flat":
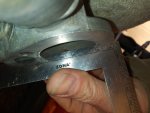
20210103_112406.jpg

Used two bolts as alignment dowels to line up the gasket. After the gasket was stuck to the thermostat housing, I put a very thin coat of aviation sealant on the side of the gasket that goes against the head. Over kill maybe.

20210103_113933.jpg

I added two flat washers on the bottom to get past the smooth non threaded shoulder of the stud.
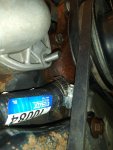
20210103_114432.jpg

All finished up. The 4.0 thermostat housing has a center stop on the large hose neck. I put a clamp above and below the center ridge. Overkill maybe, but I want to keep this damn thing from having that annoying cool down drip!!!
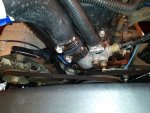
20210103_120410.jpg

I drove the Scrambler around a bunch this afternoon. No more drips!!!
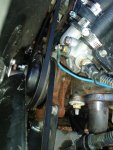
20210103_145143.jpg

Should have painted that water pump when I swapped the engine in back in 2016!!!!

No leaks, and no more phantom "rise to 220 and stay there" issues. I plan on daily driving it this week, like I have been the last few weeks, so will be able to quickly tell if my fixes fixed it.

With the outside temp at around 50 today, 195 degree thermostat, it ran between 195-205, mainly between 200-205.

Hopefully that is it for cooling issues for awhile!!!

 
I always drill a small hole in thermostats when I put them in. I also alway check them with a cup of boiling before installing, maybe not necessary but I did have one that would not open.
 
I smell antifreeze, go back out and check it again....:ROFLMAO:

I always hate that I end up with coolant on the engine/radiator when doing work like this and it takes a bit to burn off before the smell is gone. Makes me question myself every freaking time...

On the burping the system: I finally got one of the funnel/plunger/adapter kits off Amazon for this job and it's one of those "why the $&*# didn't I do this a long time ago?!?!" items now. Makes it so freaking clean and simple. Just did the LJ to swap the water pump a couple weeks ago and used it on Mater before that. A new favorite shop tool fo' sho' (I never drill any thermostats :shrug: )
 
Another quick "Pre-SandBlast FixFix".

I thought I had my wiper problem fixed. On the way to Michigan, driving through some of the worst rain I have ever driven through, after using the wipers for over 2 hours straight, the wipers failed.

When the wipers would swing to the driver side, the driver side wiper would "over extend" to the driver side, and stall the system. I could reach out the window, very gently push the driver side wiper back upwards, and the wipers would work again. Sometimes a nudge would last a few minutes, other times just one swipe.

Eventually, the wipers would stall every time they would swing to the driver side. When I got home and took the system apart, I discovered the wiper motor was loose to the frame, and all screws that hold the wiper motor/gearbox assembly together were falling out. Who knows.

Anyway, I ordered a new used replacement driver side pivot, to replace the pivot I modified. Finally installed it.

Previously installed/modified pivot on the left, new used replacement on the right.

20210104_173316.jpg

The previously installed/modified driver side wiper pivot. You can see where I filed down the stop, to prevent the "tap" sound I was getting due to the aftermarket windshield frame being a POS. The windshield frames wiper motor mounting holes are in the wrong spot, so the short arm contacts this stop hard when pulling the wipers to the driver side. I filed it to prevent the tap, but in doing so, I believe it allowed the motor/linkage to ever so slightly hyper extend, and jam up. Very slight over extension, the lightest upward touch/push of a single finger would get the system working again.

20210104_173324.jpg

The new to me used non-modified driver side pivot, unmolested "stop".

20210104_173331.jpg

Installed the new used pivot, wipers work again. They do "tap" everytime they pull the wipers to the driver side. But they work again.

I might loosen the motor, see if I can slide the motor left/right to lesson the tap. But for now, they work again. For how long, who knows.

I have one more idea to try to salvage the existing windshield frame, and have faith in fully functional wipers. Not messing with it right now. If this future fix does NOT fix the wipers, then I will have to buy a new windshield frame. Not the end of the world, besides the wiper issue, this WS frame has:

Stress cracks up top where I have nutserts to secure the soft top channel, thin gauge Chinese steel stress fractured from interstate driving with a soft top.

I peeled open the passenger side pinch seam with a tree/hammered it back together on a trail ride. Surprisingly, the trail repair is not too noticable.

The glass to rubber, and rubber to steel joints leak water when it rains hard. Would have to pull it all apart to fix this anyway.

Numerous unused screw holes from when I ran the Whitco 1/2 soft top.

Would like to keep this windshield frame if possible, but if it has to go, so be it. But, I think I can fix the wipers, I don't want to take the easy way out now, and a new replacement windshield frame is no guarantee that the wiper motor mounting holes will be in the right spot!!!
 
What 2 core radiator and fan clutch did you use? Just curious if this was how you achieved more clearance between fan blades and radiator.
 
What 2 core radiator and fan clutch did you use? Just curious if this was how you achieved more clearance between fan blades and radiator.

I used this 2 core radiator:

https://www.summitracing.com/parts/sum-382007/make/jeep/model/scrambler/year/1984


I used a stock replacement fan clutch on this red Scrambler, pretty sure this is it, clockwise for V belts:

https://www.napaonline.com/en/p/TEM272320?keywordInput=fan+clutch


You can use a fan clutch off of a 1978 or so CJ-7 to gain a bit more clearance if needed:

https://www.napaonline.com/en/p/TEM...ne+Cooling+Fan+Clutch&keywordInput=fan+clutch

I used the 271305 on my 1983 Green Scrambler to gain a bit more clearance between the face of the fan clutch/face of radiator. On the NAPA clutch fans, the 271305 is shorter then the 272320.
 
I always hate that I end up with coolant on the engine/radiator when doing work like this and it takes a bit to burn off before the smell is gone. Makes me question myself every freaking time...

On the burping the system: I finally got one of the funnel/plunger/adapter kits off Amazon for this job and it's one of those "why the $&*# didn't I do this a long time ago?!?!" items now. Makes it so freaking clean and simple. Just did the LJ to swap the water pump a couple weeks ago and used it on Mater before that. A new favorite shop tool fo' sho' (I never drill any thermostats :shrug: )

What "funnel/plunger/adapter kits" are you referring to?

Sounds like another tool I need that I didnt' know existed.
 
What "funnel/plunger/adapter kits" are you referring to?

Sounds like another tool I need that I didnt' know existed.

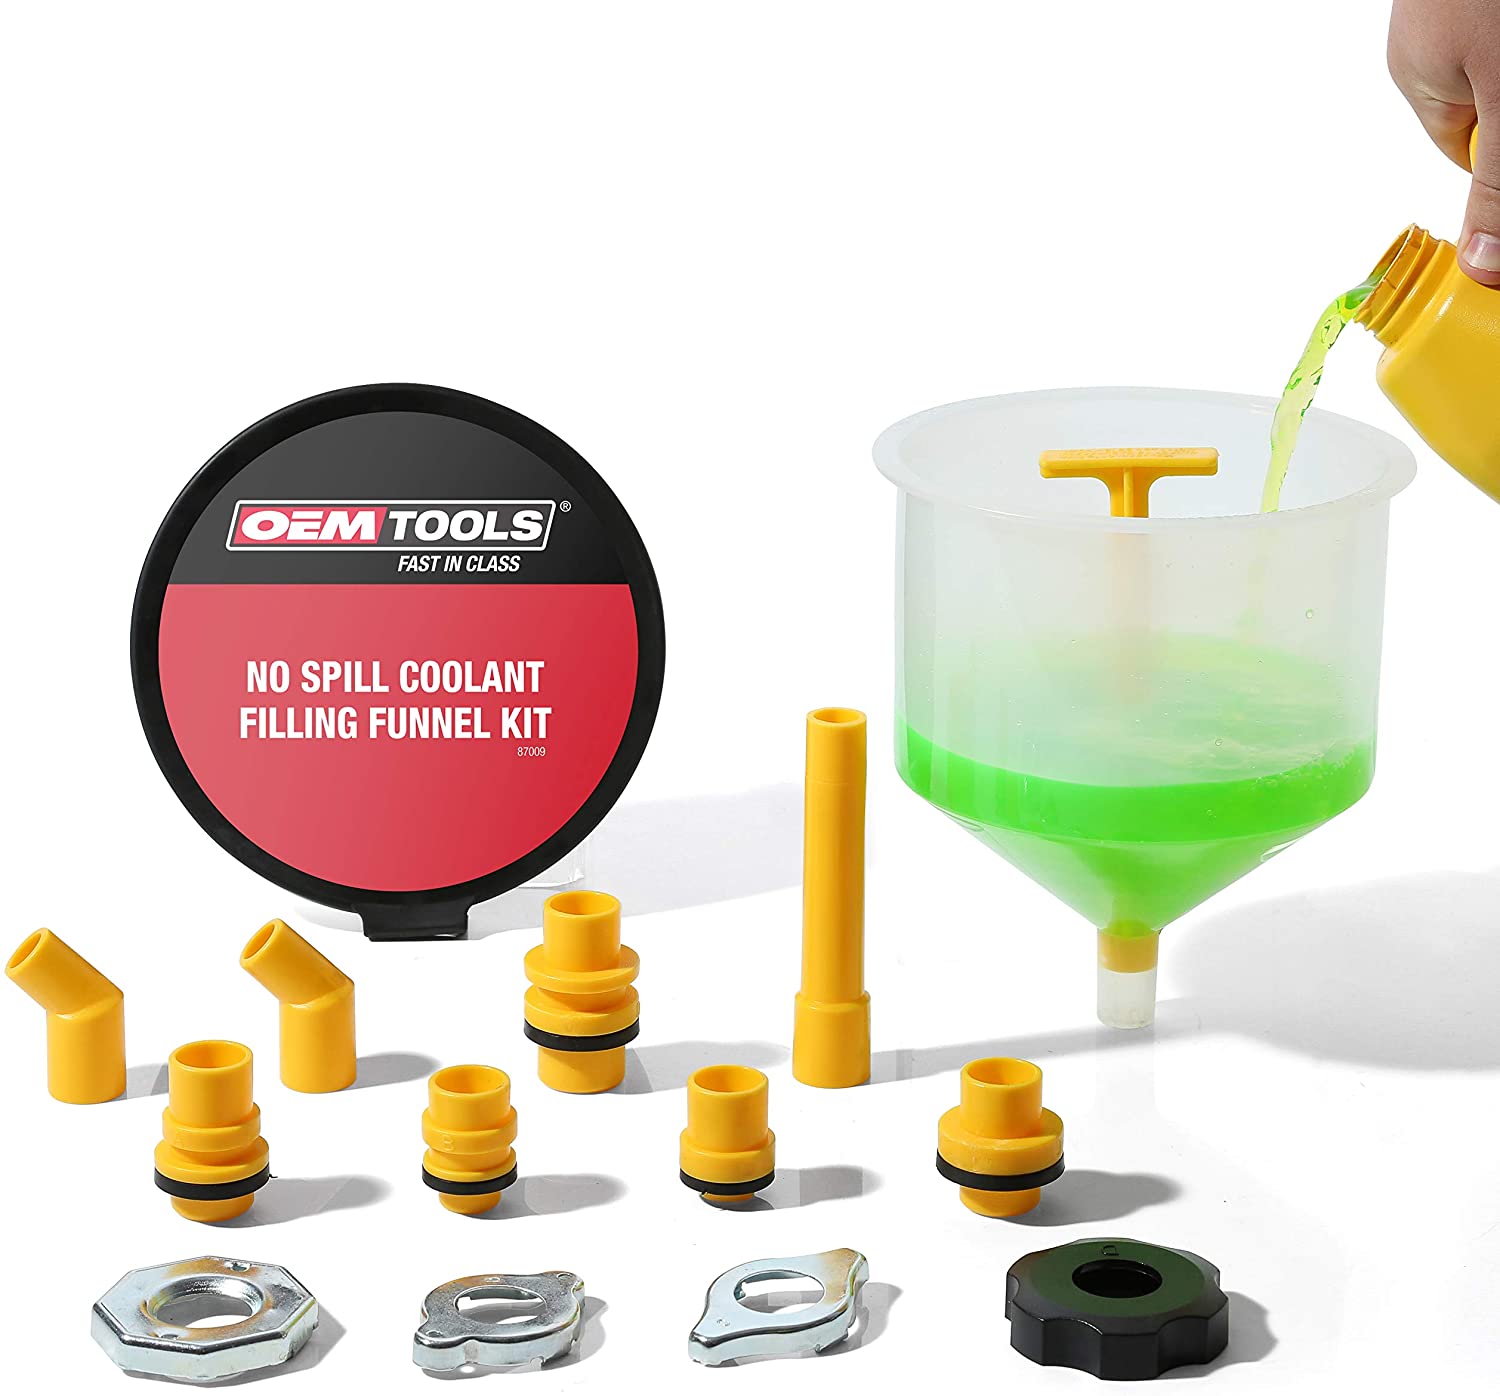
I'm assuming he means one of these, or similar: No Spill Coolant Filling Funnel Kit
81e7kcjyiRL._AC_SL1500_.jpg
 
I have a "mystery plasticky rattle" that I can not find to save my life. It sounds like it is coming from the "steering column/firewall/windshield frame/transmission area". It is not induced by speed/bumps, pretty much always there, caused by normal vehicle harmonics. Rarely happens sitting still idling, mainly driving down paved streets, smooth or rough, any speed. Does not happen off-road in my yard in 4 Low. It is driving me crazy.

I have checked all the following:

All body mounts (grill mount was loose)
Fenders to grill/hood
Hood prop rod and rods that go from body to grill
All firewall/inner fender mounted stuff
Every roll cage/dash board bolt
Steering column/pedal brackets (pedal bushings are loose but not the cause of noise)
Hood to body tub rubber snubbers
Windshield wiper linkages/motor/cover
Hardtop
Seatbelts
All windshield mounted items
Changed driver side lower door hinge

Anyway, I can not find this rattle to save my life!!
I did find some items I needed to address, but rattle still present.

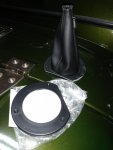
I have been using a cheap Chinese T5 shifter boot on my AX15. The AX15 shifter has to move more then a T5, which stressed/tore the boot. So, I bought this cheap Speedway Motors Universal shifter boot:

20210122_174634.jpg

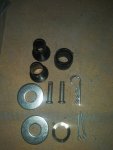
An eBay Dana 300 shifter rebuild kit:

20210122_174639.jpg

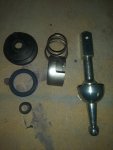
My AX15 shifter was a little loose, you could pull it upward some, so I purchased some AX15 shifter parts:

20210122_174647.jpg

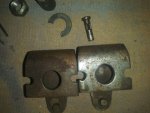
Taking the Dana 300 shifter stuff apart, noticed some parts had some wear. One pin was egged out, one bushing was cracked, and the metal part had egged out holes where the pins go. I had a spare/rusty metal piece I installed that was in better shape.

20210122_184701.jpg

20210122_184710.jpg

Picture from FSM, it does NOT show the shifter bushing/washer that is needed:

20210122_184741.jpg

The shifter bushing/washer is usually rotted out. I never installed one on this Jeep. The bushing from eBay was a little short. But, all these shifters are slightly different. The top shifter is from an '81, middle is a T176 Dana 300 shifter, lowest is a T5 Dana 300 shifter, all different:

20210122_201827.jpg

Tried this first, did not like it:

20210122_202711.jpg

Ended up with this: one washer, old valve cover PCV grommet, eBay bushing:

20210122_214950.jpg

You have to experiment some. Also, I have an AX15 and Dana 300 that is "clocked" upward, so the large OD washers supplied for the shifter shaft would not clear the transmission, but some smaller OD washers worked perfectly:

20210122_223219.jpg
 
I also reinstalled the "correct" Dana 300 shifter shaft nut. The "coned " portion of the nut threads on first, keys into the shifter handle:

20210123_095646.jpg

Again, I am not stock, so mods necessary. I have to shim the shifter handle over with 3 washers to clear the floor plate/shifter boot:

20210123_100422.jpg

20210123_101923.jpg

You can also see the scraped paint on the tub near the shifter nut. I have a 1" body lift. This would not clear without the body lift. Again, AX15, clocked Dana 300. The paint scuffs are from wrenches. With poly engine/transmission mount, and all the play removed from the torque arm mount stud, the power train will not hit the tub, unless a mount breaks.

All my AX15 shifter parts were OK. I did swap out the springs, the replacement was stiffer, and fixed the upward play I had. All the other parts were perfect still, as they should be with less then 20k miles on them.

20210122_184719.jpg
 
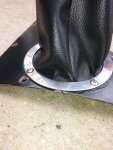
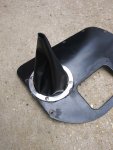
Drilling some more holes in my transmission tunnel cover for the new boot flange. I aligned it to closely center the transmission shifter AND cover any unused holes:

20210123_104935.jpg

I used the supplied nuts/bolts to hold the flange boot in place. I had to Dremel a little bit of the rub flange to clear on of the nuts on the bottom of the cover plate:

20210123_114548.jpg

I used the nuts/bolts since the flange is the only thing that secures the boot to the concave tunnel cover. I figured this was better then just sheet metal screws.

No instructions, I am not an expert, just how I did this. I put the boot seam facing the console (least visible) and pulled most of the slack to this side.

20210123_113626.jpg

I have a bit of excess boot squished out I could trim but I left it since the carpet hides all of this. You can also see where I notched the transmission shifter boot trim ring to clear the Dana 300 shifter boot flange.

20210123_113631.jpg

Looks pretty good, much better then my tore boot/can coozy/Gorrilla Tape boot I had in place before LOL.

20210123_113619.jpg

Boot fits tight to the shifter handle, so I sprayed some Silicone spray on the transmission shifter, boot slid down nice and tight and easy.

20210123_120204.jpg

This style boot is a better fit for my AX15 shifter. It is loose enough to handle the wide range of movement needed, and high enough to go easily go over the two shafts coupler. If I had a short throw shifter, the OEM T5 shifter boot would work. Anyway, better then what I had, cost about $20 and an hour or two.

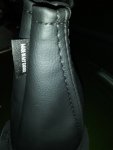
This shifter boot showed up the next day LOL:

20210124_101111.jpg

Love the tag!!!

20210124_101121.jpg

20210124_101138.jpg

And how it is made at the bottom, no squish outs or wrinkles:

20210124_101210.jpg

About $50, but made in the USA, much better quality. I will keep it in the spares box for now.

It came with a ridgid plastic retainer plate, not sure how that would work on the concave tunnel covet?

Anyway, the Dana 300 shifts much better/tighter, no play in the stock AX15 shifter, and no more drafts through tore shifter boots.

All good, but still have the mystery rattle.
 
  • Like
Reactions: SKT
Really searching for the rattle, I tore down the steering column to see if anything was loose. Nothing loose, found two issues.

Lots of copper from the horn contact ring/turn sinal switch button, more on this later:

20210124_103845.jpg

20210124_103852.jpg

Some of the grease that had squished out was really stiff/clay like. I used white lithium grease, so no idea:

20210124_110044.jpg

I pulled the whole column apart, nothing broken or loose. I cleaned the grease off the shaft/upper bearing, thinking maybe it was causing the noise:

20210124_110054.jpg

20210124_110932.jpg

I packed the bearing with synthetic wheel bearing grease:

20210124_113447.jpg

20210124_113452.jpg

I left the old grease on all the other moving parts, it was still good. Very strange? Anyway, the new grease did not fix the rattle.

Found this, these parts were loose on the bracket. I am pretty sure the melted plastic held them tight originally.

20210124_122440.jpg

I greased them and slid them back on. Did not fix the rattle.

20210124_122447.jpg


Back to the copper dust. The replacement turn signal switches do NOT match OEM exactly. We ran across this in Michigan, working on Kevin's postal. If you fully tighten all 3 screws, it will cock the switch, making the plunger hit the contactor ring at an angle. This is why mine had all the dust. You can also look back at the picture and see the uneven wear on the copper rod thing.

You can fix this two ways. IIRC, behind the threaded insert for the turn signal switch screw, there is a metal cap you can pop out. Or, like I did here, fully tighten two of the screws, only tighten the upper screw enough to secure the switch, but before it bends/cocks it:

20210124_130232.jpg

Anyway, all of that work, still have the rattle.

Once it warms up some, I will remove the doors. Could be the handle remote rods, since these doors do not have the little anti rattle brackets anymore. But, really doesn't sound like the rod rattle. Worth a shot.
 
Back
Top